
Team MemberSpace
If you’re a creator or entrepreneur with digital products to sell — whether that’s an eBook, course, template, or video series — one of the first questions you’ll ask is: where should I sell them?
There are plenty of online marketplaces that make it easy to list and sell your digital products, but there’s also a strong case for selling them on your own website.
In this post, we’ll cover:
- The most popular places to sell digital products (and the pros and cons of each)
- Why selling on your own website gives you more control and long-term growth
- A step-by-step guide on how to create a website to sell digital products using MemberSpace
- Tips and tools to help you launch and start earning quickly
By the end, you’ll know exactly where to start — whether you want to list your products on existing marketplaces or sell them on your own website.
Where to Sell Digital Products
There’s no shortage of places to sell digital products online. Here are some of the most popular options — and what to consider for each.
1. Creative Marketplaces
If you create design assets, templates, or creative tools, marketplaces like Creative Market or Envato Elements can be great options. They already have a built-in audience looking for digital resources, so you can get exposure quickly.
Pros:
- Instant access to a large audience
- Easy setup and listing process
Cons:
- High competition
- Platform fees and commissions
- Limited control over pricing and branding
2. Online Learning Marketplaces
If your digital products are educational — like video lessons, workshops, or tutorials — you can sell them on online learning marketplaces such as Udemy or Skillshare. These platforms already have large audiences looking for courses, so they can be a great way to reach new students quickly.
Pros:
- Access to a built-in audience of learners
- Simple setup and course publishing tools
- Great for exposure when you’re starting out
Cons:
- Platform fees and revenue sharing
- Limited control over pricing and branding
- You don’t own your student data or audience
While marketplaces like Udemy or Skillshare can help you get discovered, the tradeoff is control. You’re building your business on someone else’s platform — with their rules, pricing limits, and algorithms.
That’s why many creators eventually move to selling on their own website, where they can keep more profit, customize the experience, and own their audience.
3. Stock or Niche Marketplaces
If you sell specific types of content (like photos, music, or fonts), you might consider niche marketplaces such as Etsy (for digital downloads) or Pond5 (for media).
Pros:
- Customers already searching for your type of product
- Streamlined selling process
Cons:
- You’re bound by the platform’s rules and algorithms
- Harder to build your own brand presence
4. Your Own Website
Finally — and most importantly — you can sell your digital products on your own website.
This gives you complete control over your brand, your customer experience, and your profits. You set the rules, prices, and design. Plus, you own your customer data and audience — which is key for long-term growth.
Why sell digital products on your own website?
- Full control: You decide how everything looks and works.
- Keep more profit: No marketplace commissions or fees.
- Own your audience: Build direct relationships with your customers.
- Brand consistency: Everything lives under your own domain and design.
If you’re serious about building a sustainable digital product business, selling on your own site is the way to go. And the best part? It’s easier than you might think.
How to Create a Website to Sell Digital Products
You don’t need to be a web developer or designer to create a professional website to sell your digital products. With the right tools, you can have everything up and running in just a few steps.
Here’s how to do it:
Step 1: Set Up A Simple Website
Start by choosing a website platform that fits your comfort level and style. Popular options include:
- Squarespace – Great for creators who want beautiful, ready-made templates.
- WordPress – Ideal if you want full flexibility and customization.
- Webflow, Wix, or Notion – Other great options depending on your needs.
Once you’ve chosen your platform, create a few core pages to give your site structure and credibility:
- Home Page: Introduce who you are and what you offer.
- About Page: Share your story and build trust with your audience.
- Contact Page: Give visitors an easy way to reach you.
- Products or Members Page: Where visitors can browse your digital products.
Your site doesn’t need to be complicated — a clean, simple design is all you need to start selling. The goal is to create a professional home base for your digital products that reflects your brand and makes it easy for customers to learn more about you.
✨ If you don’t want to build a website, you can have a free, customizable site created for you when you join MemberSpace! Just create an account and select the Create a simple MemberSpace site for me automatically during onboarding.
Step 2: Install MemberSpace on Your Site
Now for the fun part — turning your website into a place where people can actually buy your digital products.
MemberSpace integrates seamlessly with any website platform (including Squarespace, WordPress, Webflow, and more). Installation only takes a few minutes, and you don’t need any coding experience.
Once MemberSpace is connected, you’ll be able to:
- Sell access to a library of digital content and exclusive pages of your site
- Accept secure payments
- Manage members and subscriptions automatically
This is what transforms your regular website into a fully functional digital product store.
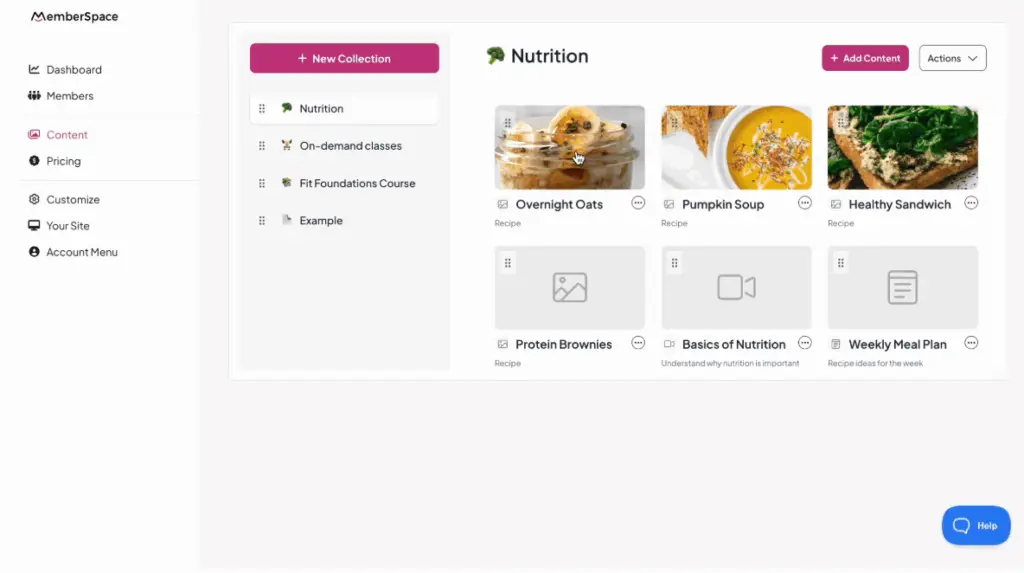
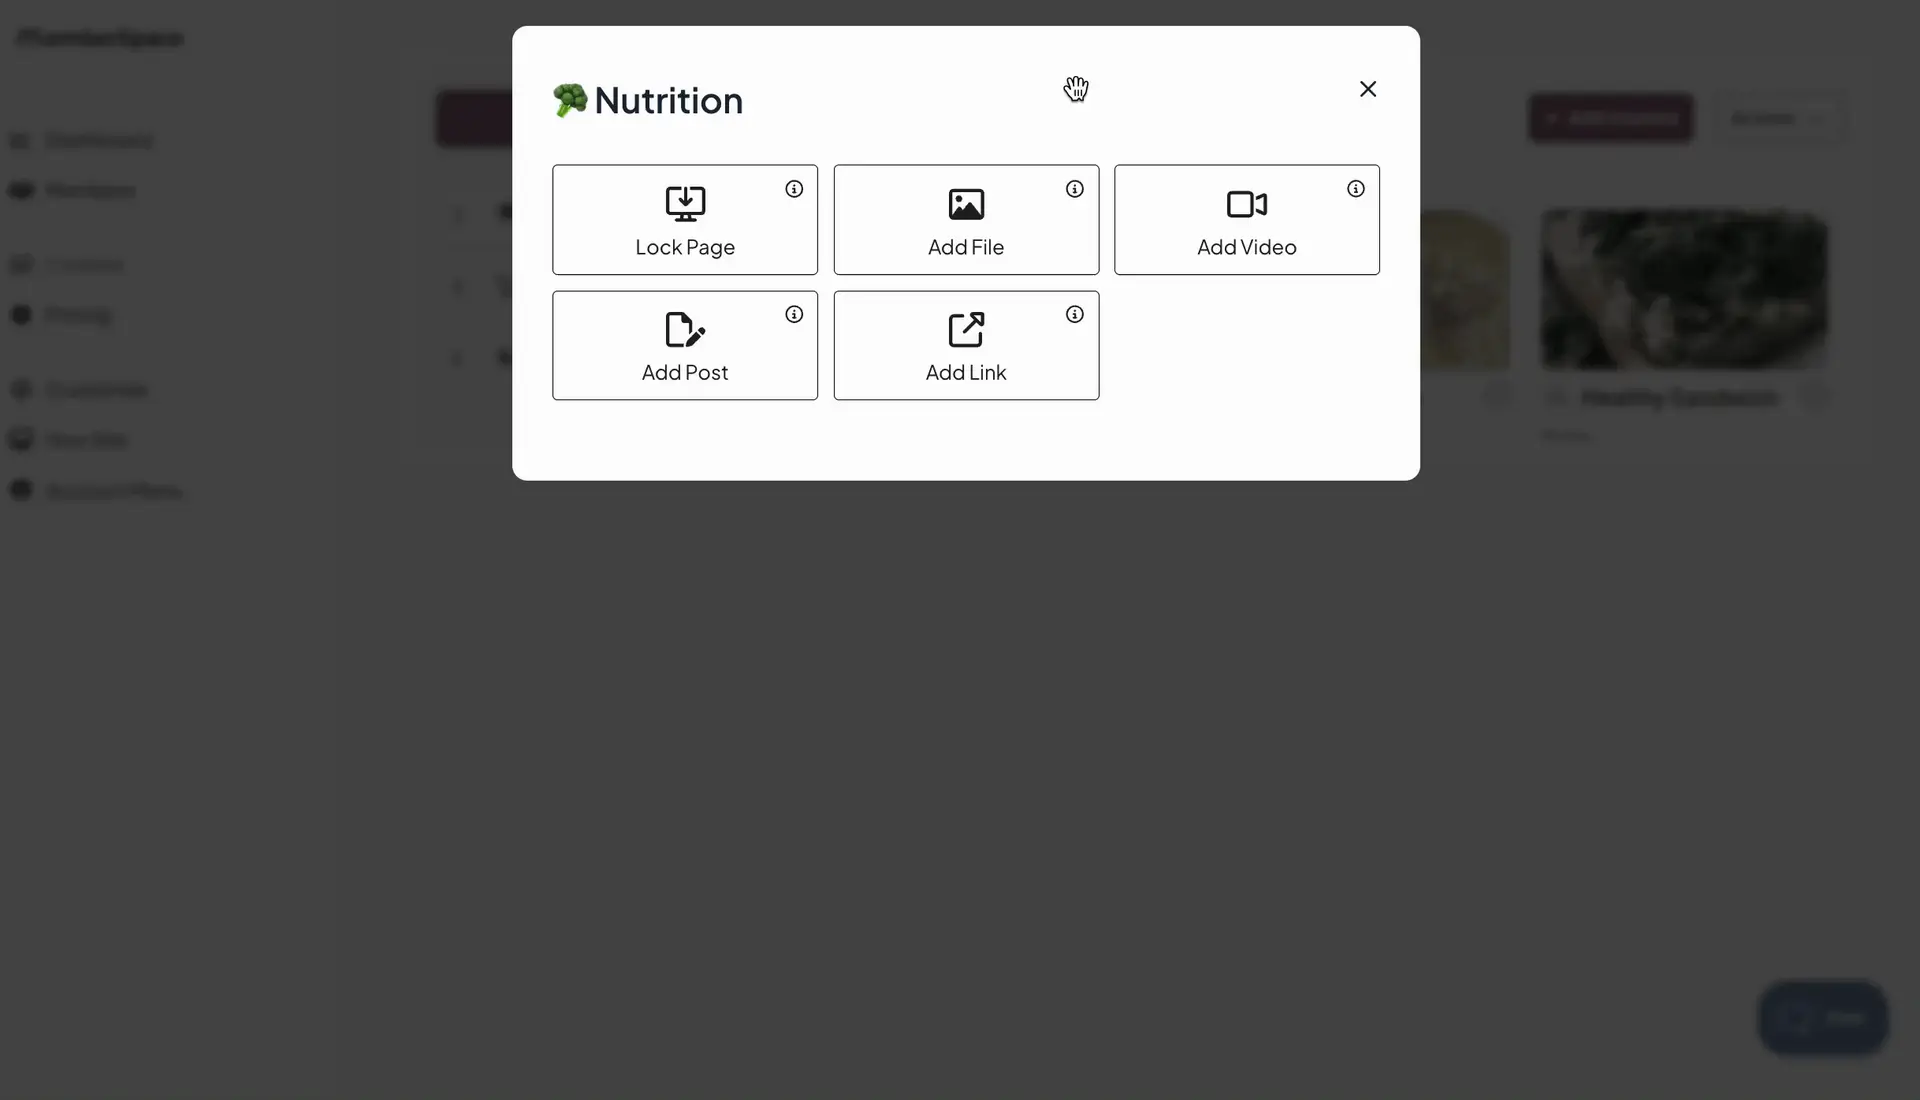
Step 3: Add and Organize Your Digital Products in MemberSpace
Once MemberSpace is installed, you can easily upload and manage your digital products directly inside your account — no need to edit your website. You can upload files, embed videos, or even create posts like newsletters or articles.
MemberSpace also makes it simple to organize your content however you like using drag-and-drop and folders. Your customers can even mark their favorite content for quick access later, creating a clean and personalized experience for them.
From your customers’ perspective, the process is seamless — they can sign up, pay, and get instant access to your entire library of digital products right after checkout.
Step 4: Set Your Pricing
MemberSpace gives you flexible pricing options so you can sell your digital products however you like:
- One-time payments for single downloads
- Subscriptions for ongoing access or memberships
- Installment plans for higher-ticket offers
- Free access for lead magnets or bonus content
You’re in full control of how your products are priced and delivered.
Step 5: Share Your Product Links
Once your products are live, it’s time to promote them! MemberSpace provides shareable links for each product, so you can post them anywhere your audience hangs out:
- Social media bios and posts
- Email newsletters
- YouTube descriptions
- Chat groups or communities
When someone clicks the link, they’ll be taken directly to a signup/checkout form where they can create an account and pay for access — all within your website.
Final Thoughts
There are plenty of places to sell digital products online, but building your own website gives you something marketplaces can’t — ownership and control. You decide how your business runs, how your products are presented, and how your customers experience your brand.
With MemberSpace, you can easily turn any website into a digital product store in minutes — no coding, plugins, or complicated setup required.
👉 Ready to create your own website to sell digital products? Sign up for MemberSpace and start building your digital business today.