To begin, we expect you to have already completed the following steps:
Once those steps have been completed, you are ready to begin this guide.
Need help deciding the layout of your website? Check out these free membership site wireframes!
Editing the Main Site Page
When you first create a Weebly site and select your theme, you will be given an example site to build on. Unless your site’s goals match your theme, there are probably a lot of changes that will need to take place.
The first step to personalizing your main site page is to remove content that you don’t want and add content that you do. With Weebly’s drag-and-drop interface, this is as simple as clicking an “X” and dragging new content into its place.
Removing Weebly Content
To remove content that you do not want, you must first hover over the unwanted element. For example, if you don’t like where a header is placed, you can hover over that header.
When you hover over an element, a box will appear around it. This will help you determine what the element is and what it contains. If you choose to remove that element, you need to click the “X” in the right corner of the element’s box.

This will remove the selected content from the page completely. If you erroneously remove an element from the page, you can add it back using the process in the next section.
Adding New Weebly Content
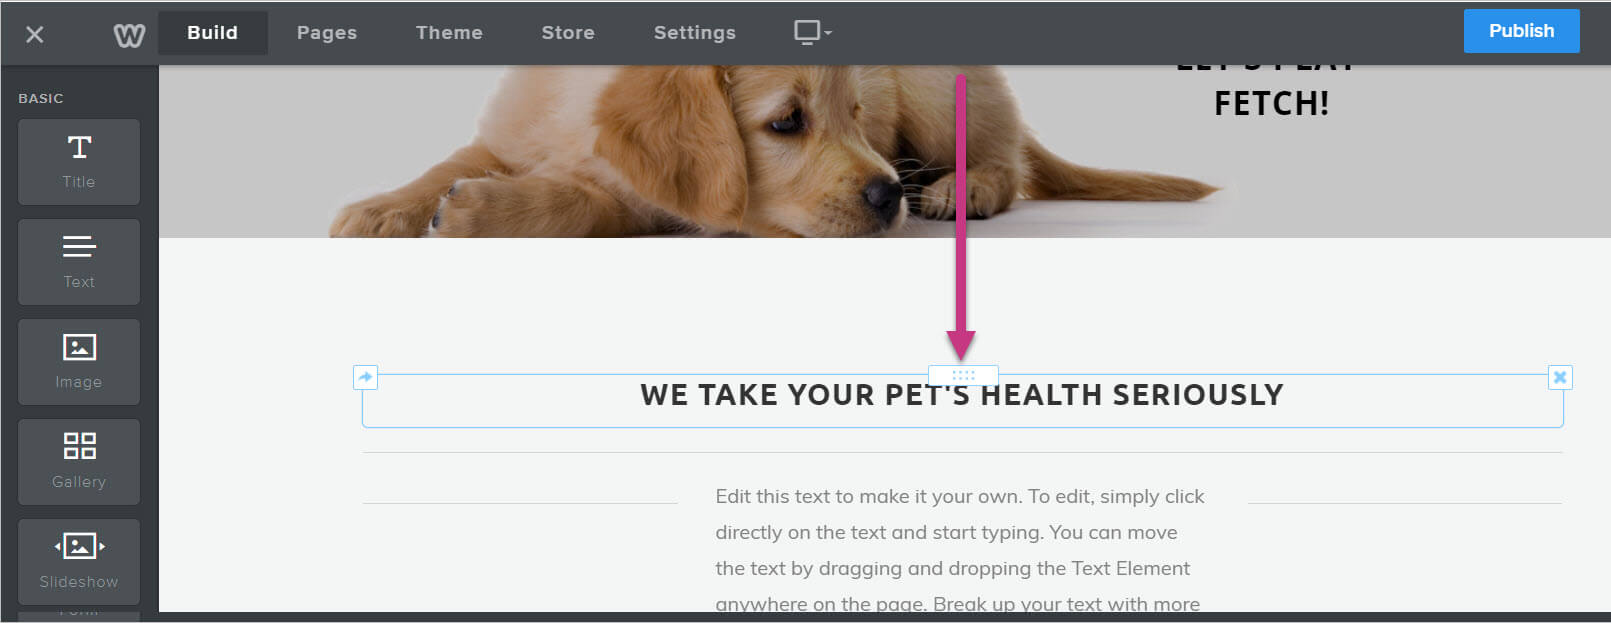
In the left sidebar of the Weebly site editor, there are elements that you can use on your site pages. You can add elements by clicking and holding an element in the left sidebar, then dragging it onto your page.
Pages will gray out places where the element cannot be added, so be sure to drop the element in one of the highlighted areas. If you drop the element in a grayed out area, the element will not be added to the page.

When dragging the element onto the page, you will see a line displayed. This line indicates where the element will be placed if you were to release it. Make sure this line is displayed before you drop the element onto the page. If it is not displayed, the element may be discarded.
If you accidentally place the element in the wrong location, you can use move the element using the process found in the next section.
Moving Weebly Content
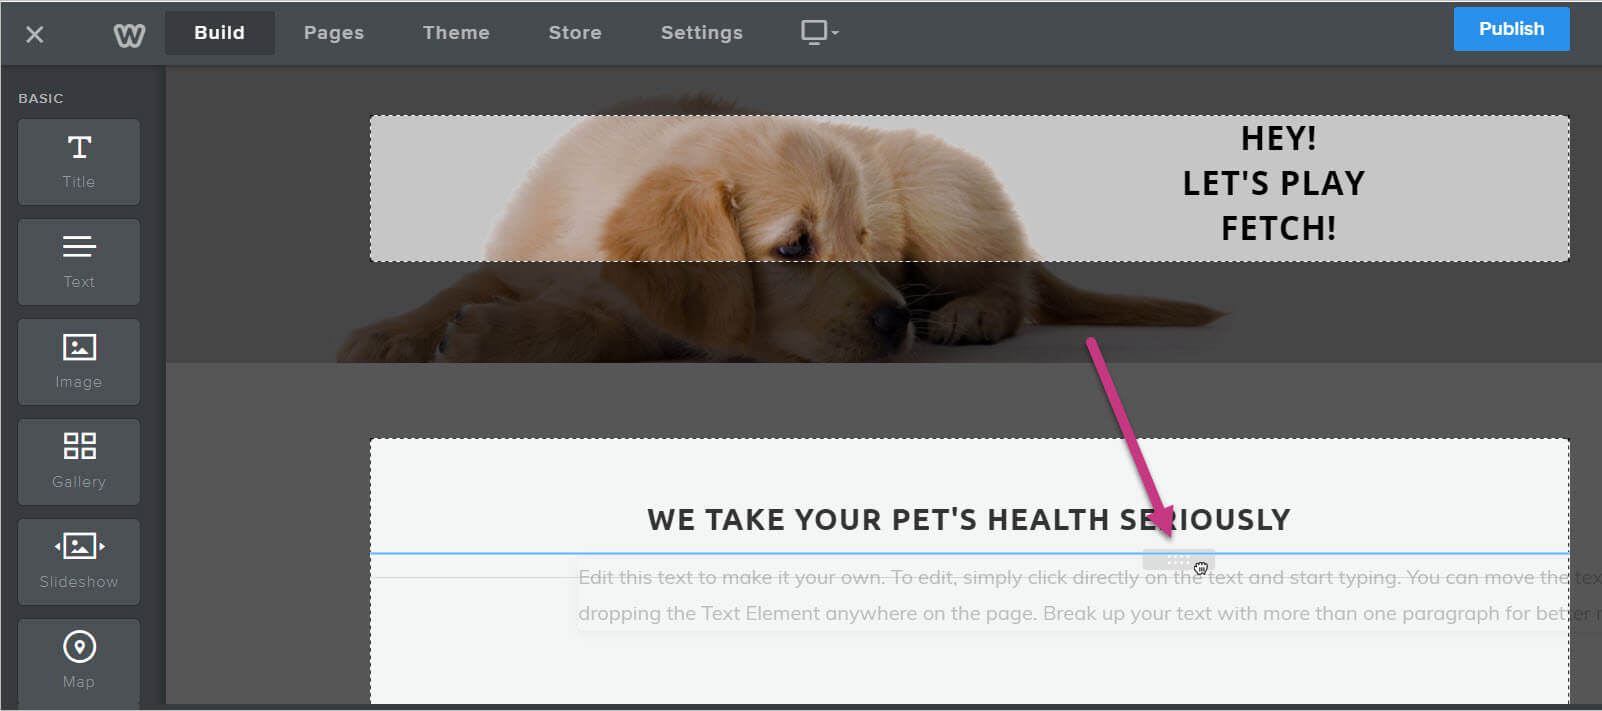
Sometimes content needs to be rearranged. Since Weebly sites are made up of content blocks, it’s fairly easy to move blocks around your page. To do this, you need to again hover over the content element.
A box will appear, showing you what the element contains. To move the element, click and hold the rectangle with dots at the top of the element’s box.
You can then drag the element to its new location. Just like when adding new content, you must keep an eye out for the line showing where your content will land. If dropped without the line, the element will revert to its previous location.
Now that you know the basics of editing a Weebly page, we are going to go over some membership items you should include on your main page. Your main page is where the majority of your traffic will land and, while the layout and the actual content are up to you, there are some membership items that are good to include there.
Member Login/signup
The first item you want to include on your site’s main page is a way for users to get to the membership login or signup area.
If someone finds your site and wants to sign up, you want to make it as easy as possible for them to do so. That means including a link, having a pop-up, or something that will point the user to the login or signup process.
And these two processes don’t need to exist together. They can have separate entrances.

Neither the signup or login element have to take up the bulk of the main page. On the contrary, it can simply be a link in the top navigation or a small section on your main page.
You can get creative, too. Come up with your own unique location. However, we do recommend you have it in a visible place so prospective and existing members will be able to find the login and signup processes easily.
Members-Only Content
Once members are signed in, you want them to be able to find the members-only content. Some choose to hide content until a user is logged in, while others allow non-member users to click on existing content, then offer them a signup/login form in order for them to see the content.
Regardless of whether you choose to display content to non-members, you may still want to include the entrance to member content somewhere on the main page for members who have already logged in.
Pro Tip: if you choose to allow content to be clicked before signing in, MemberSpace has a great login/ signup pop up you can utilize. We’ll cover how to set that up later in this guide.
Setting Up Other Weebly Pages
Now that you know how to edit your main page, it’s time to go over how to add new pages to your Weebly site.
New pages are essential to a membership site. While many other websites can subsist on a single page, a membership site almost always needs more than one page. Whether for various types of content, a login/signup page, or more, membership sites are naturally complex.
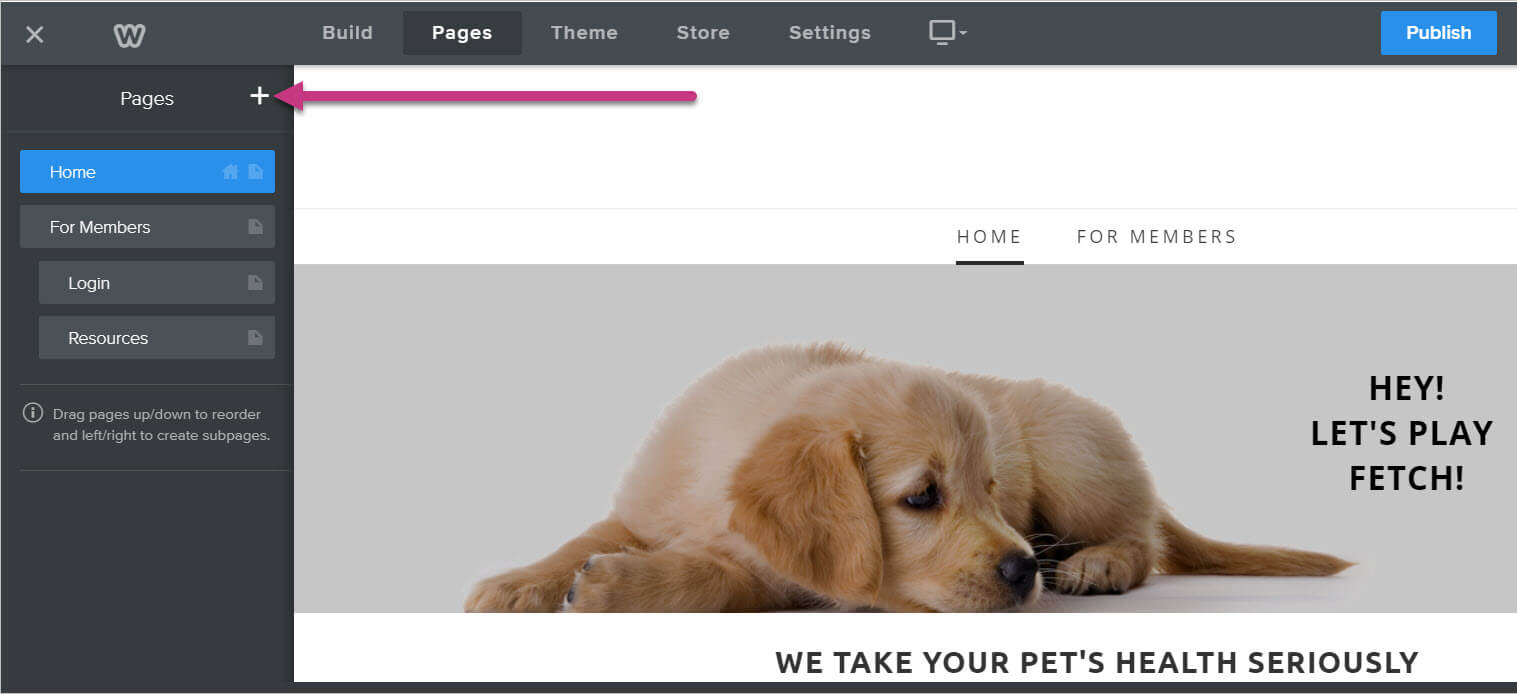
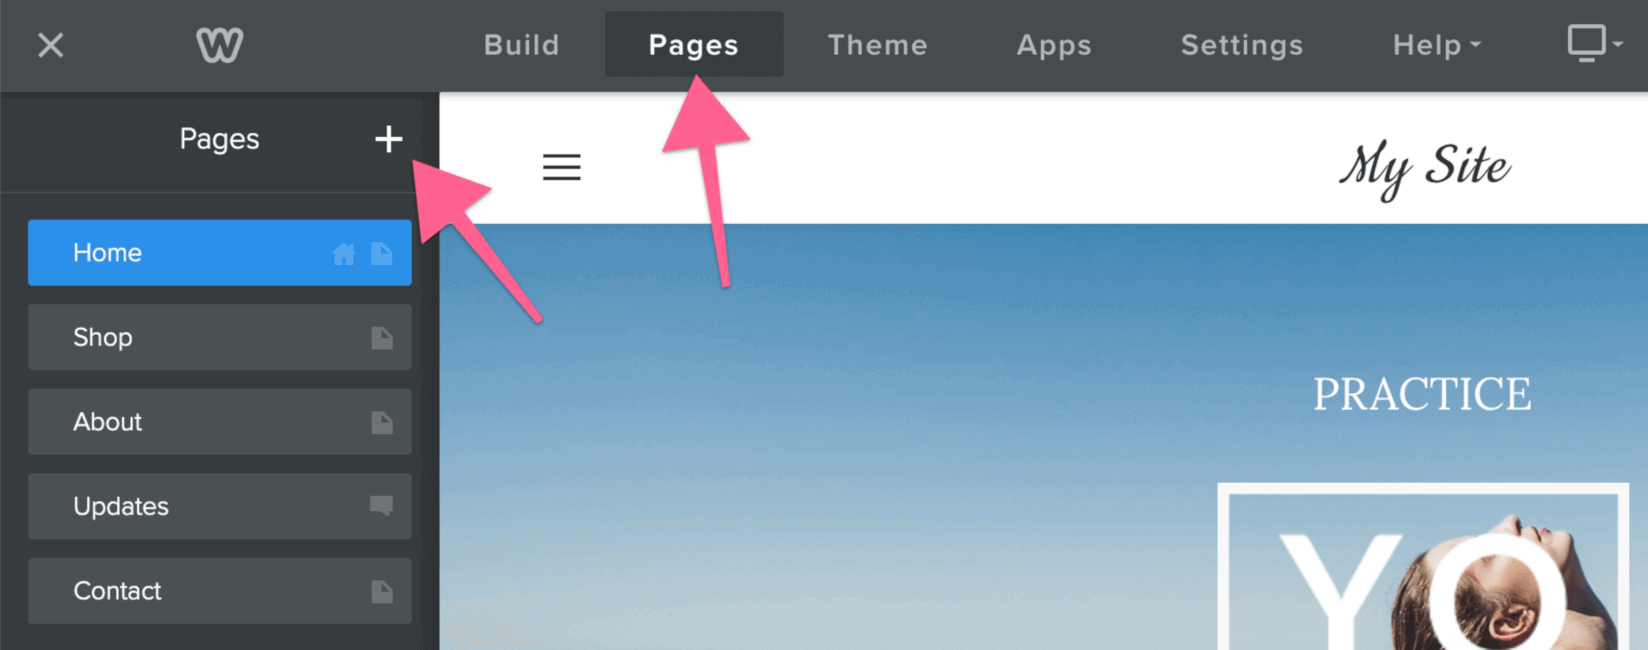
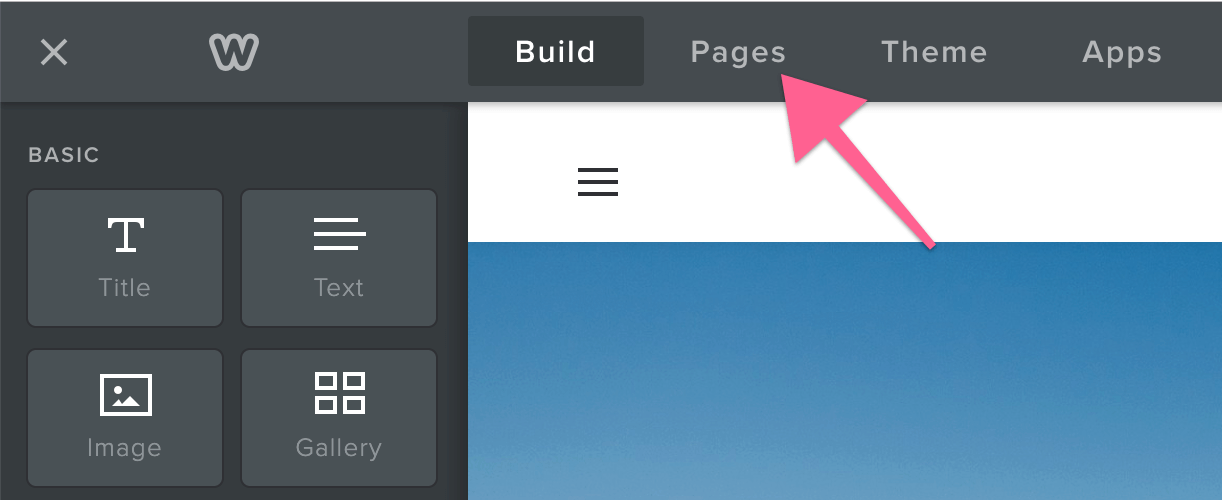
So how do you create more Weebly pages? Well, the first step is to log in to your Weebly editor, then click the “Pages” tab in the top navigation bar.

Once you have reached the Pages interface, you can create new pages and manage your existing ones. To create a new page, click the “+” button at the top of the left sidebar.
When you click the “+” button, a drop-down with page types will appear. There are various types of pages, all of which serve a different function.
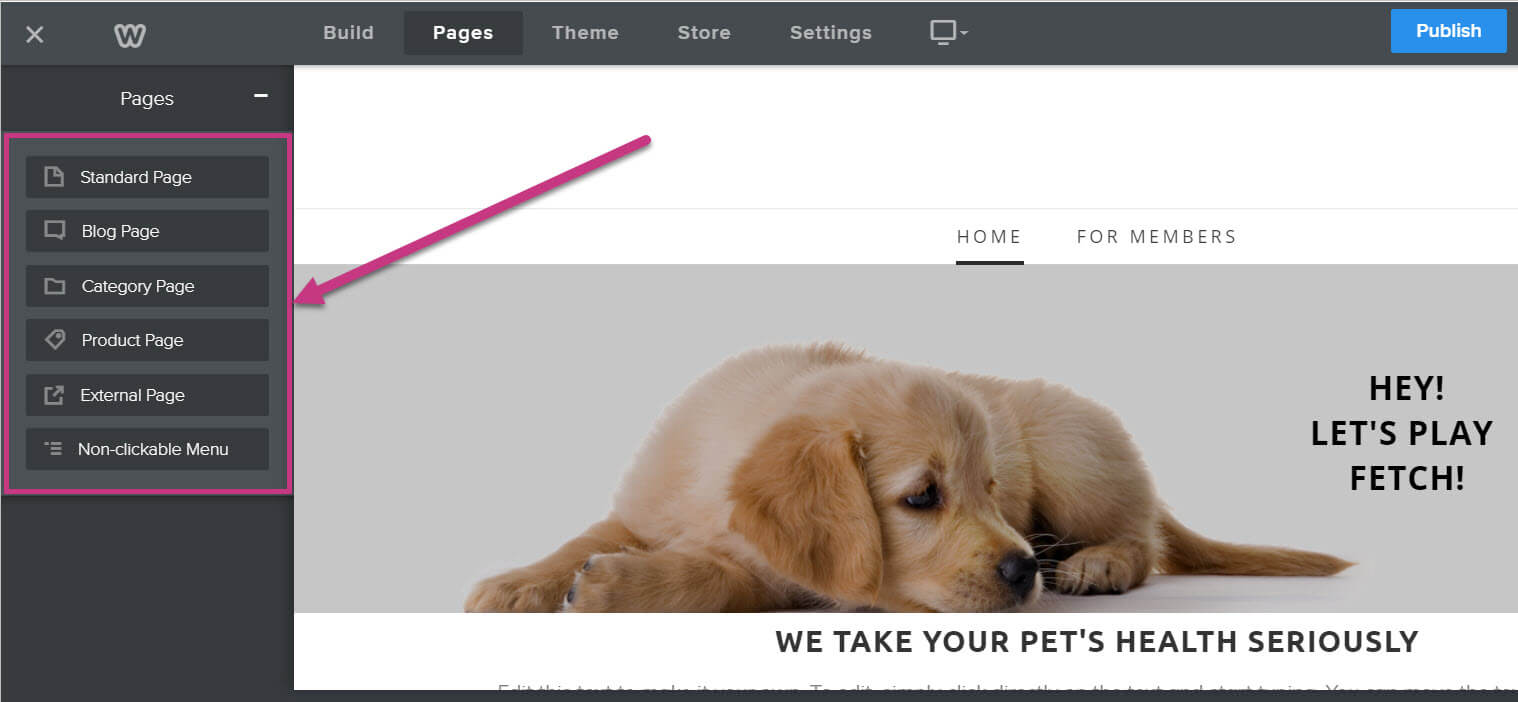
Page types include:
Standard Page – This is a standard page. You can design it however you want to do whatever you want.
Blog Page – This page will show all of your current blog posts. It serves as a centralized location for any blogs you post.
Category Page – This page will show all items within a certain category. Works with Weebly’s store feature.
Product Page – This page is devoted to a single product. Works with Weebly’s store feature.
External Page – This page exists solely to add a link to your navigation bar. It should link to a page that exists outside of your Weebly site.
Non-clickable Menu – This page isn’t actually a page. It exists solely to add an option in your navigation menu. It is usually used to show subpages in a drop-down.
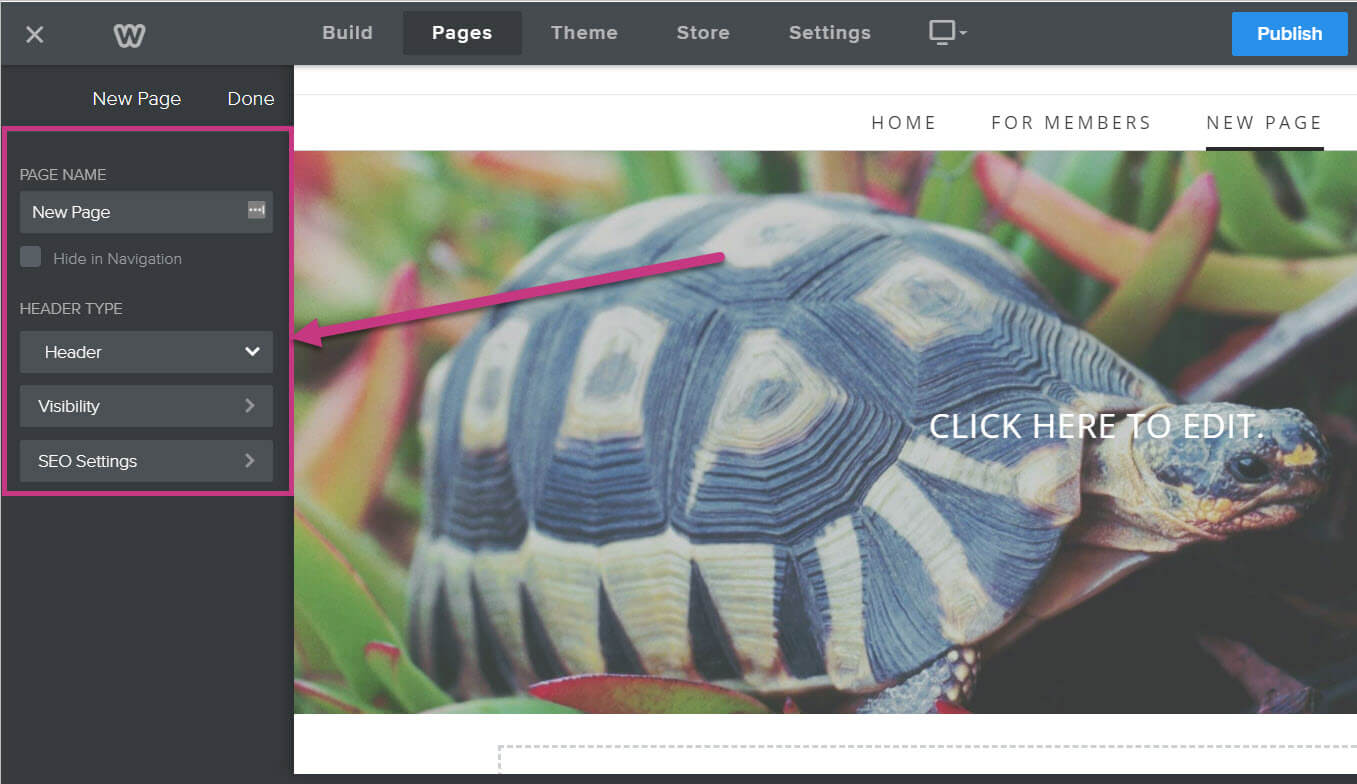
Once you choose a page type, the drop-down will be replaced with a form for page details.
The form for Standard Pages and Blog Pages will include:
Page Name – This will be the page name.
Hide in Navigation -If this box is checked, the page will not appear in the navigation menu.
Header – You can select whether there will be a header, a splash header, or no header on the new page.
Visibility – You can select whether the page is public, password-protected, or only visible to members or groups.
SEO Settings – This will open up another form where you can input SEO information for the page.
While it may seem like a good idea to use Weebly’s built-in password protection, this feature is very basic. Instead, we recommend using one of the several MemberSpace content protection features to keep your pages safe from non-member eyes. After all, these features were designed specifically with membership sites in mind. You can read more about these features in our Protecting Your “Members-Only” Content section.
The forms for the other page types depend on the type of page you choose. They are very straight forward, so we chose not to cover them here.
Once you have added a page and filled out the page’s form, click Done in the upper right corner of the left sidebar.
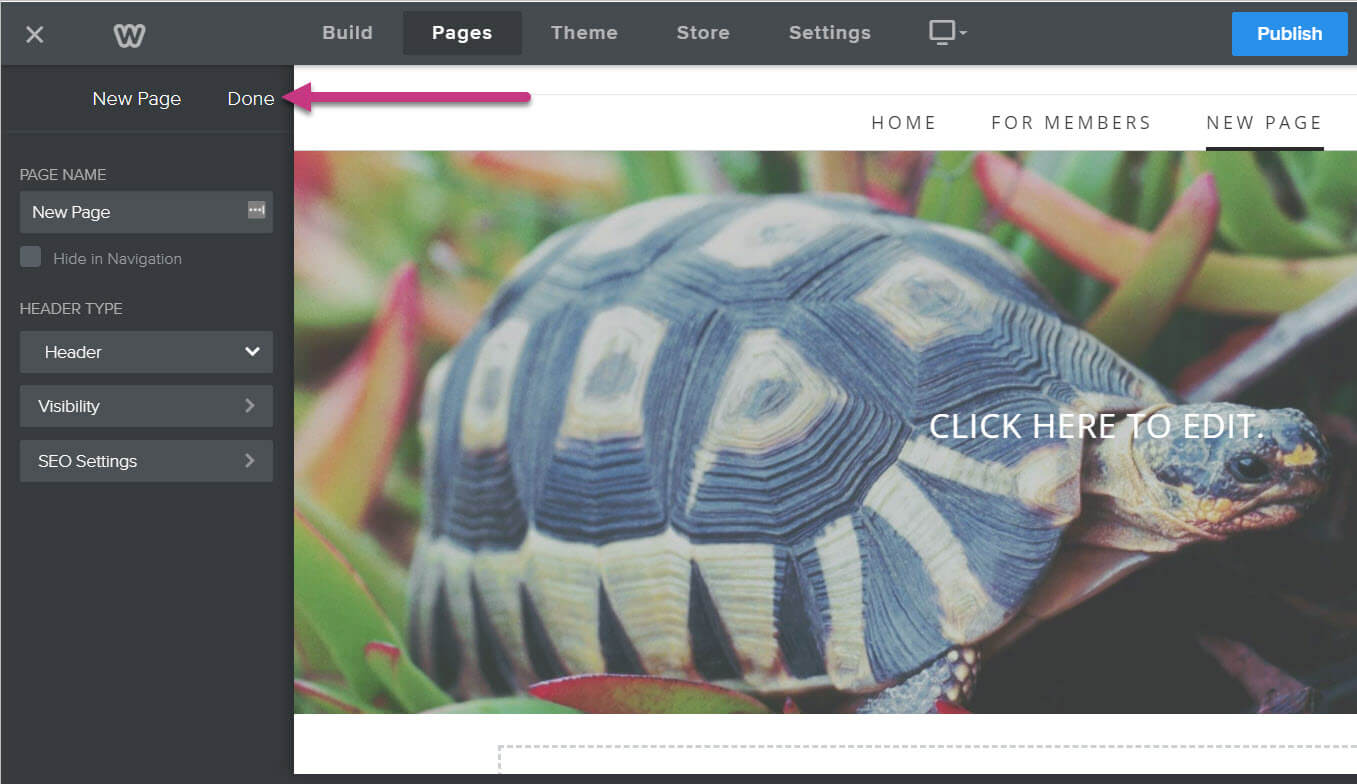
Once the page has been added, you can begin editing the page. You can use the same techniques covered earlier: adding new content, removing old content, and moving existing content around.
Now that you know the Weebly basics, we can move to using Weebly with MemberSpace. This is where you learn how to put together the actual membership aspects of your Weebly membership site.
Installing MemberSpace on Your Weebly Site
Before you can begin using all of MemberSpace’s membership features, you first need to install MemberSpace on your Weebly site. To do this, you must first log in to your MemberSpace account.
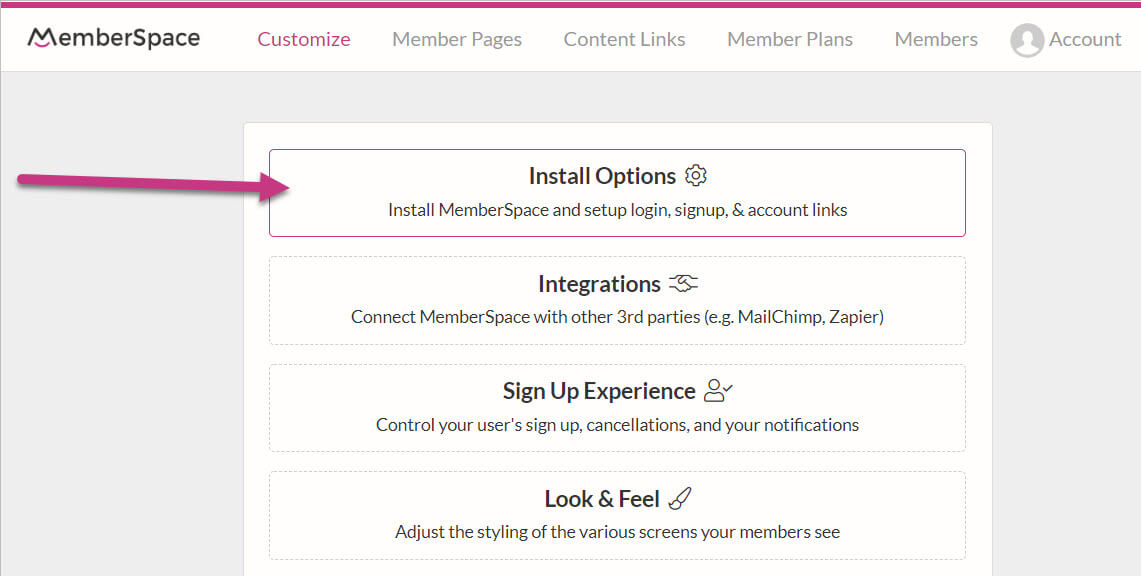
Once you have logged in, go to the top navigation menu and click the “Customize” button. Once there, click “Install Options.”
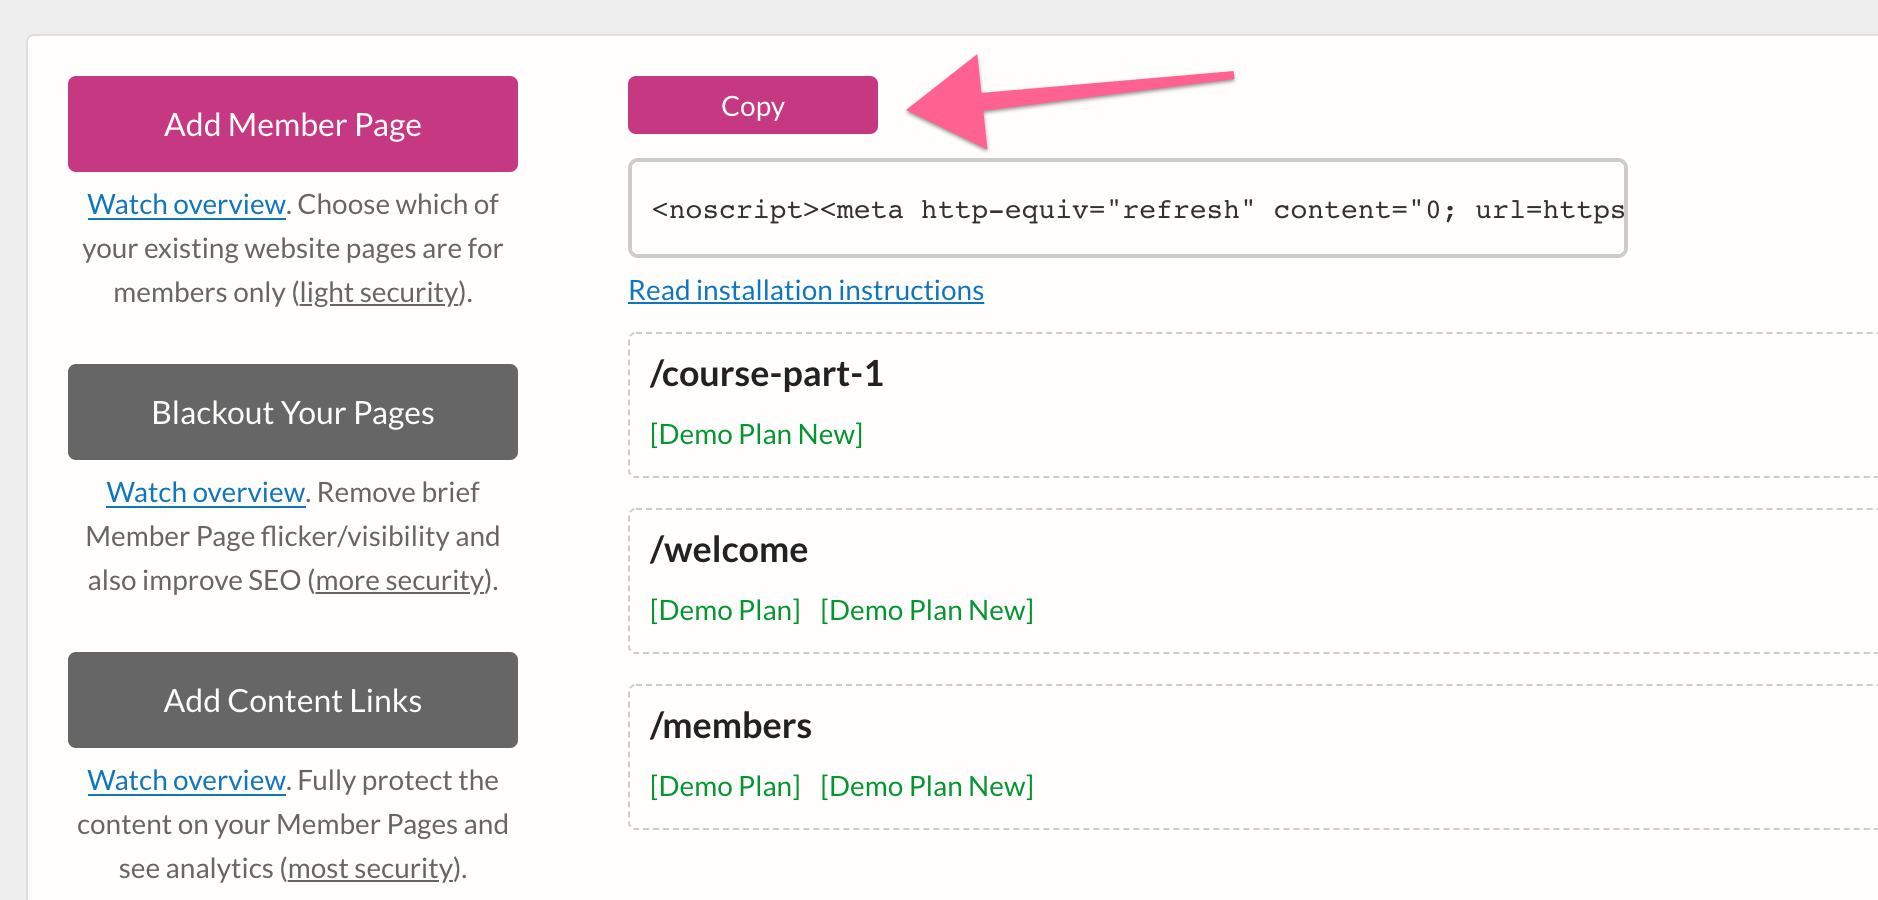
This will take you to a page where you will see MemberSpace’s installation code. Click the “Copy” button at the top of the page to copy this code.

Next, open your Weebly site editor. Go to the top of the navigation menu and click “Settings.”
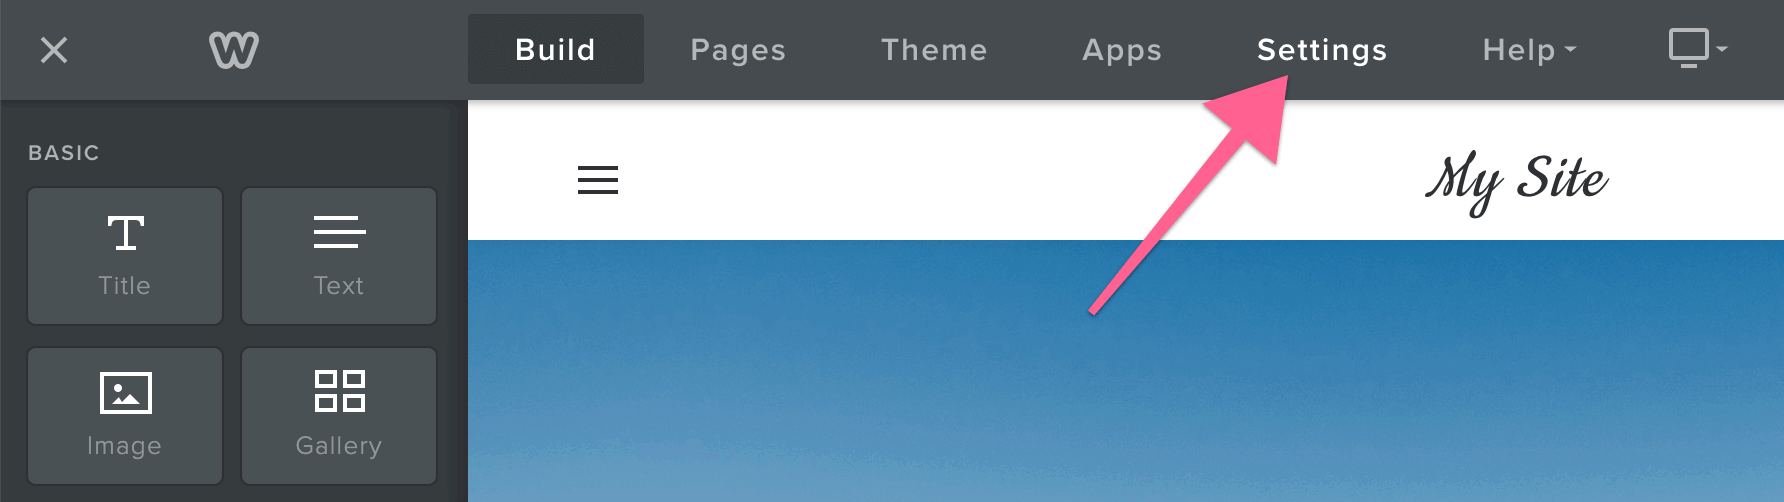
This will open the Weebly settings interface. Once you have done that, go to the left sidebar and click “SEO.”

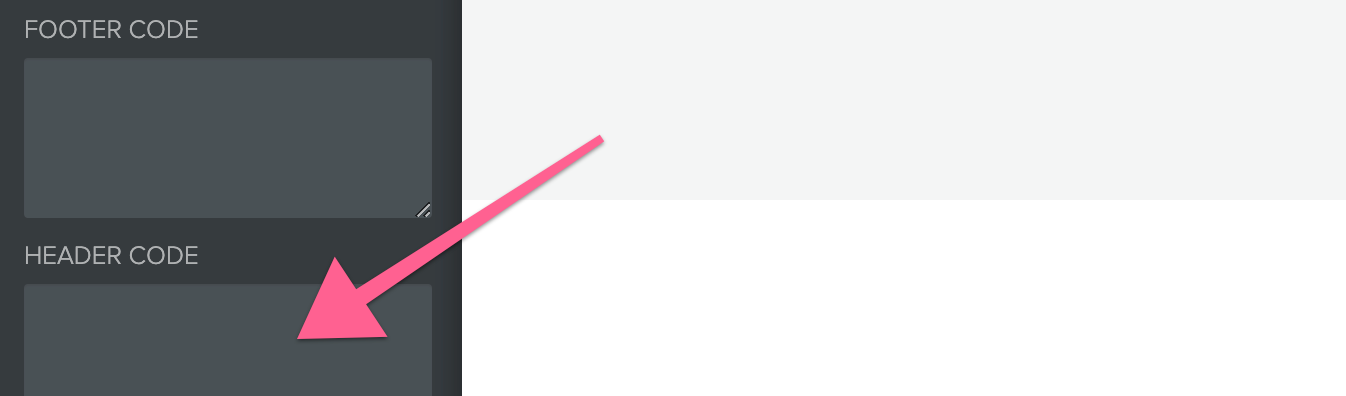
This will open a page with SEO options. Find the “Header Code” text box and paste the code from MemberSpace into it.
Don’t forget to click “Save” in the bottom right of the page to save your changes. Keep in mind that changes will not be made public, even after you save, if you do not publish your site. While you may choose to wait until after you have completed all of the site changes, testing your MemberSpace integration will not be possible until you have published your site.
This is because Weebly disables the code while in the Weebly editor, thus making it impossible to determine whether the code is actually working.
You can publish your site by clicking the “Publish” button in the upper right hand corner.
Automatic Login/signup Button Options
When MemberSpace is installed on Weebly, it automatically adds a black Login/signup button in the bottom right corner of your website. This button will appear on every page.
This is to help you get started with your membership site. If you prefer the button to be located elsewhere, you can contact our support team for help moving the button to a different spot.
If you would like to use another form of signup/login (like an embed or popup, which we will cover later in this guide), the default button can be completely removed by following these steps:
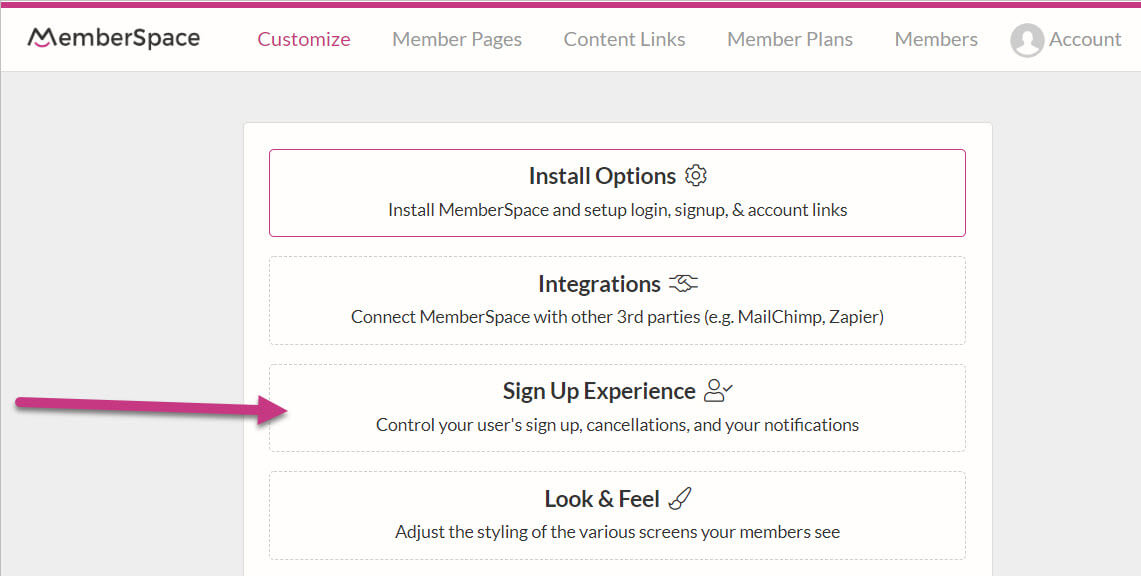
Log in to your MemberSpace account. In the upper navigation bar, click “Customize.” Once within the “Customize” interface, click “Sign up Experience.”
On the next page, find the “Display the Login/signup” checkbox and uncheck it. Then click “Save” to save your changes.
Now that MemberSpace is successfully set up on your Weebly site, you can start adding in its membership features.
The first feature we are going to cover is how to set up your member navigation. Member navigation is important to any membership site. It is the portal through which your members will interact with your offering and where they will instinctively go when searching for something new.
How you ultimately create your site navigation is up to you, but we have two member-specific navigation methods others have used successfully in the past: a members-only navigation page and a members-only drop-down menu.
Members-Only Navigation Page
A members-only navigation page works as a homebase for your members. Once they log in, they will go to this page to access all the content their membership makes available to them.
To add a members-only navigation page, you must first add a page in Weebly and design it to your liking. This is an excellent place to show members what content they have access to and direct them to the different categories of your offering. Refer back to the How to Set Up Your Weebly Site section for instructions on how to add and design pages.
Once you have designed the page, it’s time to add it as a member page in your MemberSpace account. This will keep non-members from being able to access the page.
In order to add the navigation page in MemberSpace, you must first find the page’s URL. You can find it by going to your Weebly editor and clicking the “Pages” tab in the top navigation bar.

Once you have done that, find your chosen page in the left sidebar. Click it, then click the “SEO Settings” button. This will take you to the page’s SEO interface. Feel free to add in any necessary SEO information while you are here, but to get the URL, find the “Page Permalink” section.
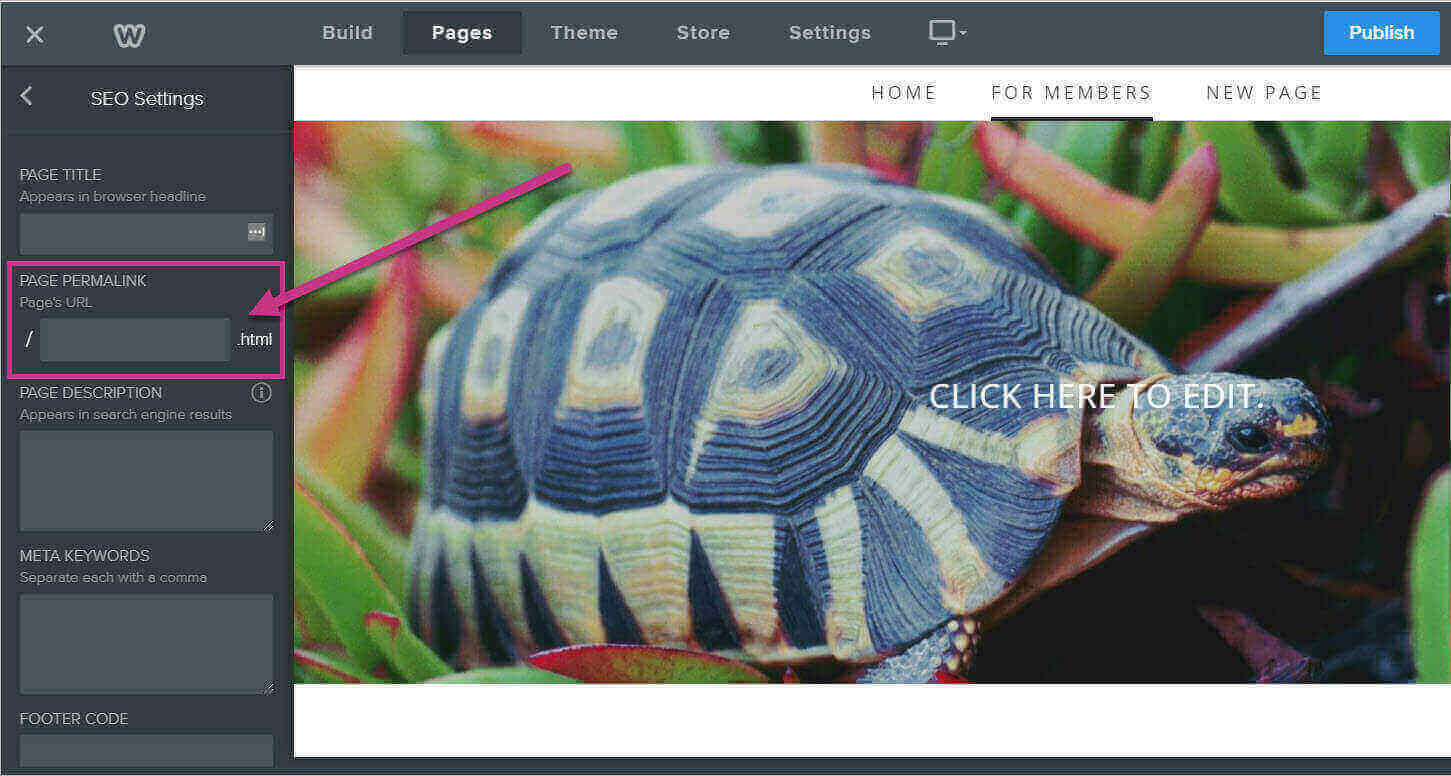
This is the URL for your chosen page. If it is empty, feel free to write in your own URL. You will need to remember this URL so that you can add it to your MemberSpace Member Page list in the next step, so we recommend copying it.
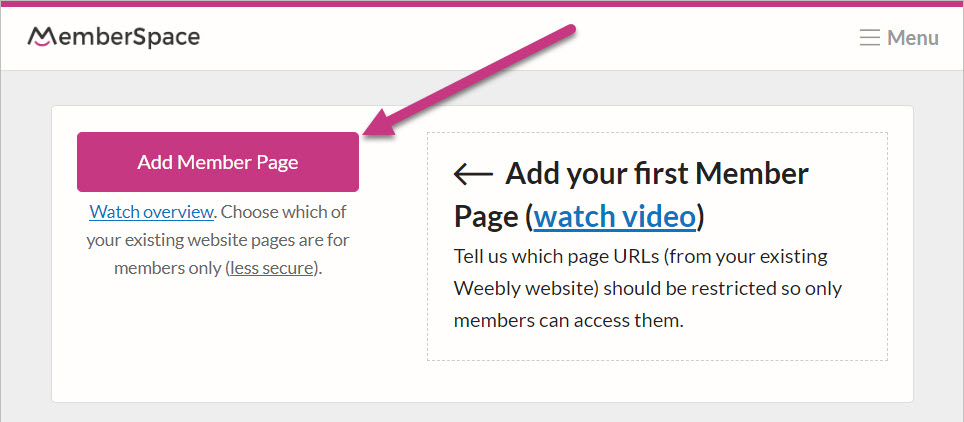
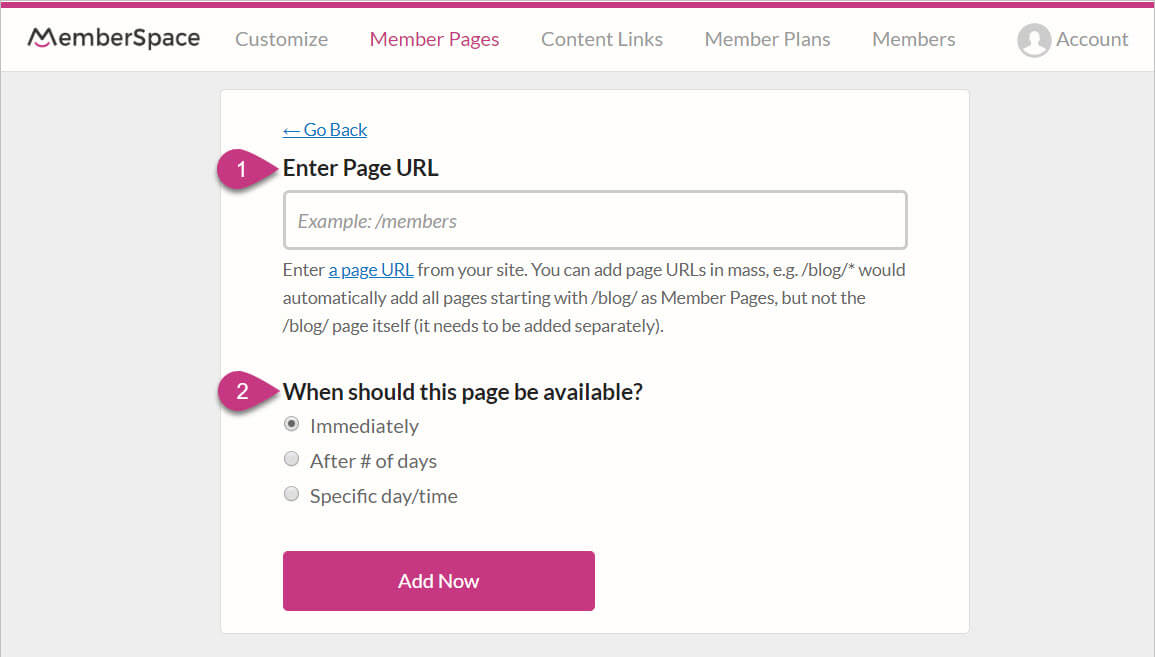
Once you know the page’s URL, log in to your MemberSpace account, then click “Member Pages” in the top navigation bar. This will take you to the Member Pages interface. In the left sidebar, click the “Add Member Page” button.
Clicking that button will take you to a form for you to fill out about the page. On this page, enter the page’s URL (that you found earlier) and select how soon after signup this page should be available to members.
If you want to add this as the default page where members are taken after signing in, you can do so by changing the “After signup – send members to this URL” or “After Login – send members to this URL” in your Member Plans settings.

Add the Navigation Page to Your Top Menu
You can also add your new navigation page to your Weebly Site’s top navigation menu. To do so, log in to your Weebly site editor, then go to the top navigation bar and click “Pages.” This will take you to the Pages interface. Once there, click the “+” button like you are adding a new page.
Next, choose the “External Link” option from the drop-down.
In the new page information form, enter the navigation page’s URL, then click “Save.” This will add the new navigation page to your top menu. When you want the change to go public, click “Publish.”
Members-Only Drop-Down in Top Navigation
The other common option for member navigation is the members-only drop-down in your Weebly site’s top navigation.This is fairly straightforward. You create a drop-down with members-only content in the Weebly Pages interface.
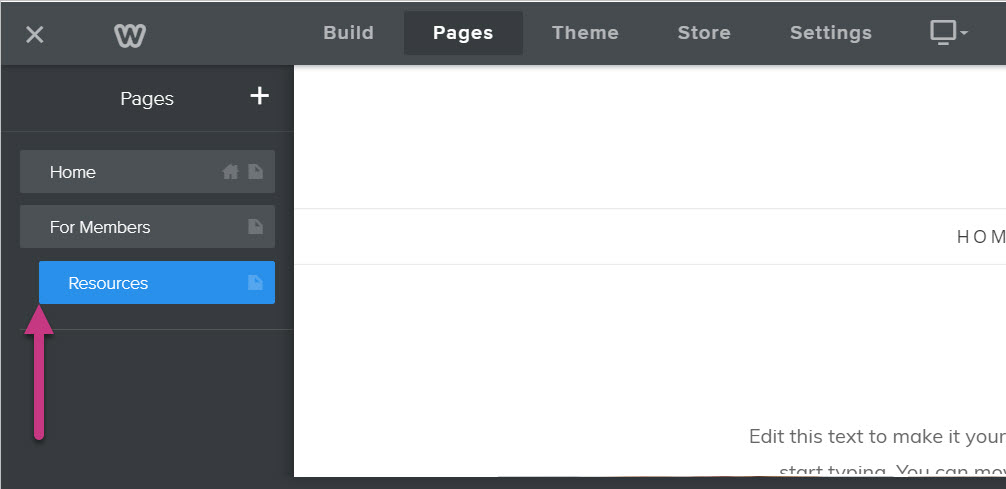
To set this up, log in to your Weebly editor, then go to the top navigation and click “Pages.” Once there, you can arrange your pages into a drop-down by clicking and dragging them underneath another page. Note that the top-level page will be the one that is displayed on the navigation bar, then when someone hovers over it, the drop-down will appear.
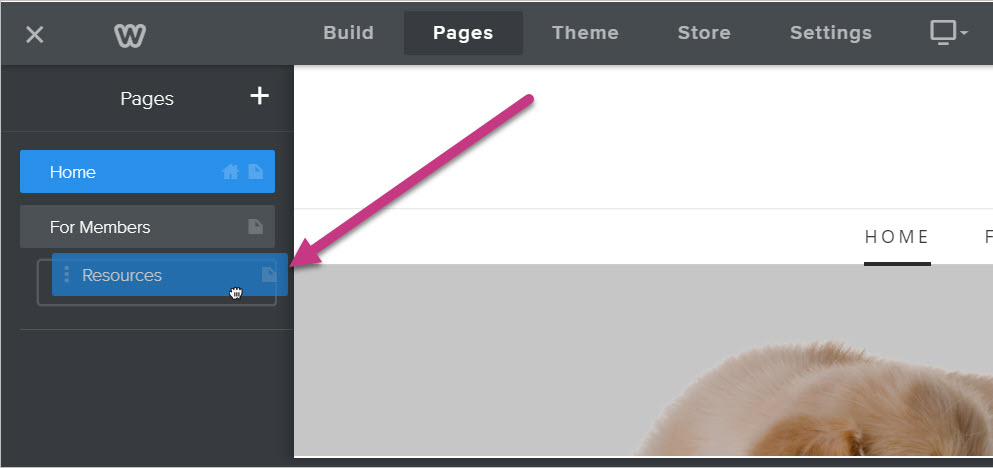
You can align the pages as you want them to appear in the drop-down. You can tell which pages are in the drop-down because they will sit underneath and farther than the ones outside of the drop-down.
 You can even have sub-drop-downs within the original drop-down. Just drag-and-drop another page under one of the pages already within the drop-down.
If you don’t want the member drop-down’s top option to be a clickable page, this is an excellent time to use the “Non-clickable Menu” page that we talked about in the Getting Started with Weebly section.
Creating signup and login pages is necessary for any functioning membership site. However, you have a lot of options about how to go about incorporating the signup or login interface into your site.
MemberSpace provides both embedded and pop up signup/login interfaces that work with Weebly.
Adding a Login/signup Pop Up to Weebly
There are two options for adding a login/signup pop up to your site. The first option is to add the pop up to a menu, which will summon the pop up when users click the link. The second option is to add the pop up to a specific page. When added in this way, the pop up will be embedded somewhere in the page as a link or a button.
Adding a Pop Up to Top Navigation
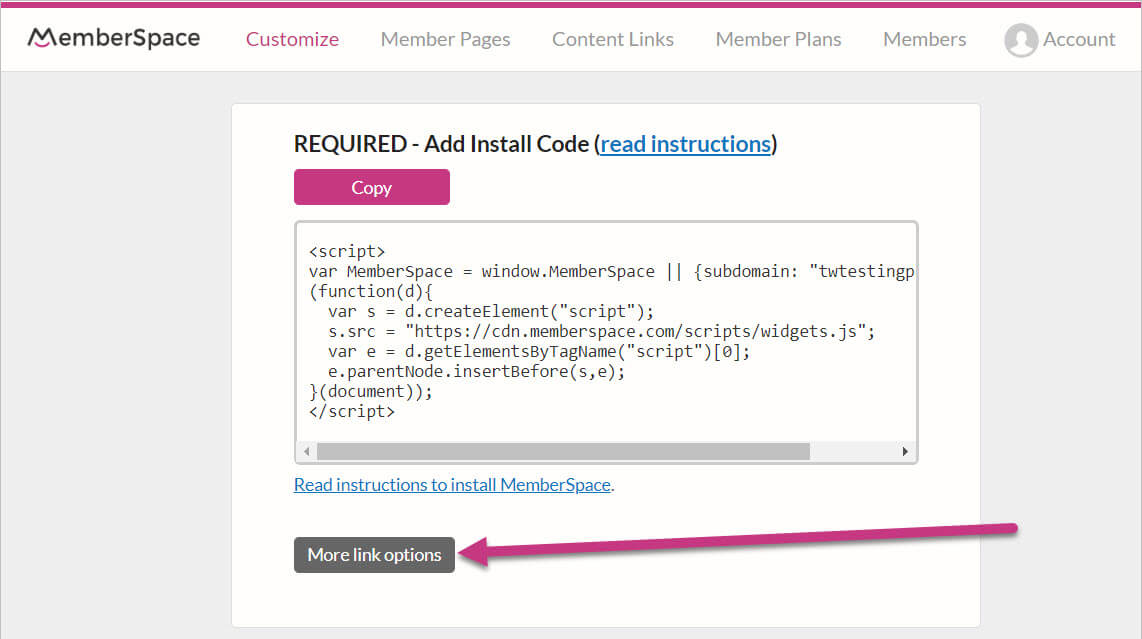
If you choose to add a pop up to your navigation, you must start by entering your MemberSpace account and clicking “Customize” in the top navigation menu. This will take you to the customization page with a list of options. Click “Install Options.”
Once on the Install Options page, click the gray “More link options” button. This will open the area that holds the various login and signup codes.
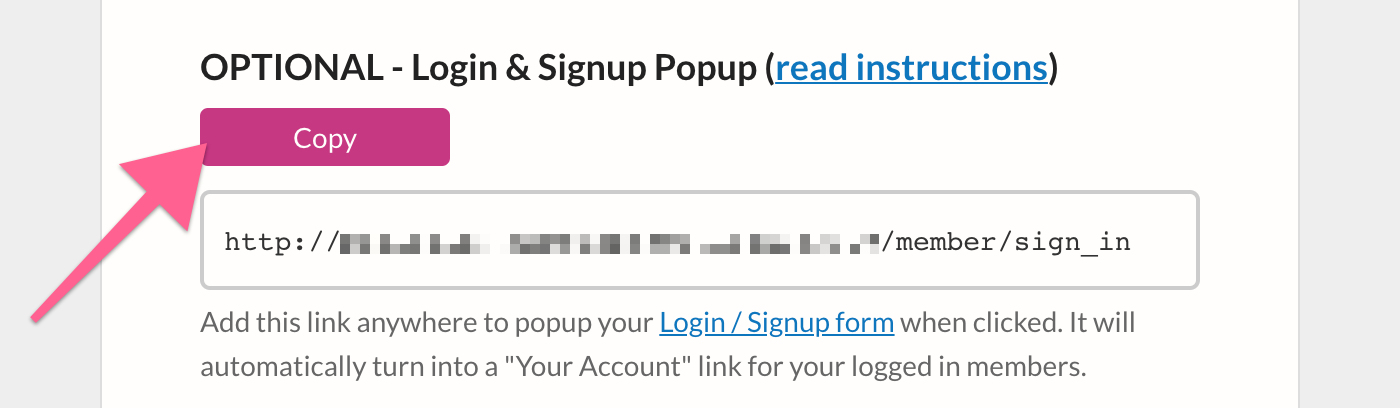
Once there, find the pop up you want (there are two options – a login/signup pop up and an only signup pop up) and click the “Copy” button to copy the pop up code.

Once you have copied the pop up code, you can go back to your Weebly site editor. Once there, go to the Pages interface once again by clicking the “Pages” tab at the top of the Weebly site editor. When you have arrived in the Pages interface, click the “+” button to add a new page.
From the drop-down, select “External Page” as your page type.

Name the page whatever you like, then paste the code you copied earlier into the link field. By doing this, every time the link is clicked, it will summon the pop up form.
Note: Remember that you need to publish the site for changes like this to go live. You will also need to publish the site in order to properly test MemberSpace code in a Weebly site – it won’t work in the Weebly editor.
When members are already logged in and click this link, the pop up will appear as a “Your Account” link. Members can then use this link to access their account and make changes, such as changing email, viewing invoices, updating payment methods, etc.
Adding a Pop Up to a Specific Page
Adding a pop up to a specific page can work well, especially for signups. You can use the pop up in any interactive element that utilizes a link. For example, you could use a button or a link in text.
So, if you were to add a pop up to a specific page, you must start by entering your MemberSpace account, clicking the “Customize” tab, selecting “Install Options,” then clicking the gray “More link options” button. This will bring up the pop up options. Find your desired pop up, then click the “Copy” button to copy the pop up code.
Once you have copied the pop up code, you can go back to your Weebly site editor.
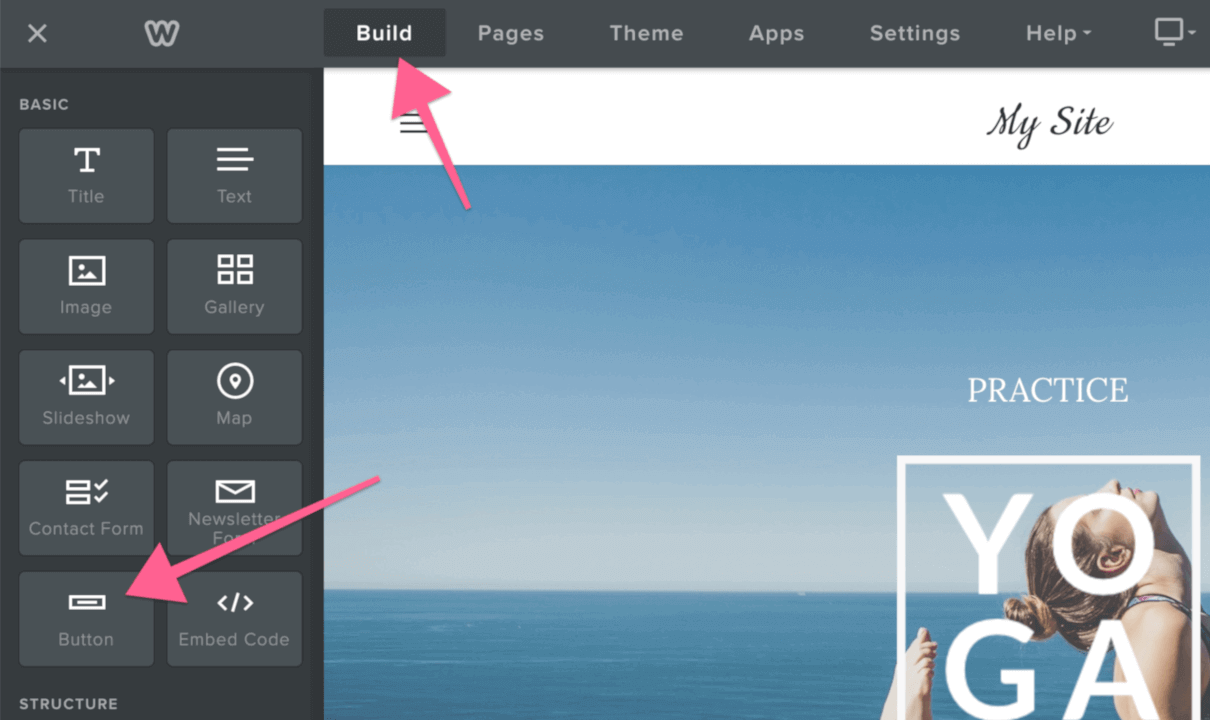
Now, click the “Build” tab, and navigate to the page where you want the pop up placed.
Once there, add the element that you would like to initiate the pop up.
Depending on the element, the method for adding in the link text may differ. But in all cases, paste the code you copied earlier in the place of the URL. Doing so will add the code necessary to initiate the login/signup pop up with MemberSpace.
You can style the link’s element however you desire. It will not affect the function of the pop up.
Note: Remember that you need to publish the site for changes like this to go live. You will also need to publish the site in order to properly test MemberSpace code in a Weebly site – it won’t work in the Weebly editor.
Just like the top navigation pop up, logged in members will see a “Your Account” version of the pop up instead of the login/signup interface. This gives them the ability to access their account and make changes, such as changing email, viewing invoices, updating payment methods, etc.
Embedding a Login/Signup in a Page
If you prefer to embed your login/signup form into a page, you can do so using the MemberSpace embed feature. MemberSpace supplies the code for the form embed, so all you have to do is paste the code into your Weebly page.
You can find the embed code in the same place as the pop up options. Enter your MemberSpace account, click the “Customize” tab, select “Install Options,” then click the gray “More link options” button. This will bring up the extra login/signup codes. Once you have found the embed code, click the “Copy” button to copy the embed code.
Once copied, return to the Weebly site editor and navigate to the page you want to add the embed form to.
When you have arrived on the page, find the “Embed Code” element in the left sidebar and add it to the page.

When the element has been added to the page, click it to bring up the element options interface. In its interface, click the “Edit Custom HTML” button. This will turn the entire element into a text box. Paste the code you copied from MemberSpace into this textbox, then click outside of the element.
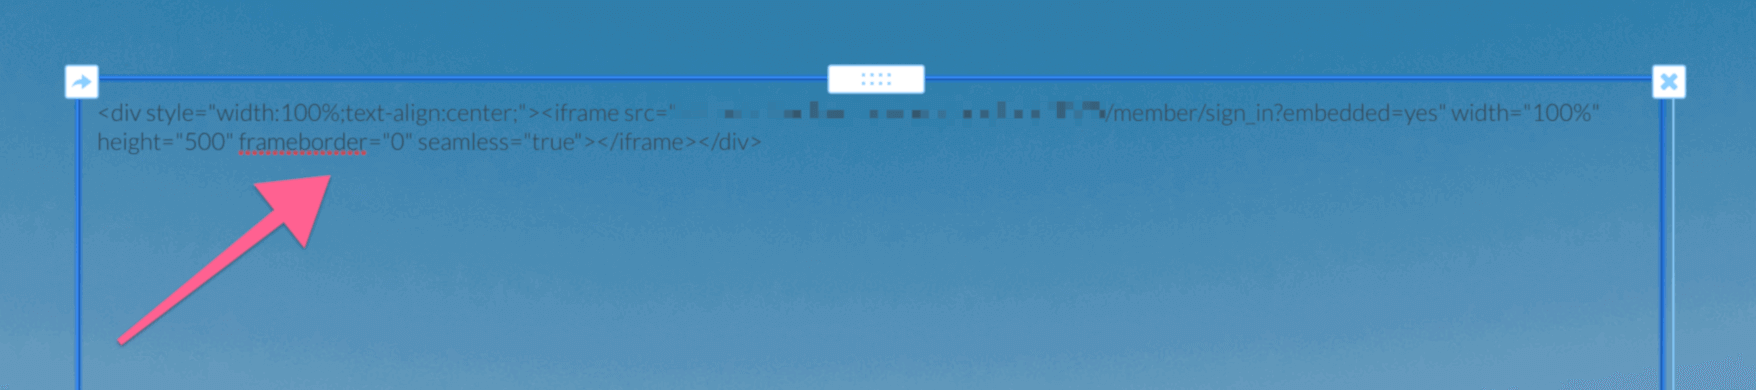
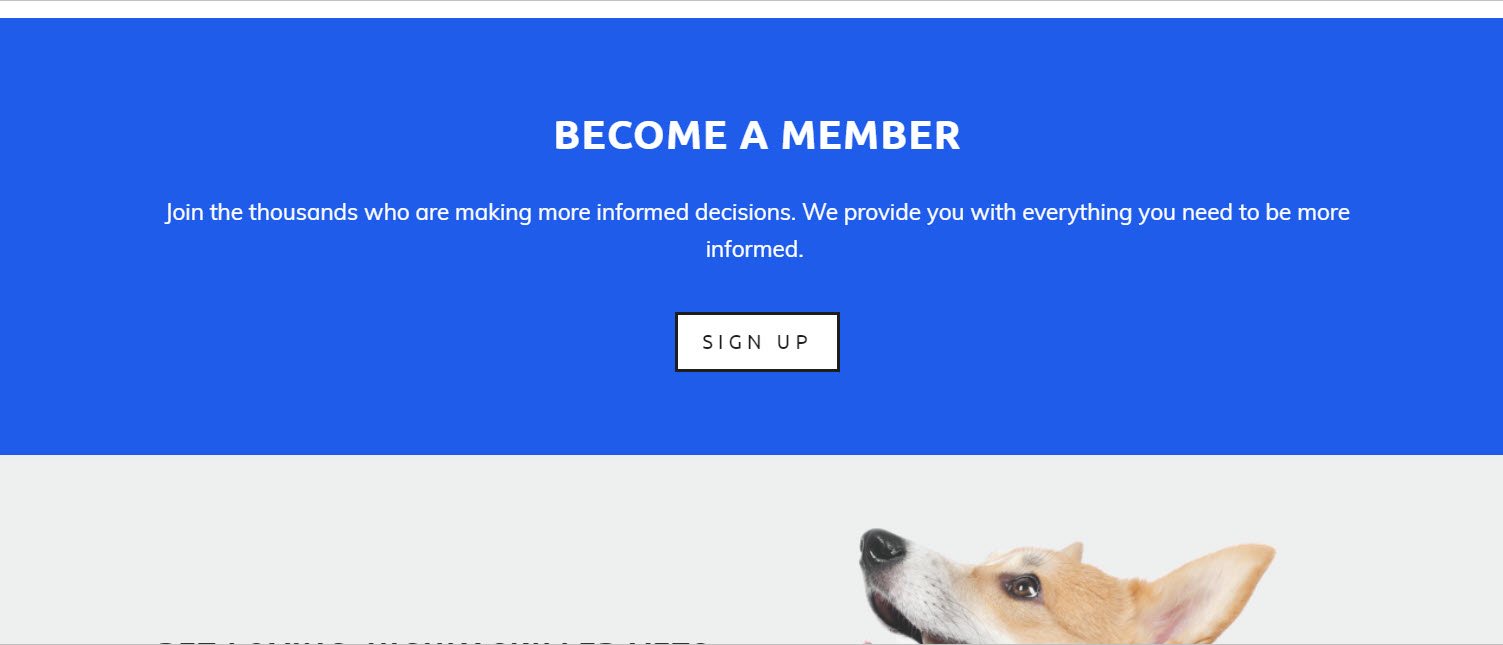
The code will automatically turn the form into a login/signup form that both prospective and existing members can use.
You can adjust the height of the form by changing the embed code slightly. All you have to do is return to the “Edit Custom HTML” interface and find height=”number”. You can change this number to whatever you want. The larger the number, the taller the form. The smaller the number, the shorter the form.
Note: As before – remember that you need to publish the site for changes like this to go live. You will also need to publish the site in order to properly test MemberSpace code in a Weebly site – testing MemberSpace code is not possible in the Weebly editor.
As with the pop up login/signup forms, logged in members will see a “Your Account” version of the pop up instead of the login/signup interface. From here, they will be able to access their account and make changes, such as changing email, viewing invoices, updating payment methods, etc.
Now that you have equipped your site with the necessary login/signup features, you can move on to adding your members-only content.
Adding Member-Only Pages
We touched on this earlier in the guide when we were going over how to add members-only navigation. However, you can set an entire page aside to only be accessible by your members.
To do this, you must first build the page in Weebly and find the page’s URL (which you can do by going to the Pages interface, clicking the name of the page, clicking the “SEO Settings” button, then finding the “Page Permalink” section).
When you have these two things, go to your MemberSpace account and click “Member Pages” in the top navigation menu. This will take you to the Member Page interface. Once there, click “Add Member Page” in the left sidebar.
This will take you to a form to fill out about your page. You will need to enter:
The link to the page (that you found earlier)
When the page should be available
Fill out these fields, then click “Add Now.” This will add the page to the list of members-only pages. MemberSpace will protect this page from being accessed by non-members.
Content is the foundation of a membership site. You need to be sure that only your members can access it. You put your time and effort into creating the content; no one should be able to circumvent your system and access your resources for free.
That’s why MemberSpace has built ways to protect your content and keep it truly members-only. By default, members-only content is kept from non-members, but we have come up with an extra level of security to keep even the most determined non-member from getting around the membership wall.
This extra layer of security blacks out your pages for non-members.
When non-members access a non-blacked out member page, the page may show on the screen for a second or two before they are told it’s members-only content. With a blacked out page, there is no brief blip. It is consistently hidden from the non-member.
A blacked out page also helps if someone with advanced technical knowledge tries to bypass the membership pay wall. Users may disable their javascript in an attempt to get around the automatic redirect to the signup/login form. If they try this and page is blacked out, they are still kept from seeing the page.
Blacked out pages also deter search engines from automatically indexing your members-only pages along with the rest of your site.
While non-members and search engines will get a blacked out page, your members will be able to log in normally and see the page as it was intended.
To black out pages, you need to log in to your MemberSpace account and click on “Member Pages” in the top navigation menu.

This will take you to the Member Pages interface. Once there, go to the left sidebar and click “Blackout Your Pages.”
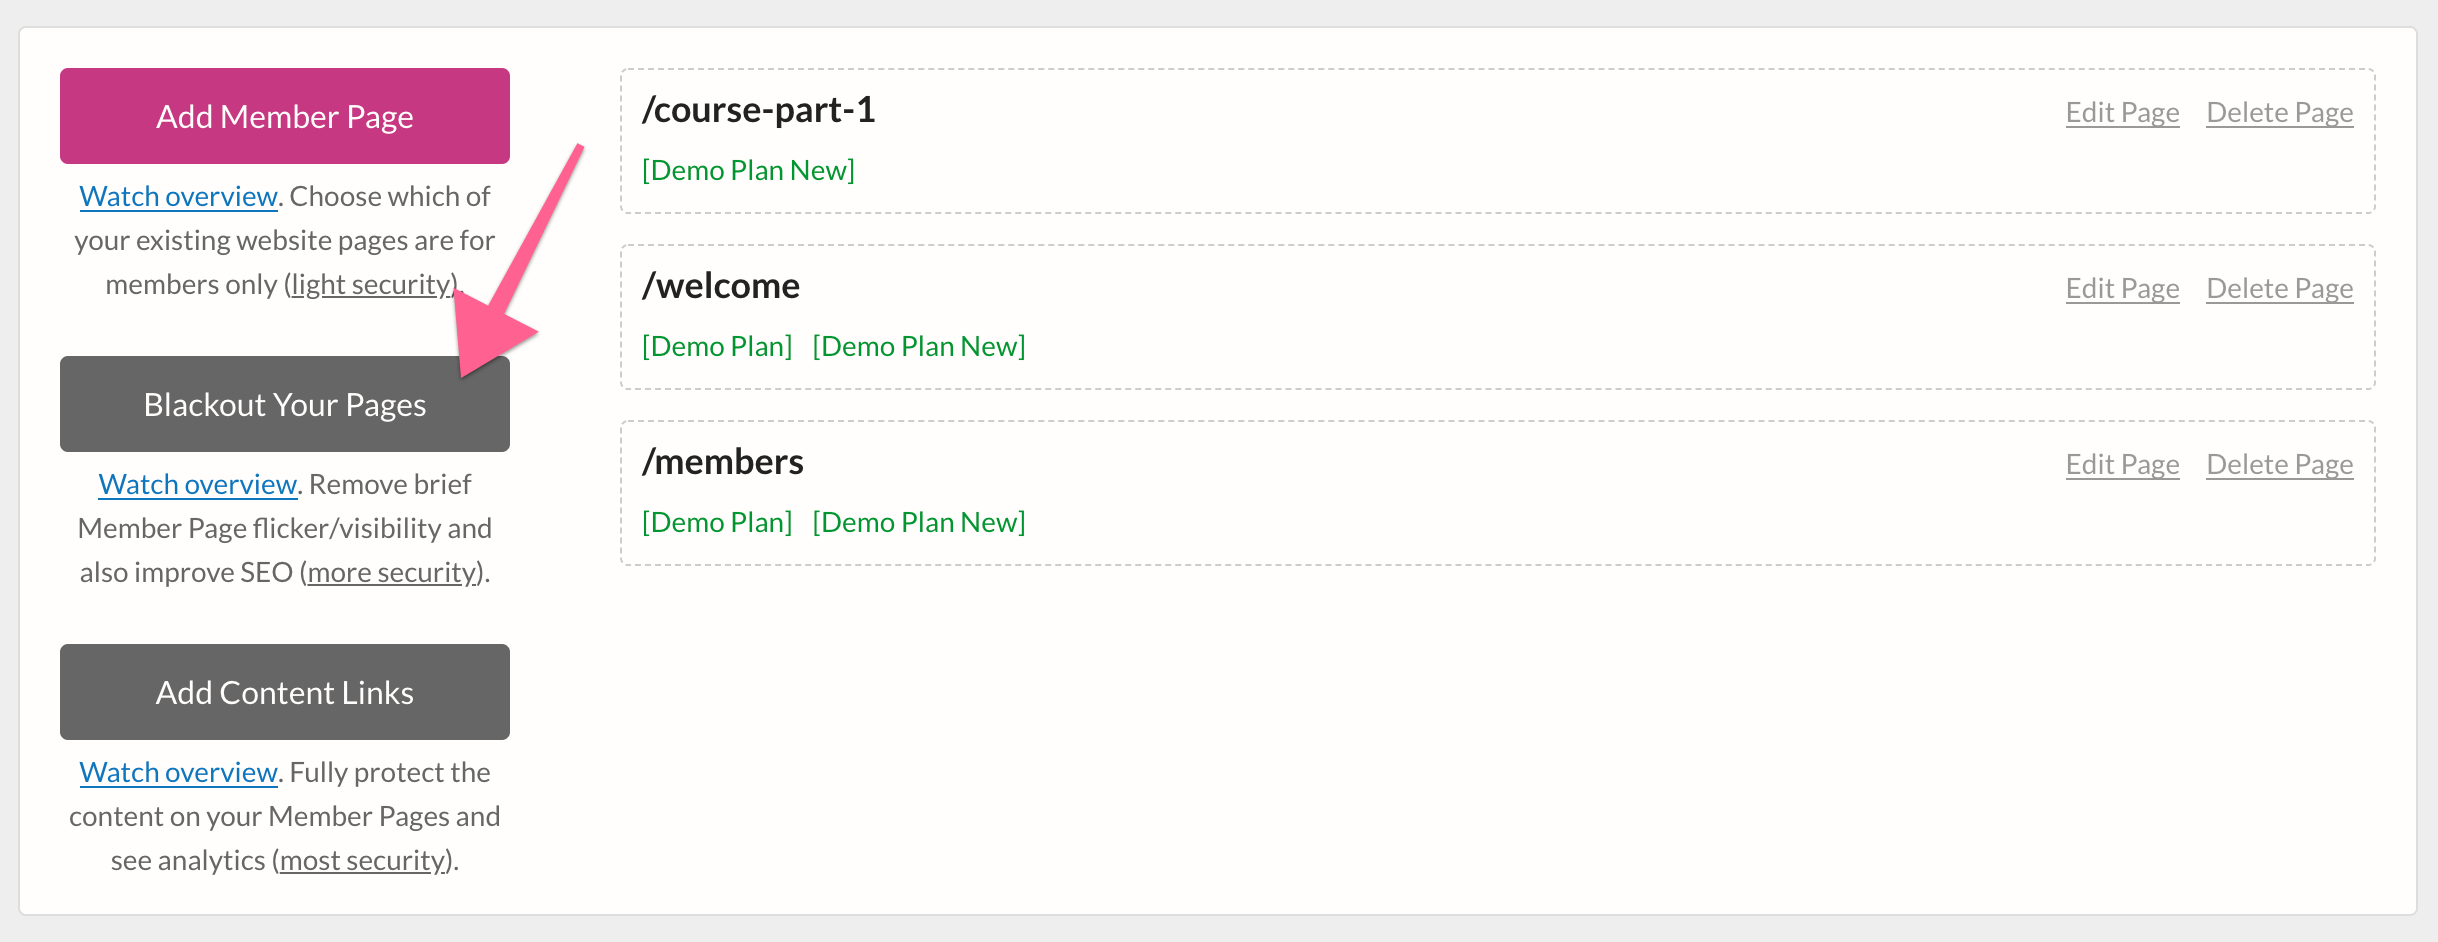
You will be taken to the blackout pages interface. At the top of the page, you will see a code. You can use this code in your Weebly interface to blackout your chosen pages.To copy this code, just click the “Copy” button.
Now, go to your Weebly editor. In the top navigation menu, click “Pages.”
You will see a list of your existing pages in the left sidebar. Find the page you want to blackout, then click on its name. This will open that page’s settings. Click on “SEO Settings.” Then scroll to the bottom and find the “Header Code” section. Once there, paste the code you copied earlier into its text field.
Once you have done this, you will need to publish the site before changes can take place. You can publish by clicking the “Publish” button in the top right corner of the screen.
If you want to add content that is accessible to members via link (like a download, a pop up, etc.), you can do that with MemberSpace’s content links.
With content links, you supply the file and MemberSpace makes sure the user is signed in before letting them see/download the item.
Content links work with:
PDF
Videos
Audio (MP3 only)
Images
HTML
Miscellaneous files
To create a content link, you must first add its file to MemberSpace so we can create a link that will protect it from non-members. To do this, log in to your MemberSpace account and click “Content Links” in the top navigation menu.

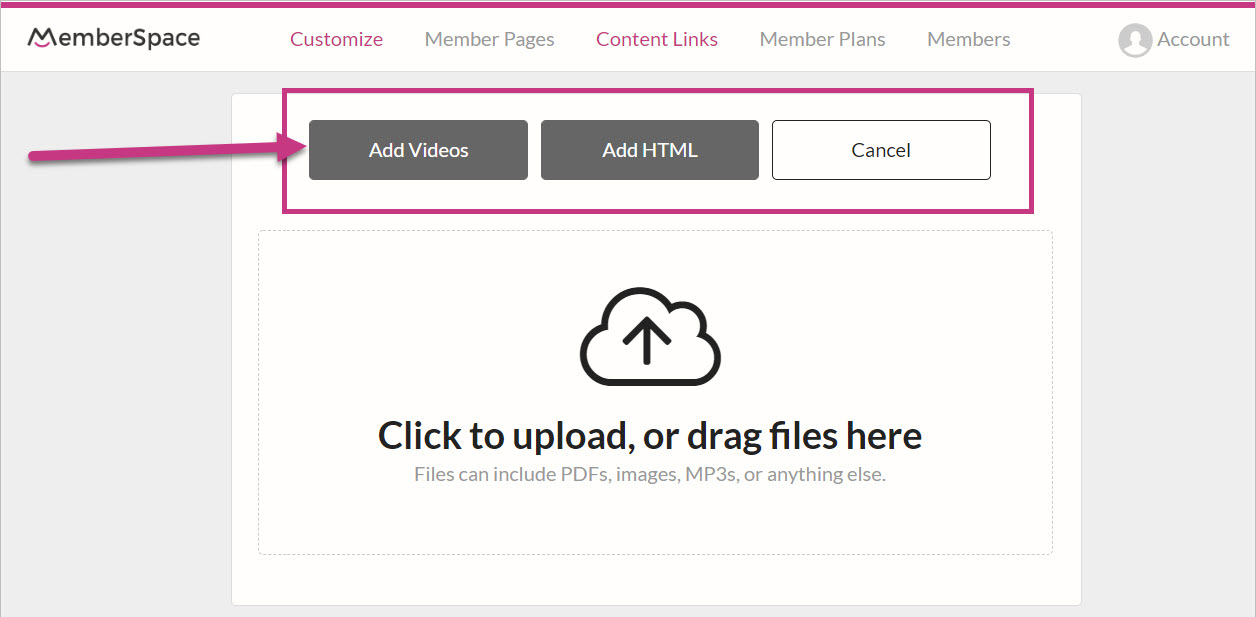
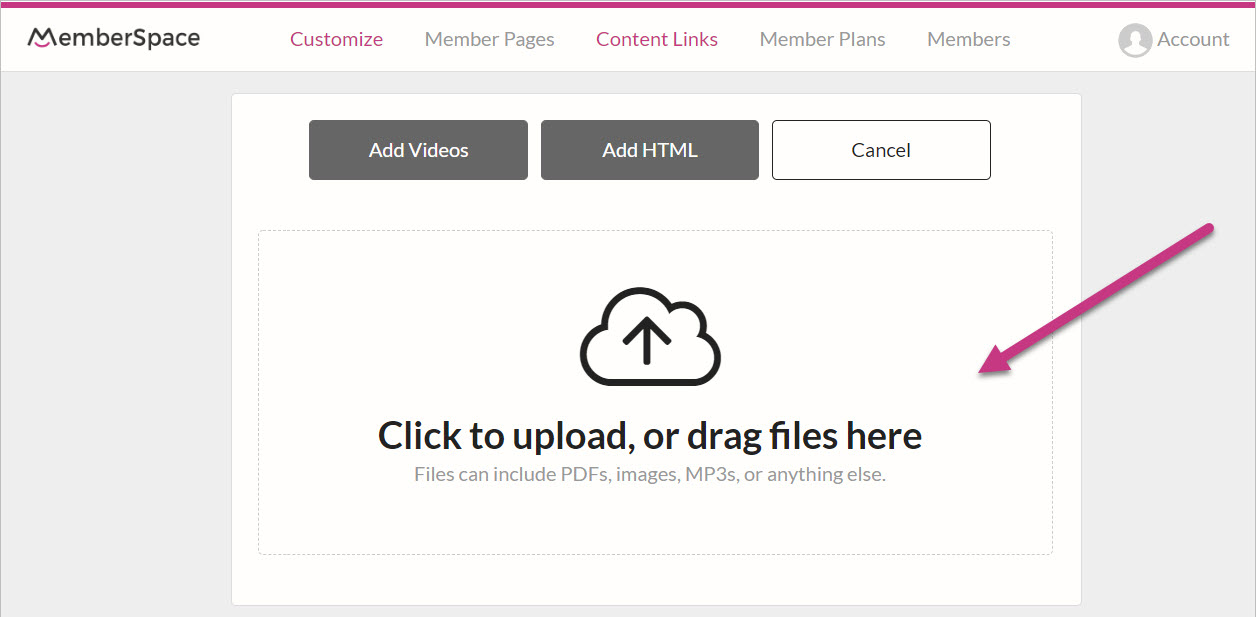
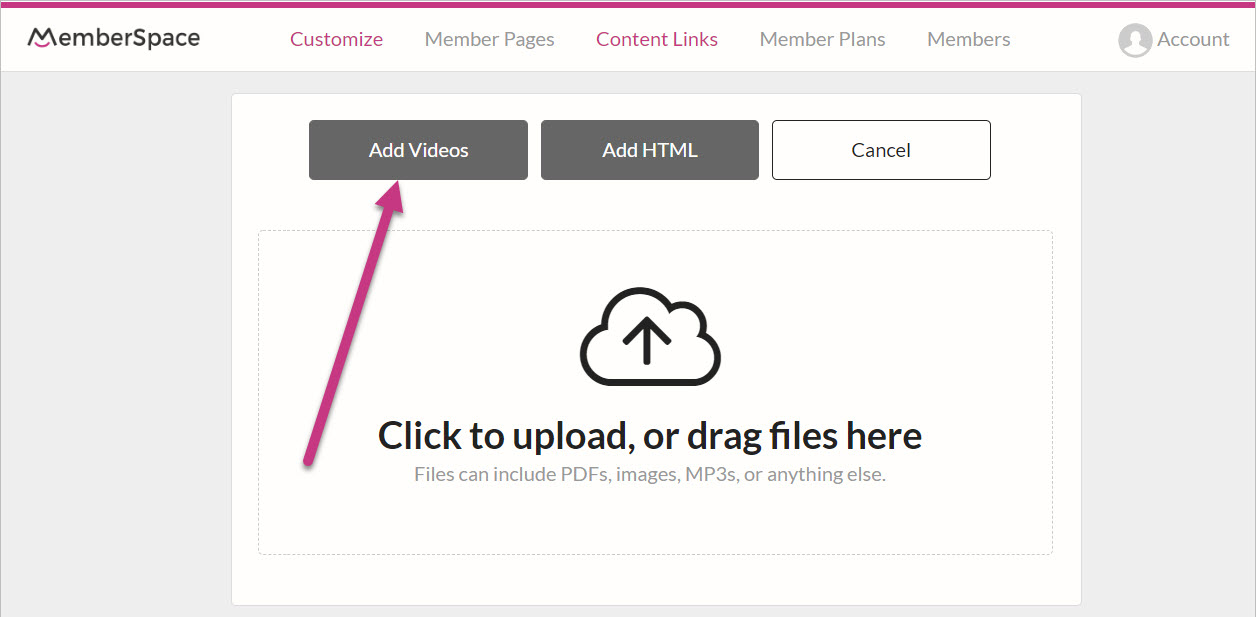
This will take you to the Content Links page. To add a new content link, click the “Add Content Links” in the left sidebar. This will bring up the content upload page.
Now, as you can see, there are three content link options:
Miscellaneous Files (which you are on by default)
HTML
Videos
These three different content types have different steps for adding them as content links. You can find an overview of each process below.
File Content Links (PDF, Audio, Images, Misc. File)
Use this page to upload the content for your link. You can either drag-and-drop the file into the file upload area, or your can click the file upload area to bring up the file interface.
Once you have uploaded a file, click “Done Uploading” in the upper left corner.
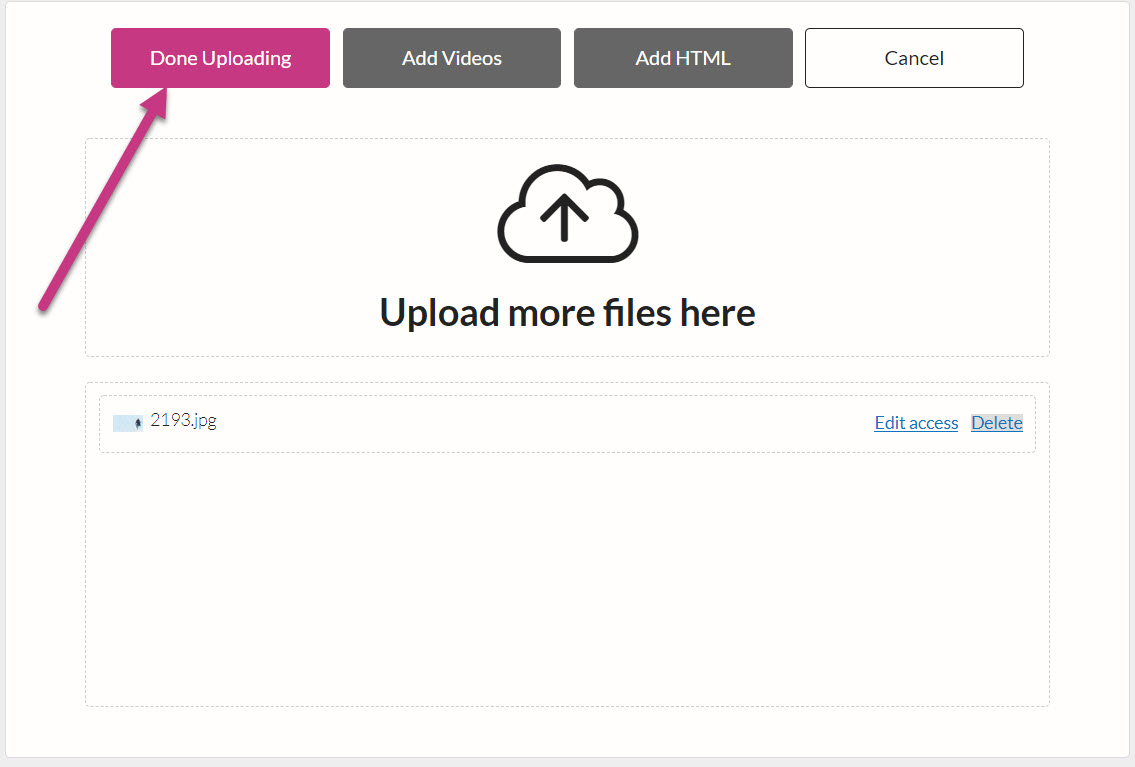
This will return you to the main Content Links page.
HTML Content Links
If you wish to add HTML, return to the Add Content Links page and click the “Add HTML” button.
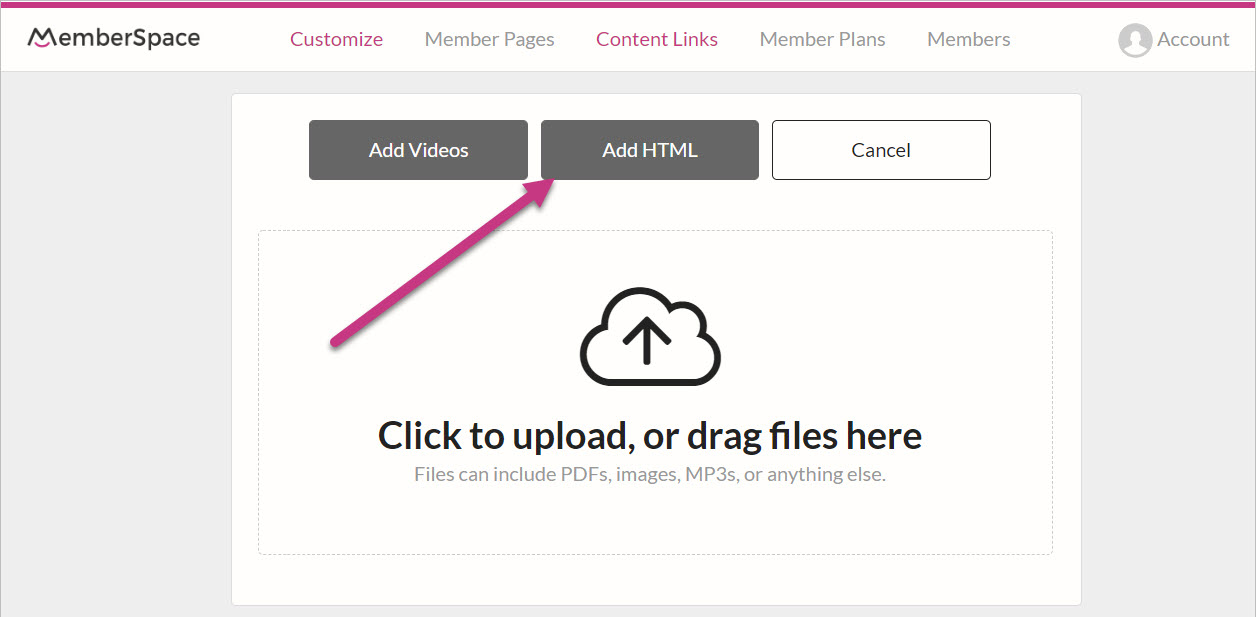
This will change the page to a form where you can enter the HTML, choose the content’s availability, and establish which plan has access.
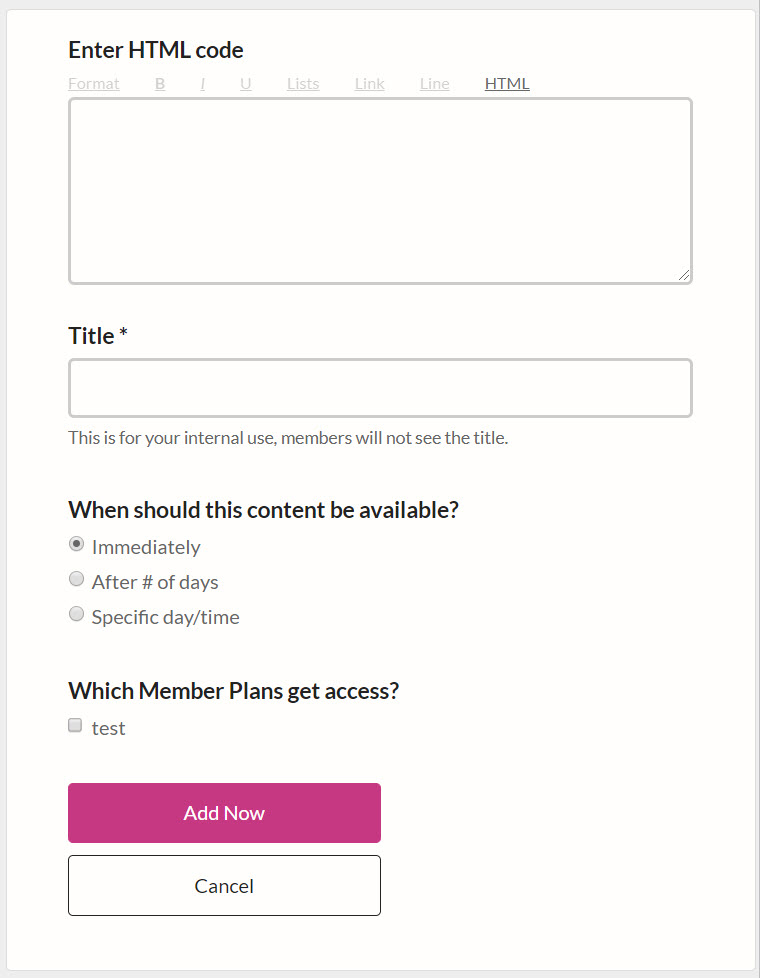
When finished, click the “Add Now” button. You will be taken to the Add Content Links page where you can either choose to add more content links or click “Done Uploading” to finish the upload process.
Video Content Links
You can add videos hosted on YouTube, Vimeo, or Wistia as content links in MemberSpace. MemberSpace ensures that videos from these sources can be embedded on your Weebly site in a way that only allows members to access them.
To add a video content link, click the “Add Videos” button at the top of the Add Content Links interface.
You will then need to fill out a form (which is very similar to the HTML content link form). This form will ask for the video’s URL, the content’s availability, and establish which plan has access to the video.
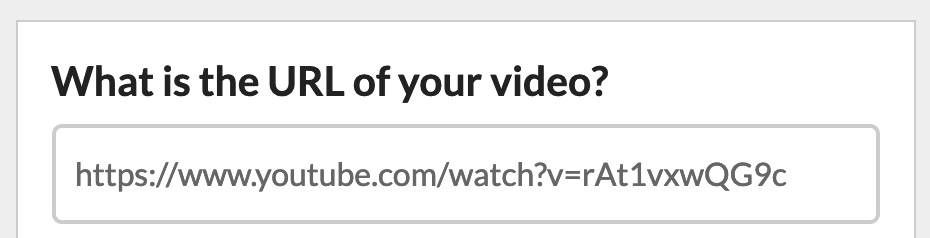
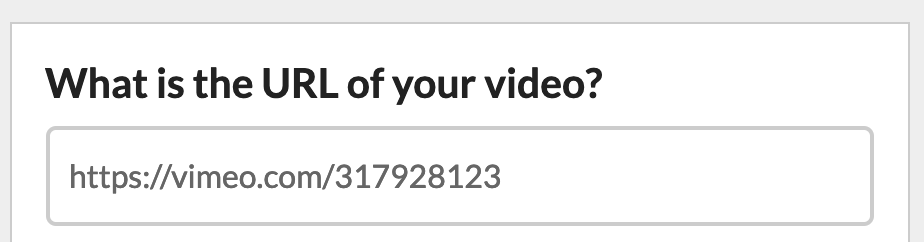
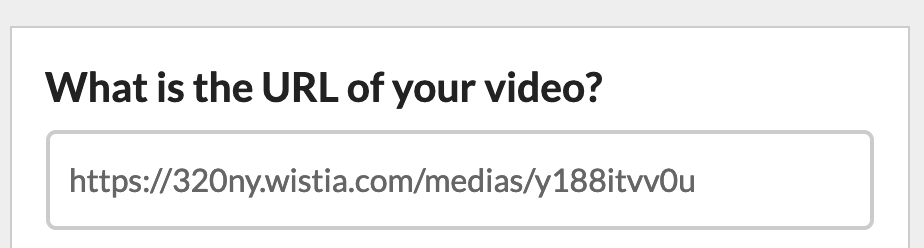
Since MemberSpace only accepts videos that are already hosted on YouTube, Vimeo, or Wistia, the formats for the URLs are important.
Recommended Youtube URL Format
Recommended Vimeo URL Format
Recommended Wistia URL Format
When finished filling out the form, click the “Add Now” button. You will be taken back to the Add Content Links page where you can either choose to add more content links or click “Done Uploading” to finish the upload process.
Videos are harder to keep secure since there isn’t a known solution to keep people from just recording the video. However, we do have some video security best practices we recommend. You can read more about these in our knowledge base article.
Adding Your Content Link to Weebly
Now that your content has been successfully uploaded, you can add it to a Member Plan. On the main Content Links page, find your new content link and click its corresponding “Add plan access” link.
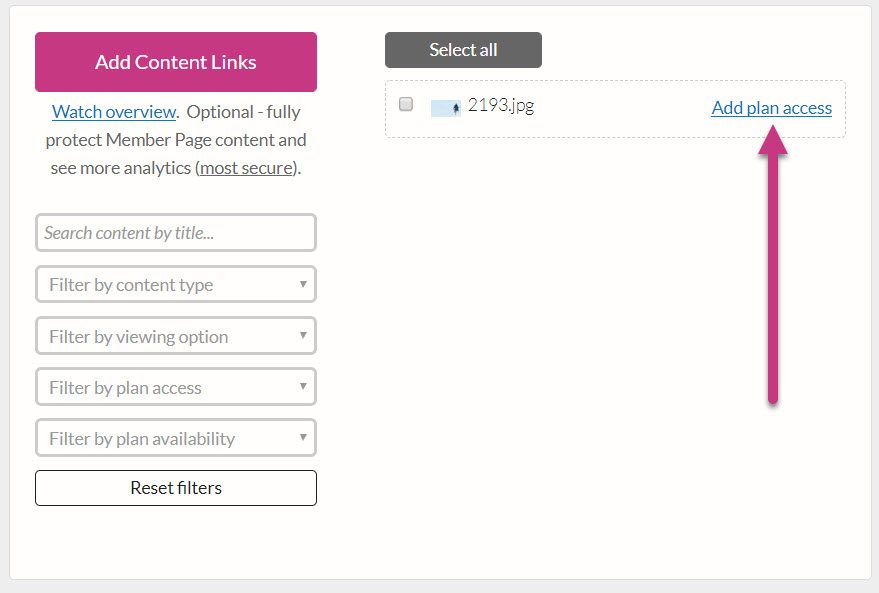
This will open the access plan form. You will be asked to fill in:
Title
When the content should be made available
What members can do with the content
Which Member Plan has access
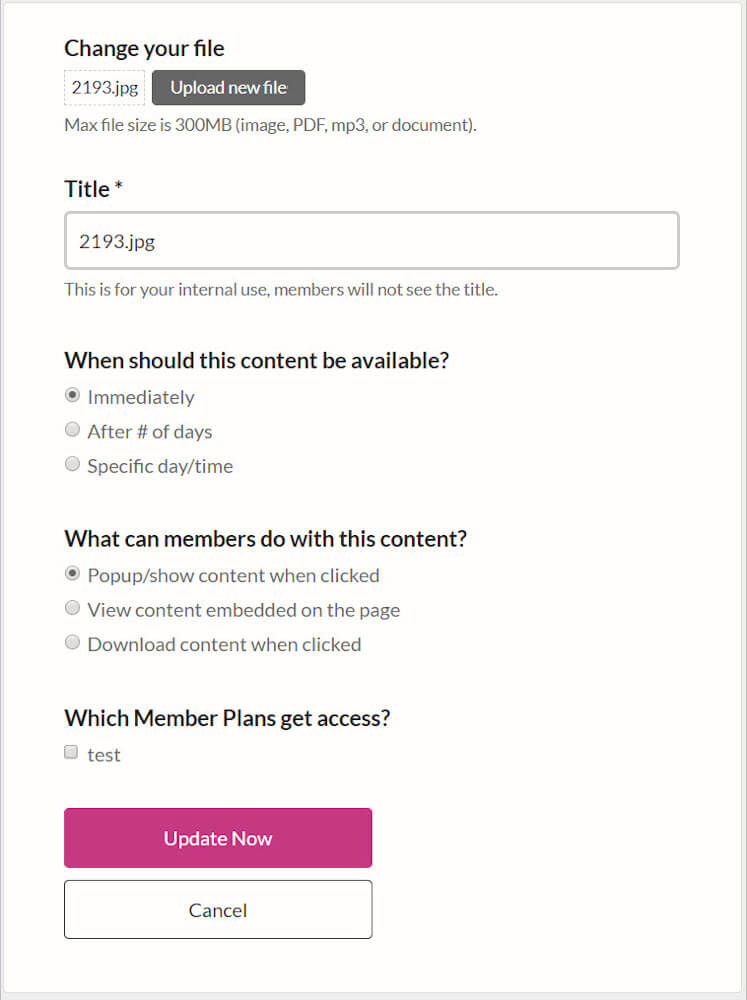
When you have finished filling out the form, click the “Update Now” button. Once updated, you will be able to access the link to use the content on your Weebly site.
To get the actual content link, go to the main Content Links page and click the “Copy” button next to the added content.

Then, go to your Weebly site editor and navigate to the page that you want to add the content link to.
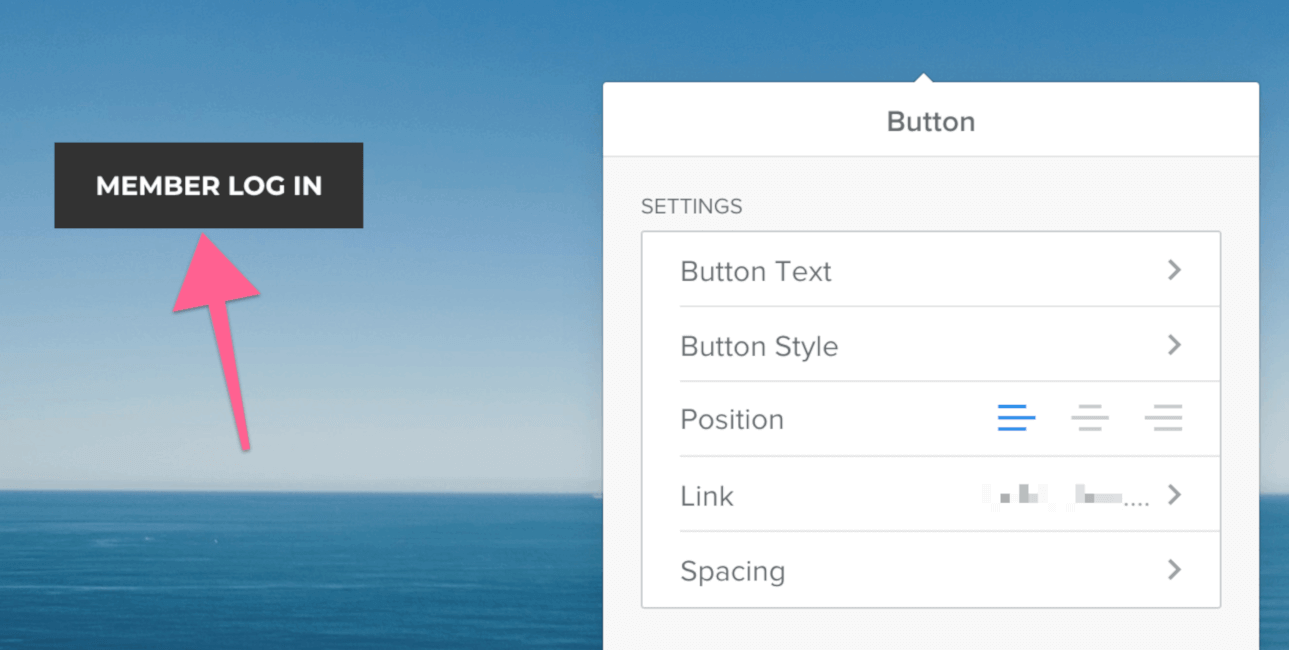
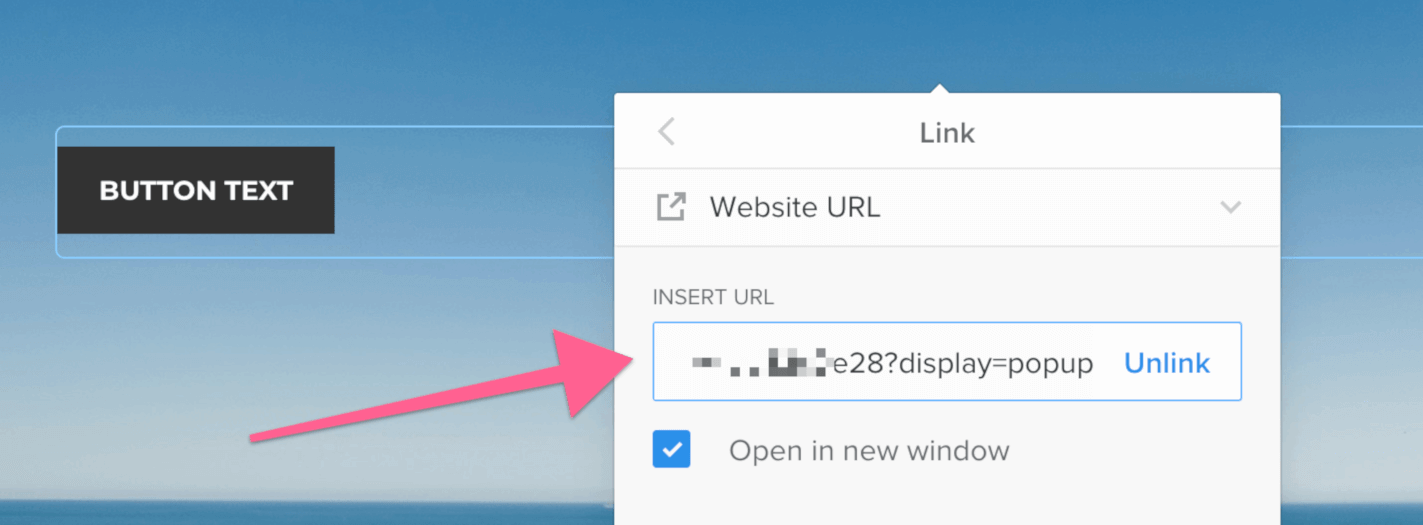
Once you are in the editor, you can add any element that accepts links (like a button or text).

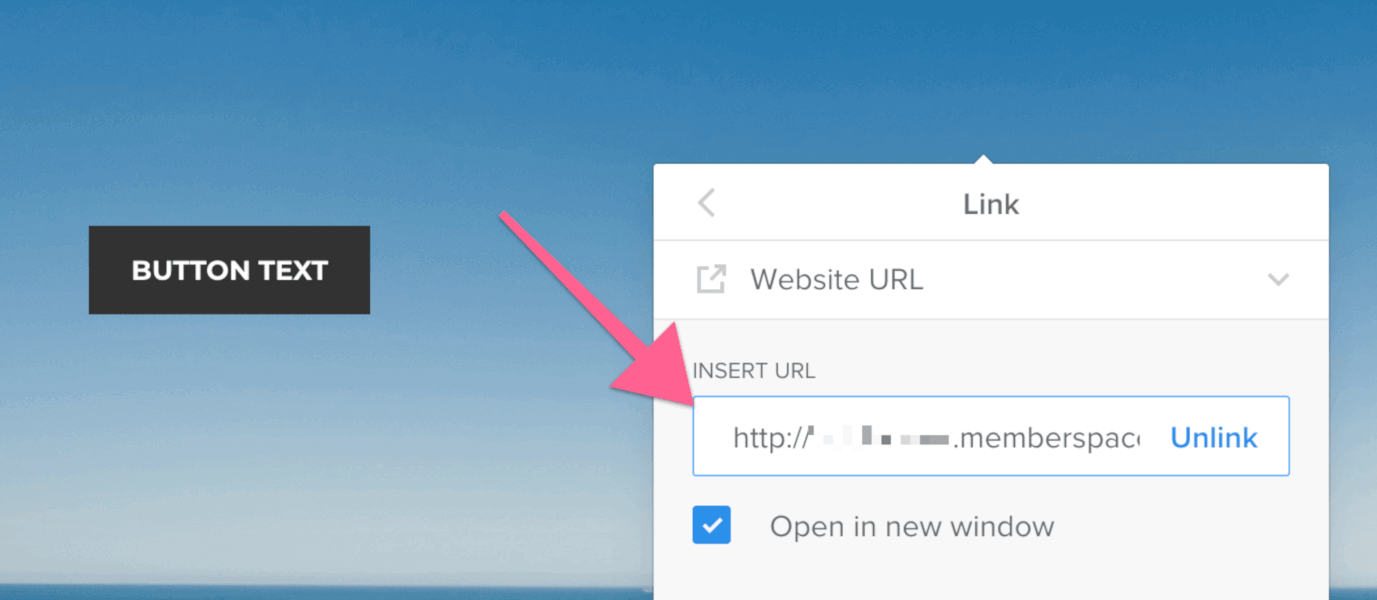
Once added, paste the link into the element’s slot for URLs. For example, if you chose to use a button, you would click the button element to bring up its interface, click “Link,” then choose “Website URL.” This would take you to the interface that will allow you to add the content link.
While the content link needs to be present for the element to work, feel free to customize the element’s design however you like.
If you were to choose to embed the content link in text, the process is similar. You would add the text element to your page.
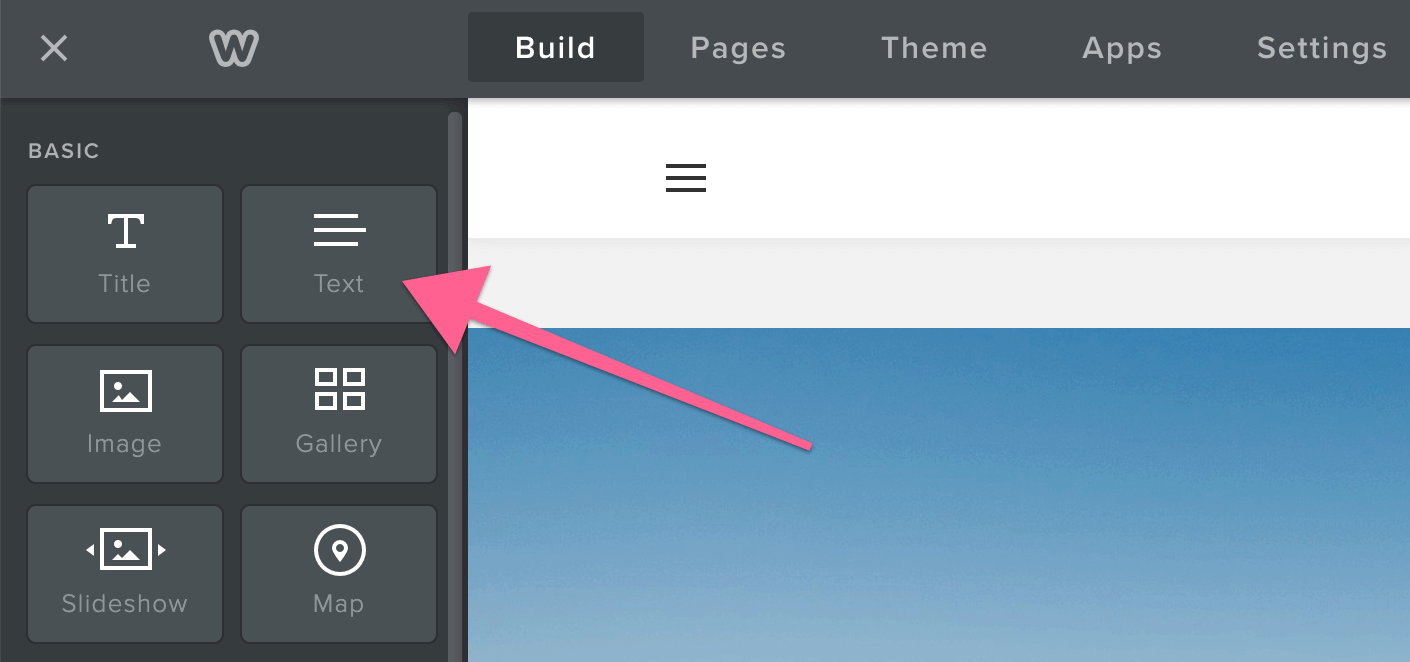
Then, add whatever text you desire. Once you text is there, you can add the content link by highlighting your existing text and clicking the link icon in the text toolbar.
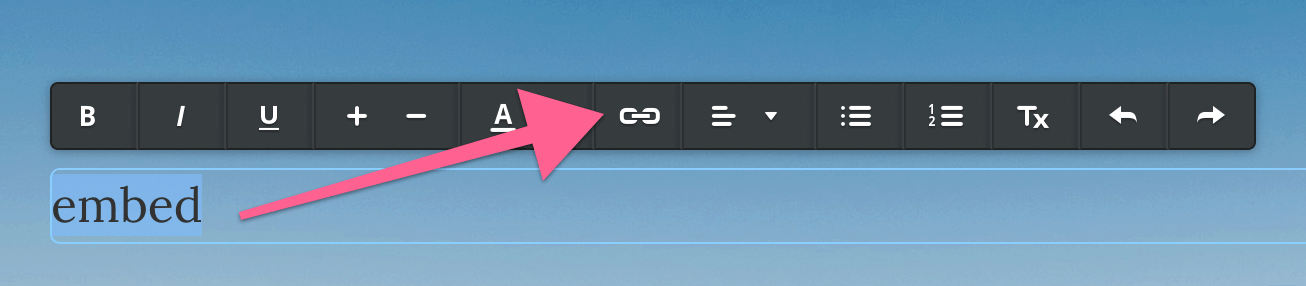
This will bring up an interface similar to the button’s. Click “Website URL,” then paste the content link code into the field.
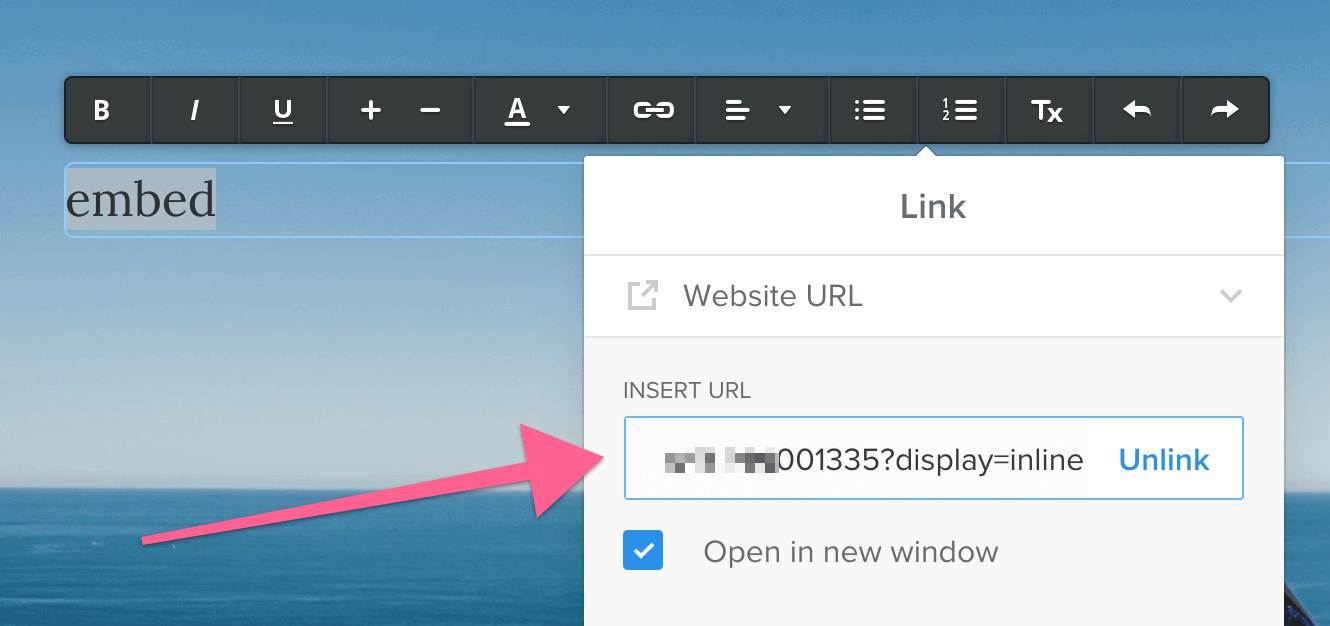
This will embed your link in the text, so when a user clicks it, it will execute the action you chose for the content (i.e. download, pop up, etc).
As with all MemberSpace-specific code, you will need to publish the page before testing it. It will not work as intended in the Weebly editor.