If you’ve built an audience online—whether it’s through Instagram, YouTube, a podcast, or your newsletter—you already know the hardest part: earning people’s trust. They show up for your content, they value your perspective, and they look to you for guidance.
That trust is gold. And one of the best ways to honor it—while also building a new income stream—is by creating an online course.
The beauty of a course is that it lets you package your expertise into something structured and actionable. Instead of answering the same questions in your DMs or repeating advice in your content, you can guide your audience step by step through a proven process… and get paid for it.
Let’s break down how to do it without overcomplicating things.
Step 1: Create Your Online Course Content
The most important part of any course is the content itself. This is where you’ll take what you know and break it down into a clear, structured learning experience.
Think of your course as a journey for your students. They’re starting at point A (where they are now) and want to get to point B (the transformation or outcome you’re promising). Your job is to guide them along that path in a way that’s simple, motivating, and actionable.
Break Your Course Into Modules and Lessons
A typical course is divided into modules (big-picture topics) and lessons (specific steps or ideas within those topics). For example:
- Module 1: Getting Started
- Lesson 1: Introduction & Goal Setting
- Lesson 2: Tools You’ll Need
- Module 2: Core Skills
- Lesson 1: Fundamentals
- Lesson 2: Practice Exercises
This structure helps learners feel a sense of progress and makes your content easier to digest.
Mix Up Your Content Formats
Not everyone learns the same way. To keep your course engaging, consider mixing different types of content:
- Video lessons – Perfect for explaining concepts, demonstrating processes, or presenting slides.
- Written guides – Great for summaries, detailed explanations, or step-by-step instructions.
- Audio files – Useful for learners who like to listen on the go.
- Downloadable resources – Checklists, worksheets, templates, or PDFs that help students apply what they’ve learned.
Even if you’re starting small, aim for at least two different content formats. For example, record a short video and include a downloadable worksheet to go with it.
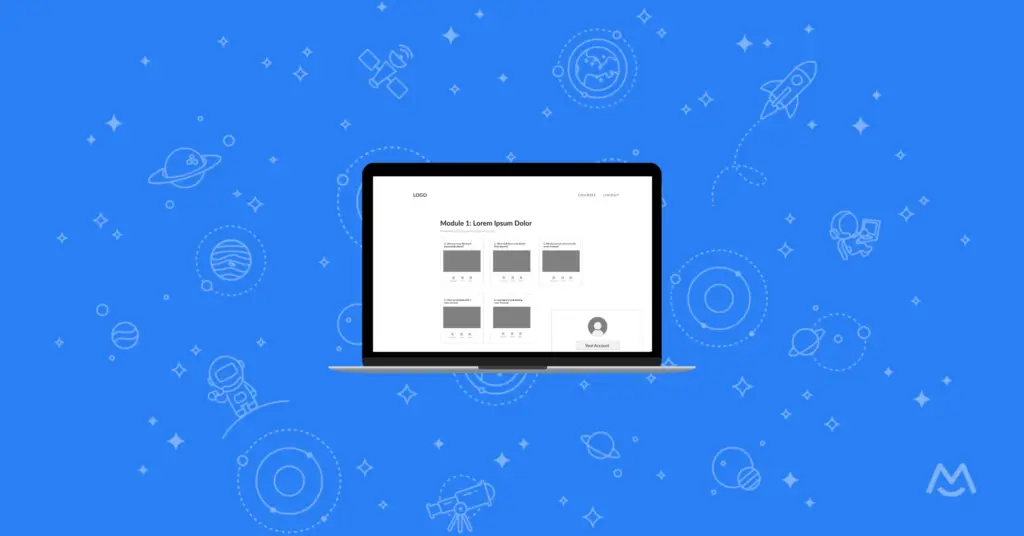
Step 2: Set Up Your Course With MemberSpace
Once your content is ready, the next step is putting it all together in a place where your students can access it. That’s where MemberSpace comes in.
Instead of juggling multiple complicated tools, MemberSpace gives you a simple way to upload, organize, and sell your course content — all in a beautifully designed content hub.
If you already have a website, you can install MemberSpace directly onto it. If you don’t, no problem — MemberSpace can create a free customizable site for you. This way, you’ll have a professional home for your course without needing to hire a web designer or learn code.
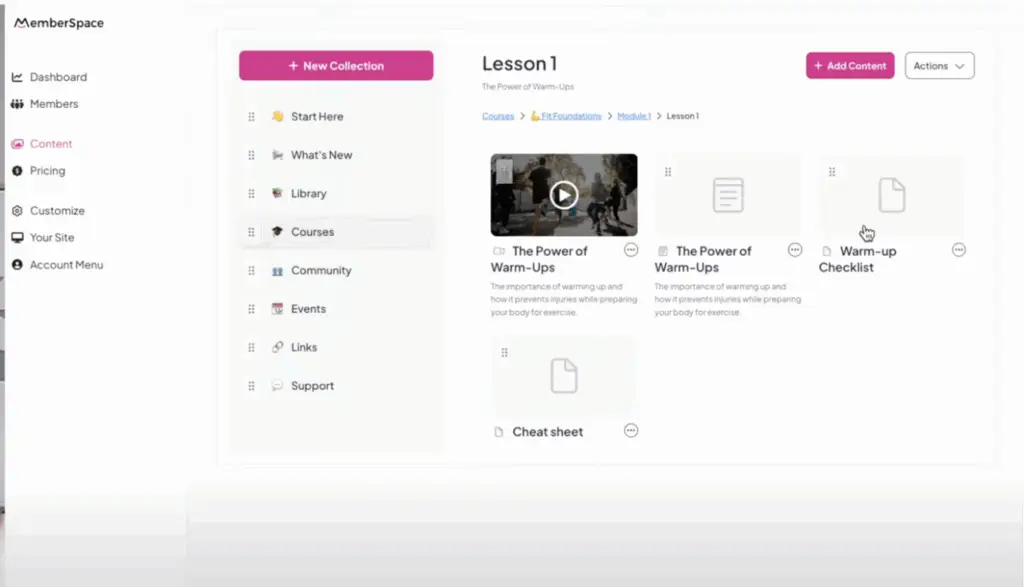
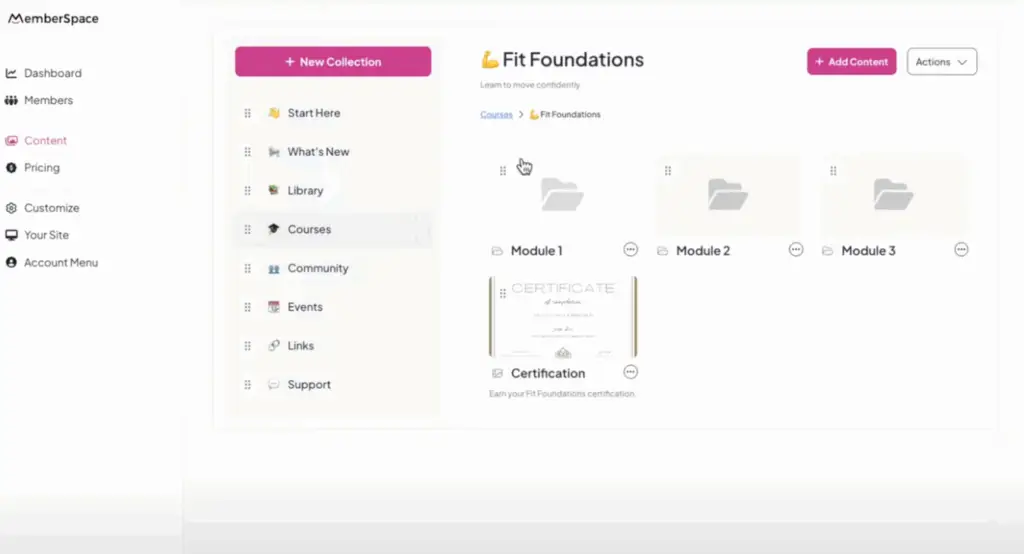
Upload and Organize Your Content
Inside MemberSpace, you can upload all your videos, PDFs, audio files, and other resources. From there, you’ll use the drag-and-drop editor to organize your modules and lessons in whatever order makes sense.
The best part? You can edit, update, or add new content anytime. If you want to launch quickly with just a few lessons and then add more later, you can.
Add Extras Like Quizzes and Certificates
To make your course more interactive, MemberSpace lets you add quizzes to check student understanding and certificates to reward completion. These little touches can make your course feel more professional and keep learners motivated.
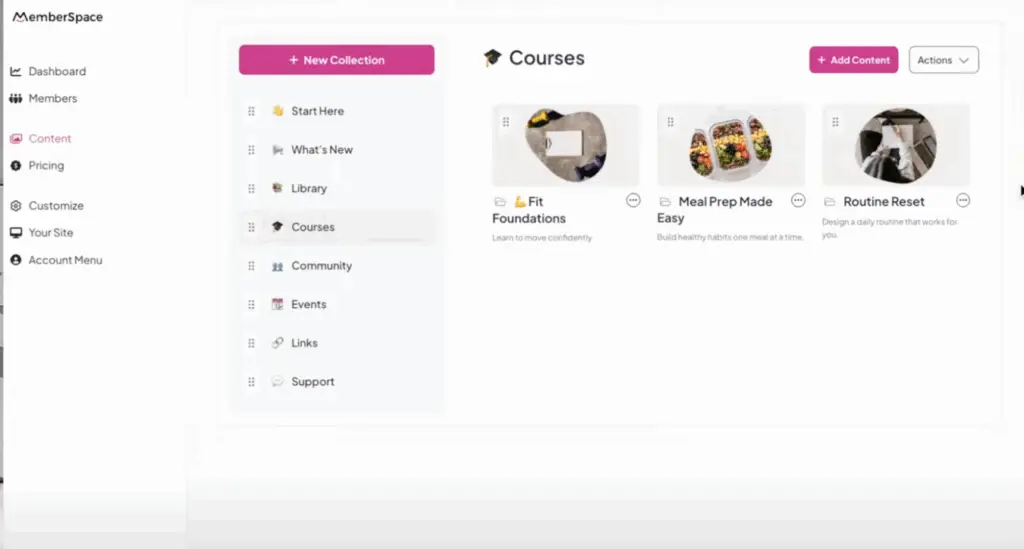
Sell More Than Just Courses
One bonus of using MemberSpace is that you’re not limited to courses. You can also sell:
- Digital downloads (like ebooks or templates).
- Access to private communities.
- Coaching sessions or workshops.
This means you can start with a course and expand into other revenue streams over time.
Step 3: Set Course Pricing
Now it’s time to decide how people will access your course. MemberSpace gives you several flexible options:
- One‑time payment for lifetime access
- Recurring subscription if you’ll be adding new content or want ongoing revenue
- Free trial to encourage sign‑ups
- Completely free if your goal is audience growth or lead generation
Think about your goals: Do you want to build recurring income? Offer a one‑time product? Or use your course as a free resource to attract new clients? MemberSpace supports all of these approaches.
Step 4: Share With Your Audience!
Once your course is set up and priced, it’s time to share it with the world.
MemberSpace gives you a direct link to your course. You can:
- Share it on social media.
- Add it to your email newsletter.
- Post it in your community groups.
- Link it on your website or blog.
The sign-up process is seamless — people click your link, pay (if it’s a paid course), and immediately get access.
Best Practices for Creating an Online Course
To make your course as engaging and successful as possible, here are some proven tips:
- Repurpose existing content. If you’ve already made YouTube videos, blog posts, or podcasts, you can repackage them into a structured course.
- Add community access. Consider including a private group or forum where students can connect, ask questions, and support each other.
- Use quizzes and certificates. These increase engagement and give learners a sense of accomplishment.
- Keep lessons short. Aim for 5–15 minutes per video to maintain attention.
- Focus on outcomes. Always tie your lessons back to the transformation your students want.
- Gather feedback. Ask your first students what they liked, what was confusing, and what they’d like more of.
Frequently Asked Questions about Creating Online Courses
1. Do I need a website to use MemberSpace for my course?
No—you can host your course directly in MemberSpace’s Content Hub and share the link with your audience. If you already have a website, you can integrate your course there too.
2. What types of content can I upload?
You can add videos, audio files, PDFs, slides, links, or any combination of formats. MemberSpace is flexible, so you can build your course in the way that works best for you.
3. Can I update my course after it’s live?
Yes. You can add new lessons, reorder modules, or update files at any time. Your learners will always see the latest version.
4. How do I decide on pricing?
It depends on your goals. A one‑time payment works well for standalone courses. A subscription makes sense if you’ll add content regularly. And if your aim is to grow your audience, offering the course for free can be a great strategy.
5. What if I want to add extras like quizzes or certificates?
You can! Quizzes can be created with tools like Google Forms or Typeform and linked directly in your course. Certificates can be designed in Canva and emailed to learners who complete the course. These are optional, but they can add value.
Final Thoughts
Creating an online course is one of the smartest ways to share your knowledge, help your audience, and build a sustainable income stream. Thanks to tools like MemberSpace, the process is no longer overwhelming — you don’t need coding skills, a huge budget, or months of setup.
Here’s a quick recap:
- Create your content – Break it into modules and lessons with a mix of formats.
- Set up your course with MemberSpace – Upload, organize, and customize your content hub.
- Choose your pricing model – One-time fee, subscription, payment plan, or free.
- Share it with your audience – Use your direct link to promote on social media, newsletters, and more.
Remember, your first course doesn’t have to be perfect. Start small, launch quickly, and improve as you go. The most important step is simply getting started.
If you’ve been sitting on an idea for a course, now’s the time to bring it to life. Your audience is waiting — and your future self will thank you.