
Haiden Hibbert
If you’ve ever tried to build an online course on your Showit website, you’ve probably realized something pretty quickly — Showit doesn’t have built-in course functionality.
That’s usually when people start looking for another platform to host their course. But here’s the good news: you don’t have to send your students somewhere else.
With MemberSpace, you can build, host, and sell your entire course — all right on your Showit site.
Let’s walk through how to do it, plus a few tips for planning, promoting, and running your course successfully.
Launch a course on your Showit website!
The easiest way to accept membership payments or one-time charges for digital products like online courses, communities, content libraries, and more — all from your own website!
Get started for free! 5 minutes to set up.
Why Host Your Course on Your Showit Site?
When your course lives on your own website, everything feels more cohesive — for you and your students.
No extra logins. No redirecting people to another platform. No juggling multiple tools.
Your members can log in, access their content, and explore any other digital products or resources you offer — all from the same space. It’s simpler, cleaner, and gives your brand a more professional feel.
Step 1: Sign Up for MemberSpace
First things first — create your MemberSpace account. It only takes a few minutes, and you’ll be ready to connect it to your Showit website right away.
MemberSpace works with any Showit plan, so you don’t need to upgrade or change anything about your current setup.
Step 2: Install MemberSpace on Your Showit Website
Once you’ve signed up, you’ll install MemberSpace on your site. When you do, you’ll see a small floating button appear in the bottom-right corner of your Showit pages.
That button is where your customers will log in, sign up, and access their course content.
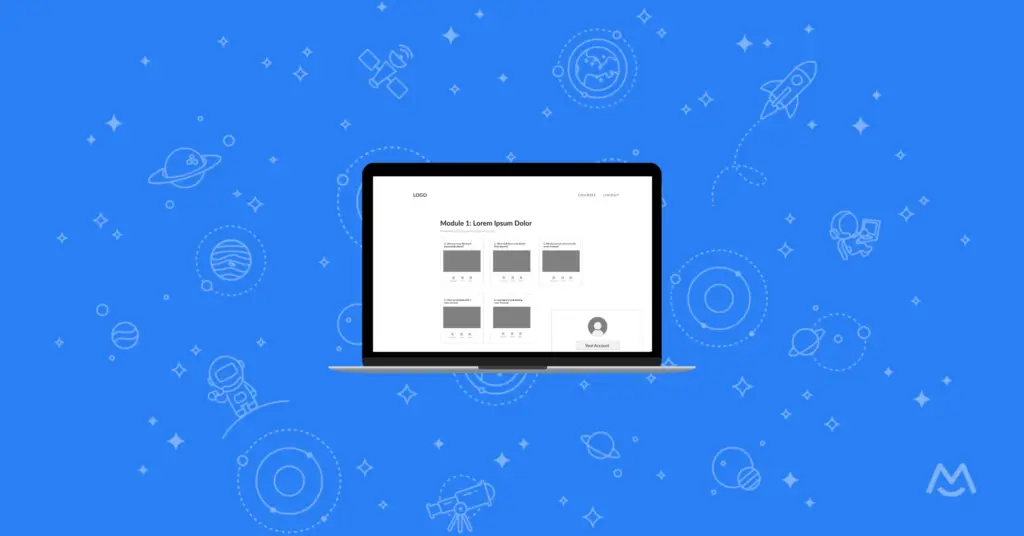
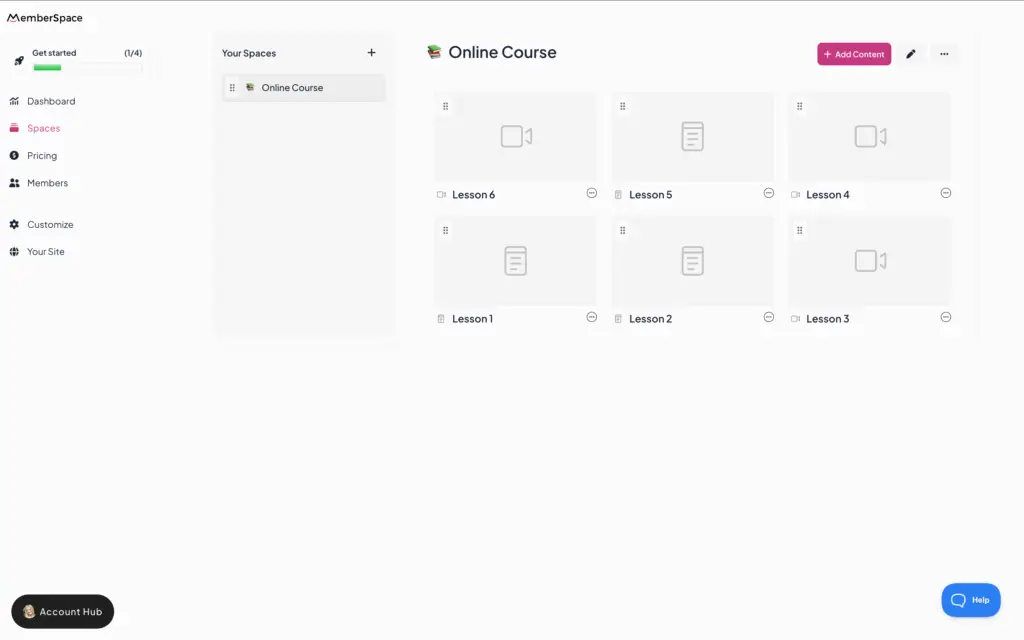
When they log in, they’ll see a clean, beautiful content hub — where all your course material lives. You can customize how it looks and what’s included, so it fits your brand perfectly.
Step 3: Create Your Course
Now for the fun part: building your course.
Inside MemberSpace, you’ll create a new Space — this is your private, members-only area that only enrolled students can access.
From there, you can structure your course however you like. Here are a few ways to organize it:
- By module: Create a folder for each module, then add nested folders or content for each lesson.
- By lesson: Skip modules and simply add each lesson as its own folder or piece of content.
- By format: Organize by content type — videos, downloads, discussions, etc.
You can upload files (PDFs, images, MP3s), embed videos from YouTube, Vimeo, or Wistia, or even create posts directly inside MemberSpace.
No need to touch your Showit design — everything happens within MemberSpace.
Step 4: Set a Price for Your Online Course
Next, decide how you want to charge for access. MemberSpace integrates with Stripe, so you can choose from several pricing options:
- One-time payment: Perfect for standalone courses.
- Recurring subscription: Great if your course is part of an ongoing membership or community.
- Multiple payments: Offer a payment plan for higher-priced courses.
- Free access: Ideal for lead magnets or bonus content.
You have full control over pricing and access — and you can change it anytime.
Step 5: Launch Your Course!
Once your course is ready, it’s time to share it with the world.
Send a link to your email list, post it on social, or add a call-to-action button to your Showit homepage.
Your members can sign up, pay, and start learning — all without ever leaving your site.
Planning Your Online Course
Before you start building, take a little time to plan. It’ll save you a ton of work later.
Here are a few things to think through:
1. Define your course goal
Ask yourself: What transformation am I helping people achieve?
Your course doesn’t have to cover everything you know — just one clear outcome. For example, “Help photographers book their first five clients” or “Teach designers how to build a Showit site from scratch.”
2. Outline your content
Start with the big picture, then break it down into modules or lessons.
A simple structure might look like this:
- Module 1: Getting Started
- Module 2: Core Skills
- Module 3: Implementation
- Module 4: Wrap-Up + Next Steps
Keep each lesson focused and short. People appreciate clarity more than volume.
3. Choose your format
Decide how you’ll teach — video, written lessons, audio, or a mix.
If you’re new to course creation, start with what’s easiest for you to produce. You can always add more formats later.
4. Plan your student experience
Think about what happens after someone buys.
Do they get a welcome email? A checklist? A bonus resource?
Small touches like that make your course feel more polished and personal.
Promoting Your Course
Building a great course is only half the work — you also need people to find it.
Here are a few ways to spread the word without feeling salesy:
1. Use your existing audience
Start with the people already following you — your email list, social media, or clients. They already trust you, which makes them more likely to buy.
2. Share behind-the-scenes content
Show your process: planning lessons, recording videos, or designing your course hub. It builds excitement and helps people feel part of the journey.
3. Offer early access or a beta round
Invite a small group to join at a discounted rate in exchange for feedback or testimonials. It’s a great way to test your content and gather social proof.
4. Create free content that leads naturally to your course
Host a free workshop, write a blog post, or share a mini-guide that gives people a taste of what you teach. Then invite them to go deeper with your course.
5. Keep promoting after launch
Don’t stop talking about your course once it’s live. Share success stories, lesson highlights, or new updates regularly to keep momentum going.
FAQ
Can I really host everything on Showit with MemberSpace?
Yes! MemberSpace handles all the membership and content protection for you. You can upload your course materials directly to MemberSpace or embed videos and links — no need for a separate course platform.
Do I need any coding or technical skills?
Nope. Installation is copy-and-paste simple, and MemberSpace walks you through the setup. If you can update your Showit site, you can set this up.
Can I drip content over time?
Absolutely. You can set release dates for lessons so content unlocks gradually — perfect for keeping students engaged week by week.
What payment methods can I accept?
MemberSpace integrates with Stripe, which supports all major credit cards, Apple Pay, Google Pay, and more.
Can I offer multiple courses or bundles?
Yes! You can create multiple Spaces for different courses, products, or membership tiers — all managed from one dashboard.
What if I already use another course platform?
You can keep using it if you want, or gradually migrate your content into MemberSpace. Many creators prefer having everything in one place once they see how easy it is to manage.
Can I add community features?
Definitely. You can create Spaces for private groups, member directories, or bonus content — so your course can grow into a full membership experience.
What if I want to update my course later?
You can edit, replace, or add new content anytime. Your members will instantly see the updates when they log in.
Final Thoughts
You don’t need a separate platform to build and sell your online course. With Showit and MemberSpace, you can keep everything — your website, your content, and your community — in one place.
It’s simpler for you, smoother for your students, and better for your brand.
If you’ve been waiting for a sign to finally launch that course — this is it.
Launch a course on your Showit website!
The easiest way to accept membership payments or one-time charges for digital products like online courses, communities, content libraries, and more — all from your own website!
Get started for free! 5 minutes to set up.