Step 1: Setup your Notion site in Super
Super is a third-party tool which allows you to:
- Host your Notion site on a custom domain e.g. yourwebsite.com
- Use ‘pretty URLs’ for each Notion page e.g. yourwebsite.com/members
- Install MemberSpace code on your Notion site
You’ll need to make your Notion pages public before you can lock them down with MemberSpace. Don’t worry, once we’re done, only your members or customers will be able to access those pages.
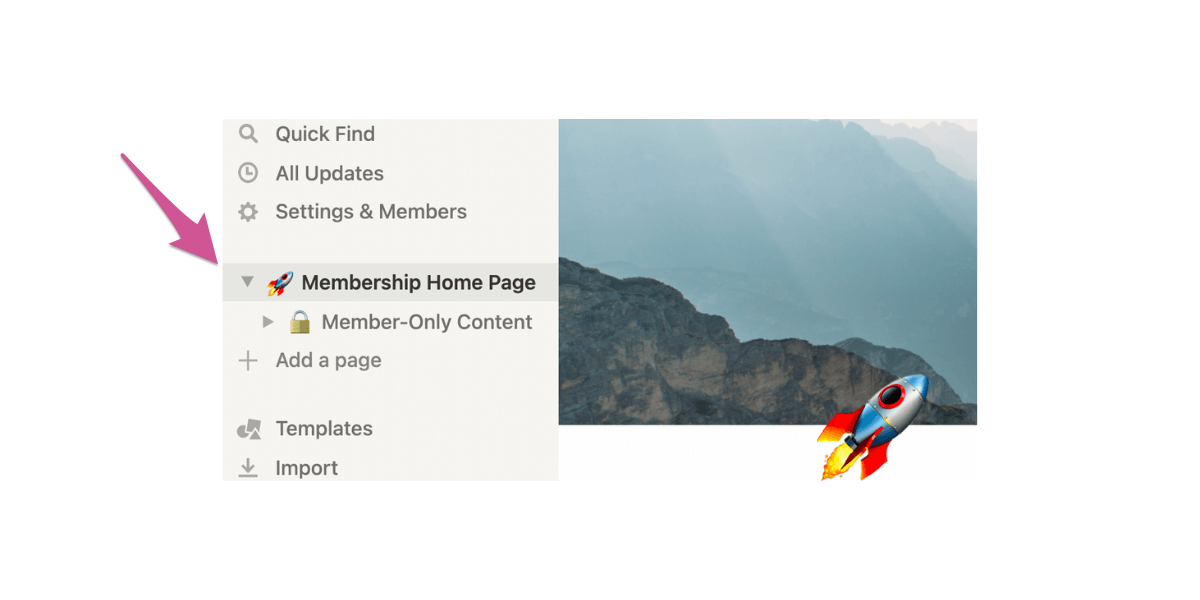
In Notion, you should create a hierarchical page structure i.e. have one top-level page e.g. members home page and then create sub-pages with all your other content below that top-level page.
Make your top landing page public in Notion’s settings by clicking “share” in the upper right-hand corner of your screen. Next, toggle on the “share to web” option.
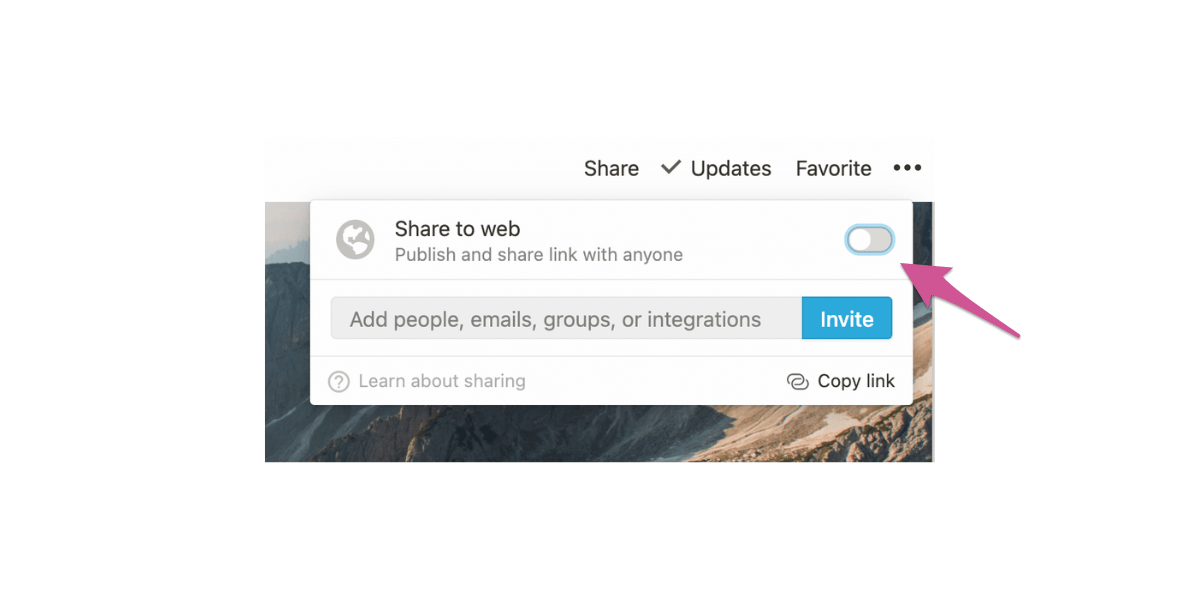
In the menu that opens up, toggle the “allow duplicate as template” to off.
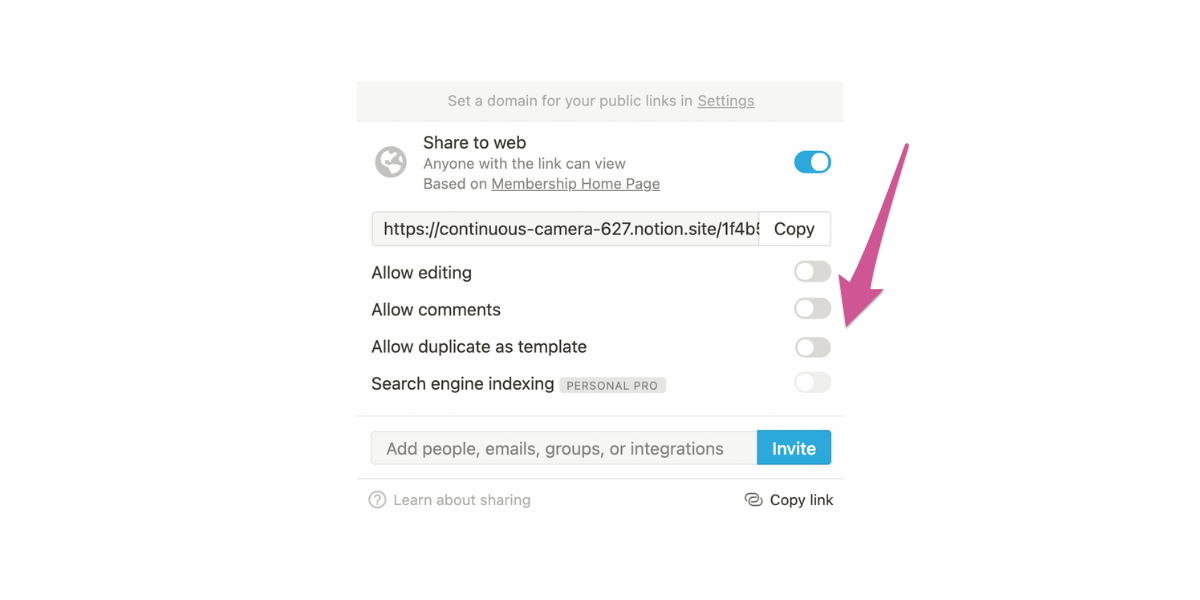
This will make all of your subpages public, too, but not for long. We’ll be protecting those subpages with MemberSpace and Super.
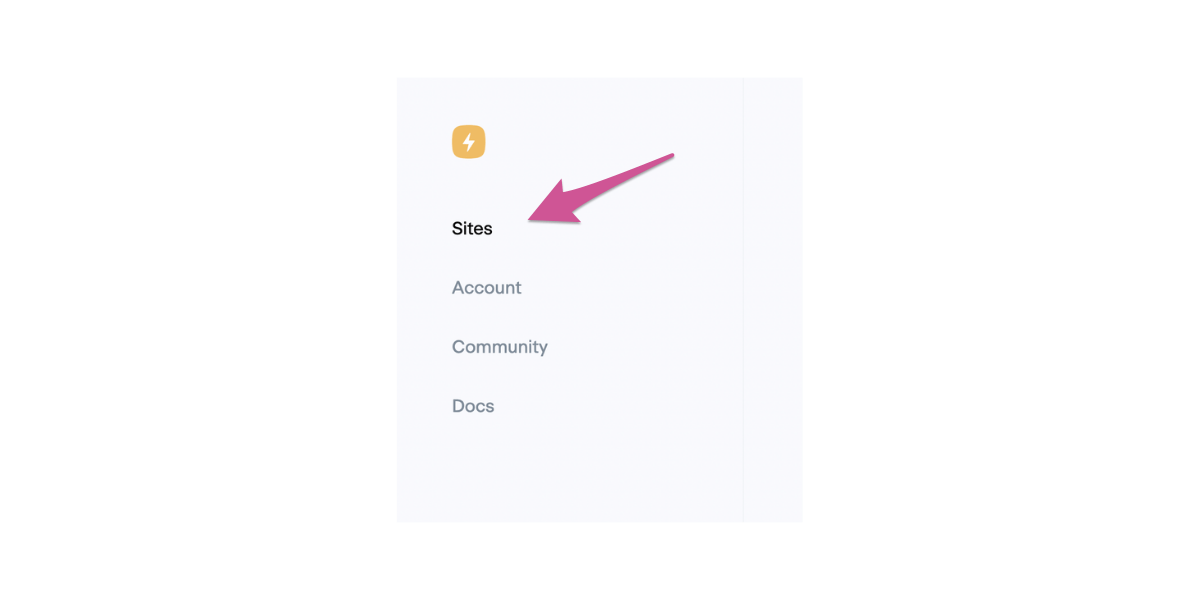
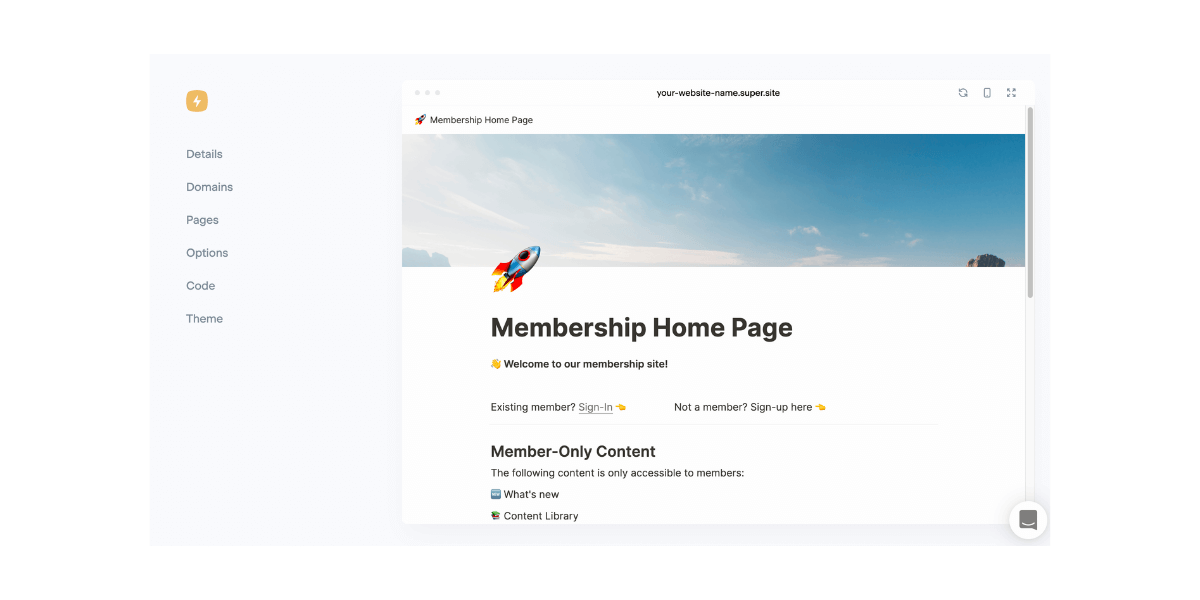
Log into Super and click “Sites” in the left-hand menu.
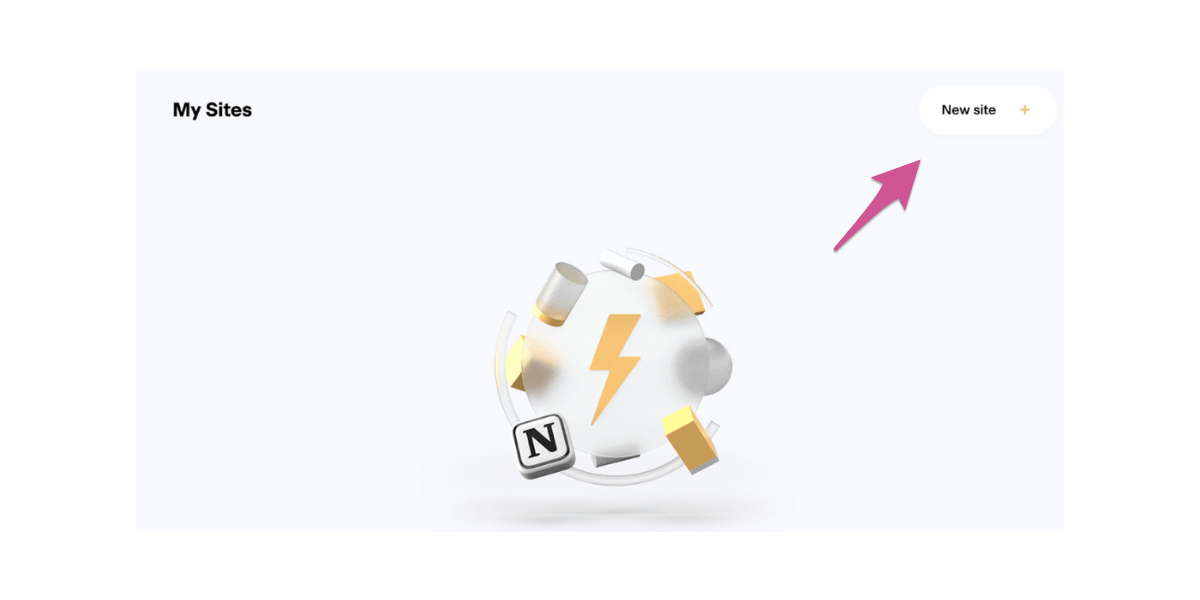
Next, click “New Site” in the upper right-hand corner.
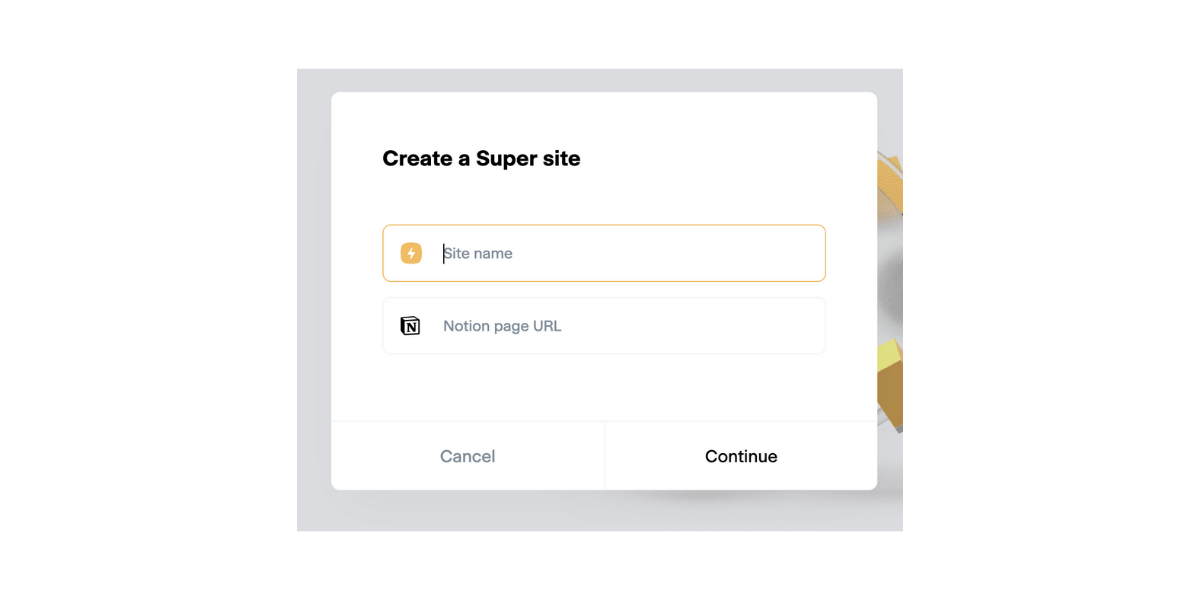
Go back to your Notion workspace and copy the public URL we created in step one (it’s in the share menu!) Then, paste it into Super and give your site a name.
You’ll notice that Notion links are, by default, long and full of numbers. Don’t worry — Super turns all your Notion URLs into nice, pretty links using your custom domain.
Click continue to advance to the next step. You’ll now see a preview of your site in Super, with a menu along the left.
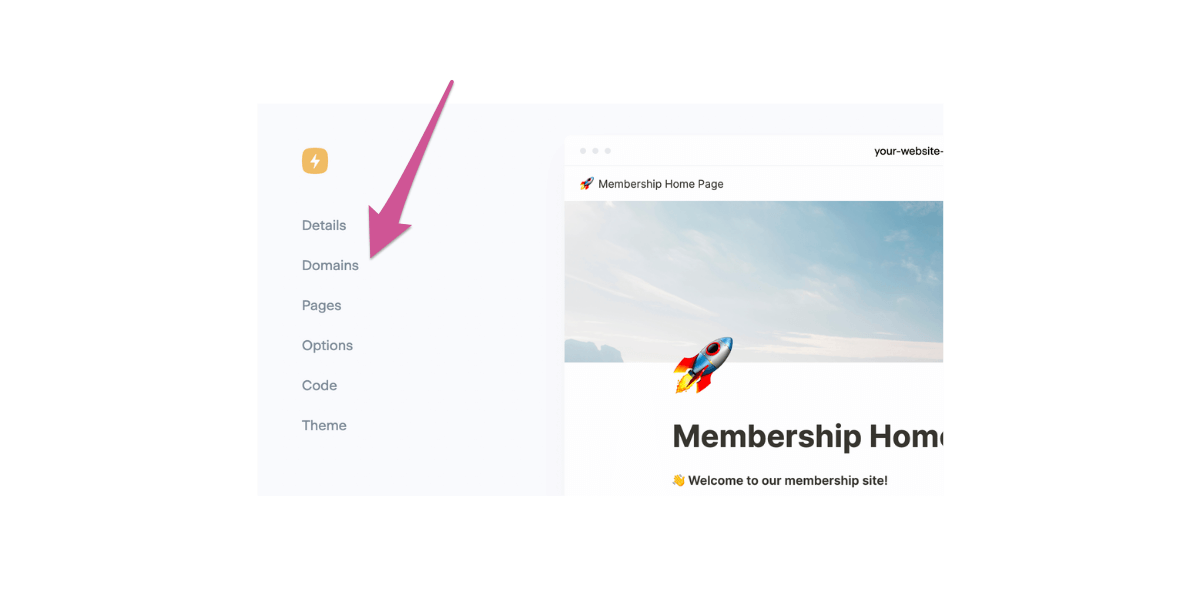
Click “Domains.”
Click “Add a Custom Domain.”
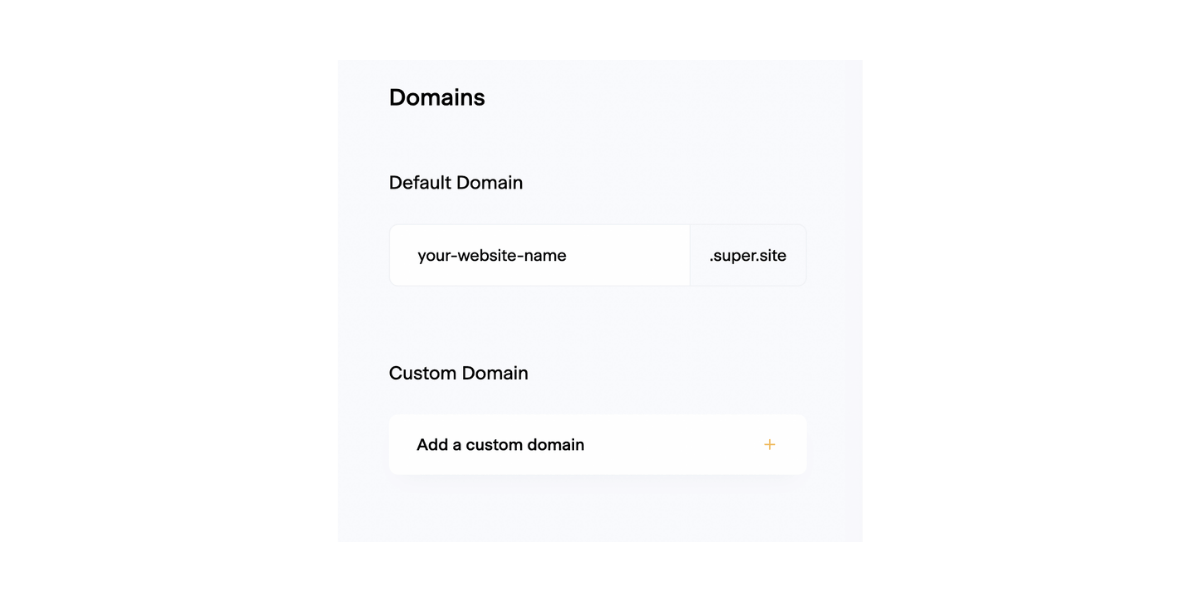
Follow Super’s steps to finish connecting your domain to their service. You will need to add another CNAME record and an A record to your domain that points to your Notion site — your registrar can help with this as well if needed.
Once your domain is connected, Super will take the names of your Notion pages and turn them into pretty URLs that are easy to link to. They’ll look something like this:
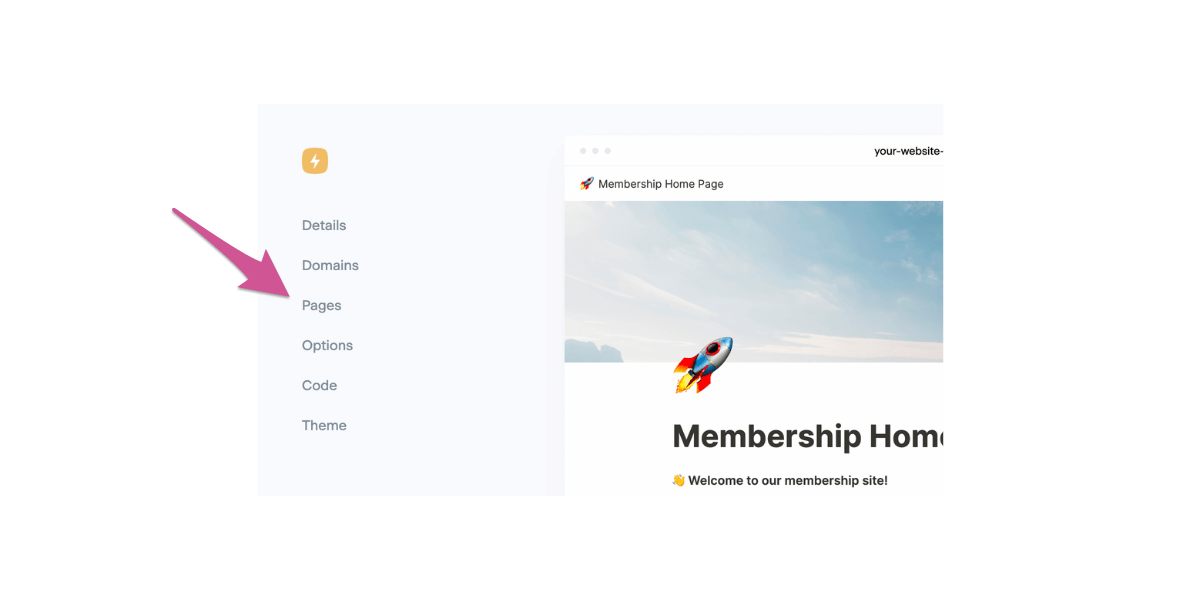
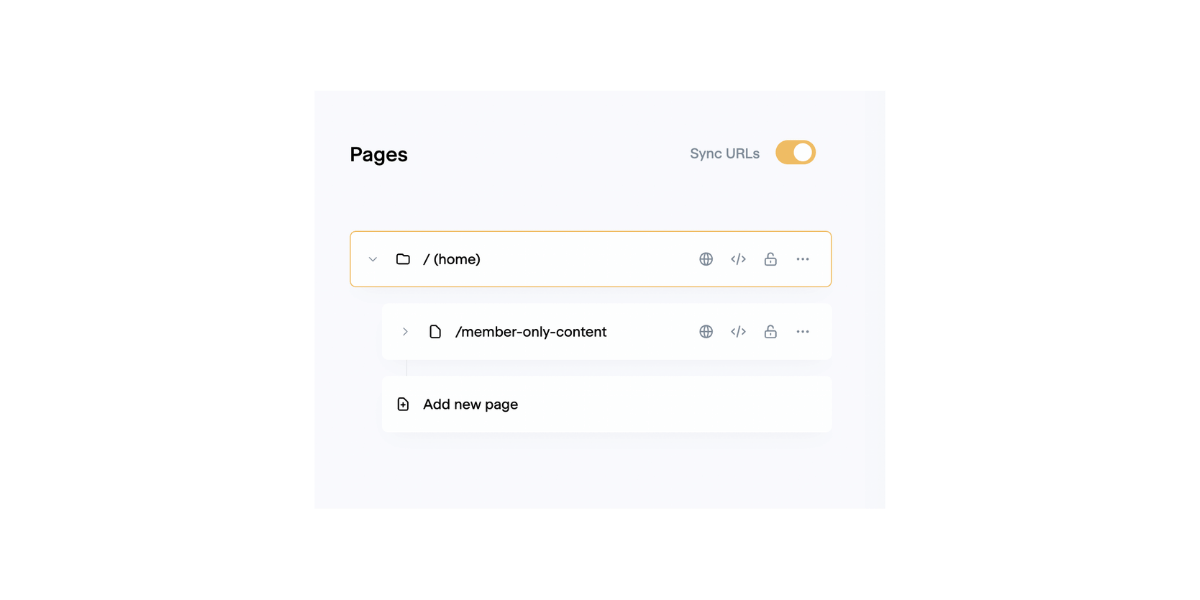
Click “pages” in your Super sidebar to check your new URLs out.
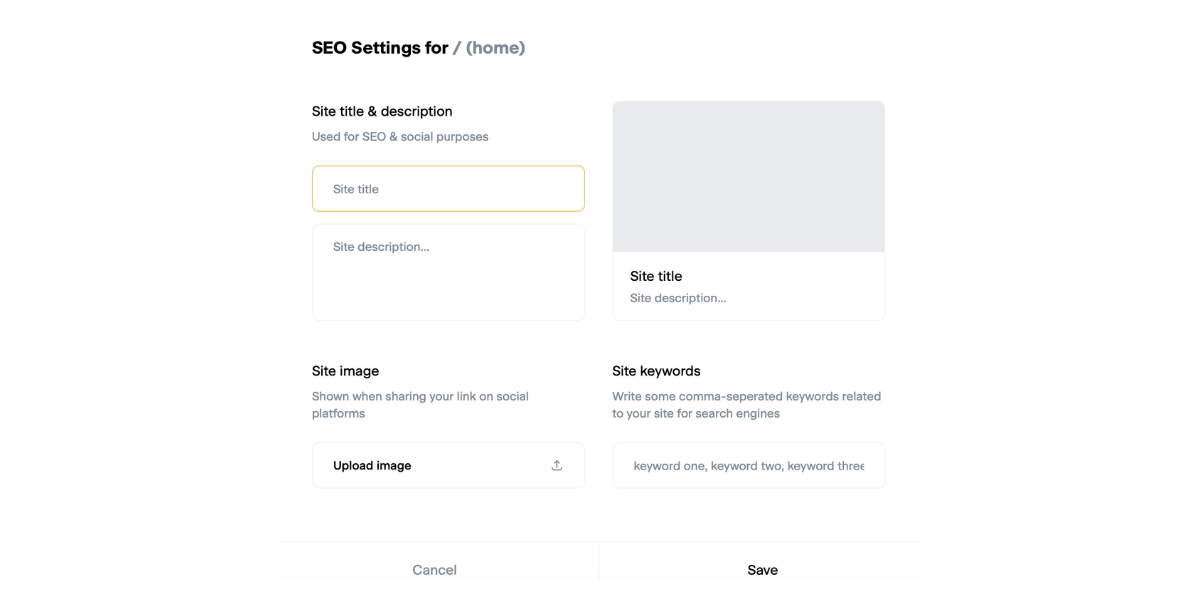
Click the globe icon next to any page name to open up your SEO settings.
In the box that pops up, you can enter information into several fields.
- Site title and description: this is what will show up in search engine results.
- Site image: this image serves as a preview for shared links.
- Keywords: additional phrases and words associated with your website — think of things people might be likely to search for online that relate to your downloads.
Step 2: Setup your Notion site in MemberSpace
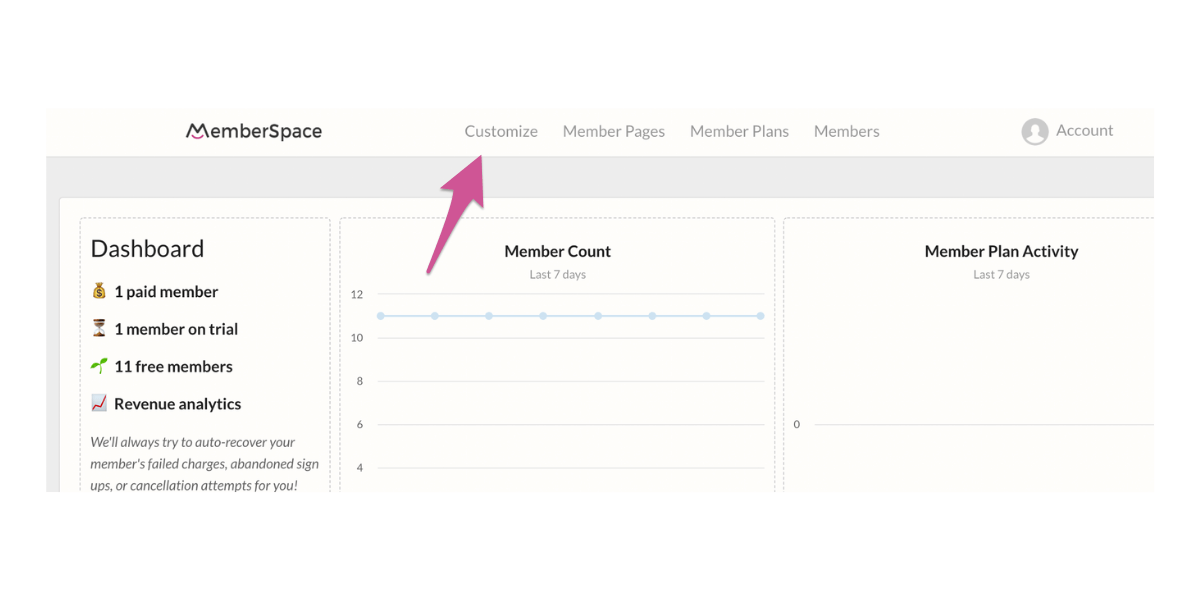
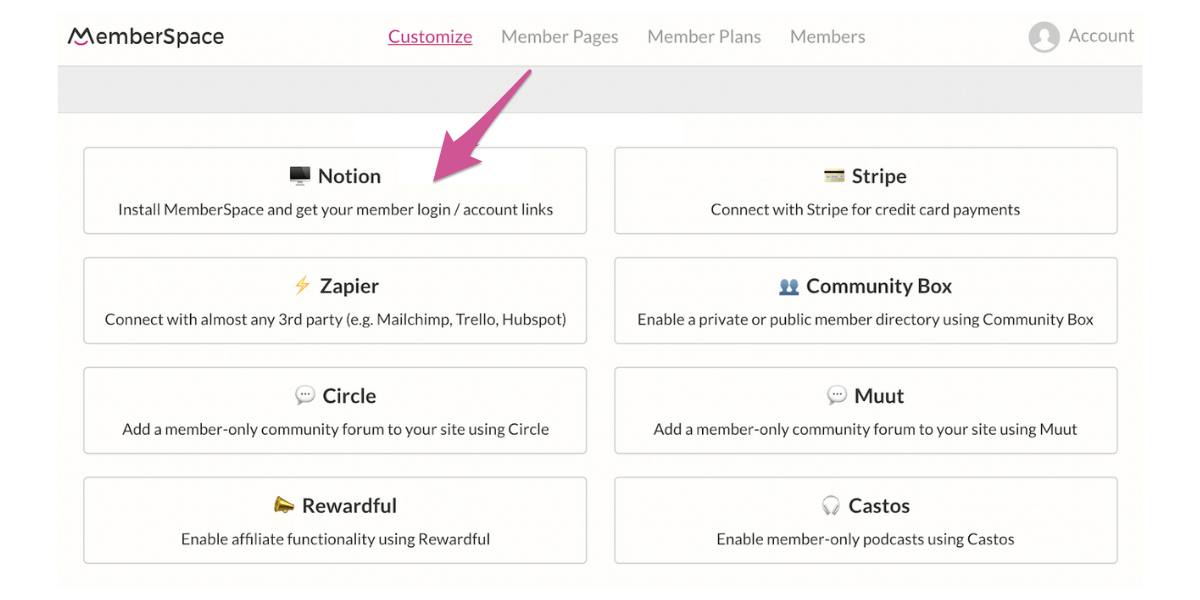
Go to your MemberSpace dashboard and click “Customize” at the top.
Next, click “Integrations.”
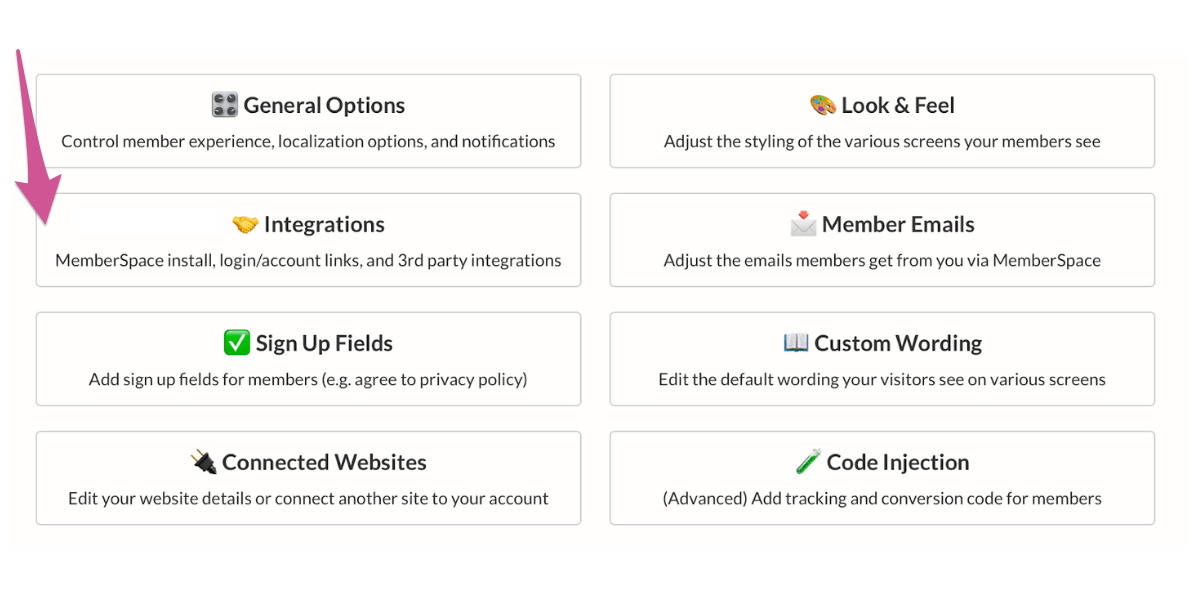
Click on “Notion.”
Under the section that says “100% Required Install Code,” click the pink button to copy it all.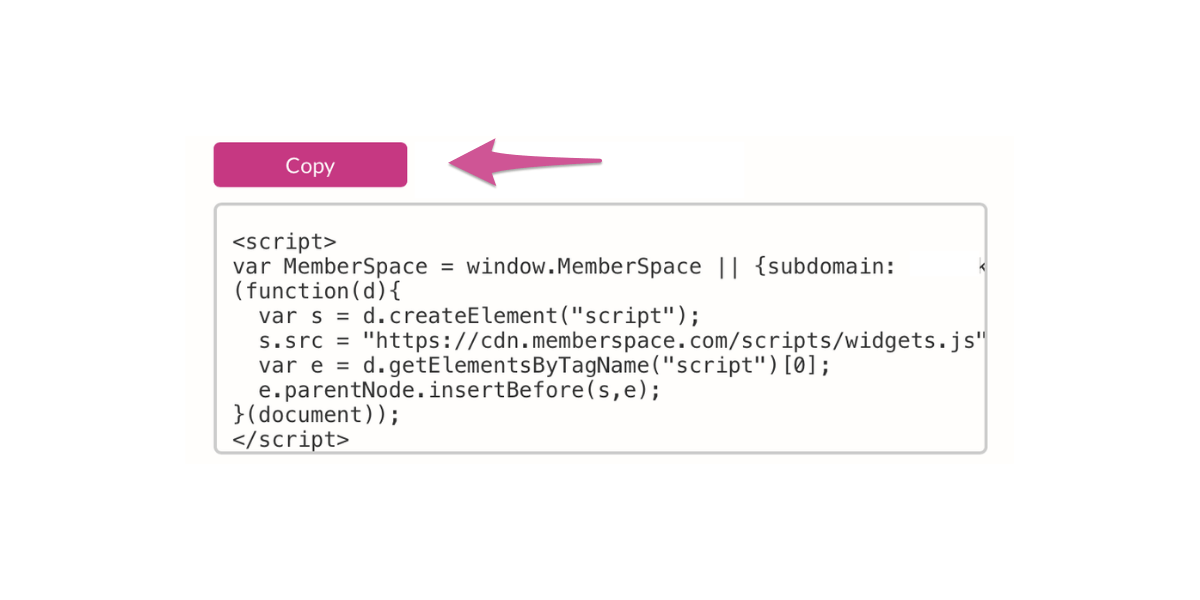
Below this code, you’ll see a checkbox labeled “Display a Login/Account button.” Keeping this box checked will add a convenient login button to your site for returning members. If you don’t want the login button, you can uncheck this box, but you’ll need to add a login popup instead.
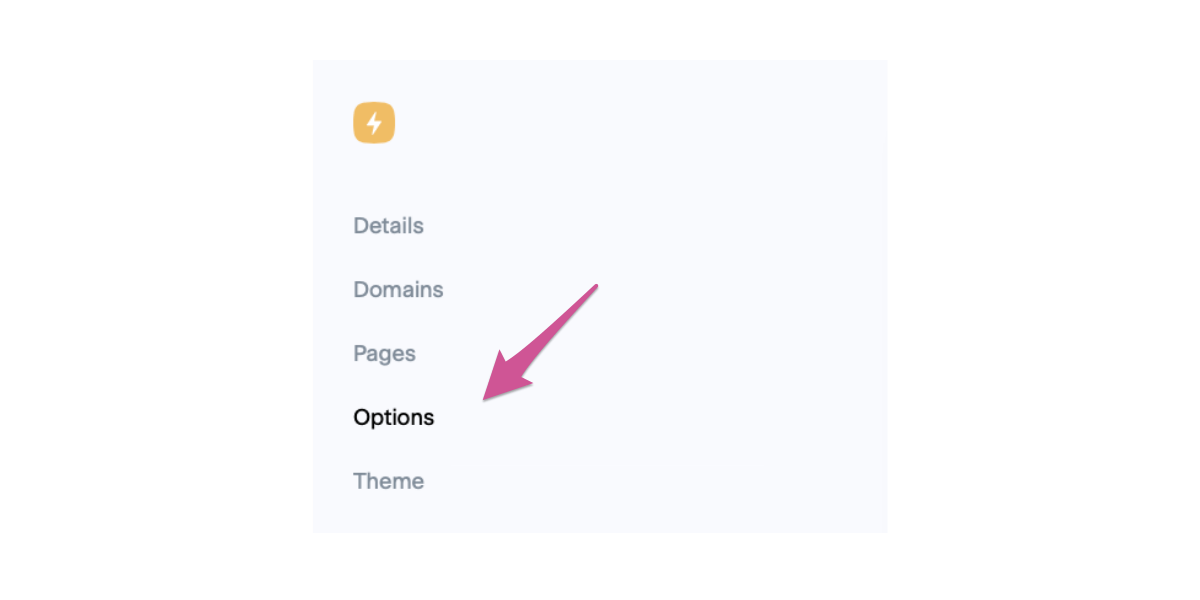
Go back to the Super dashboard. Click the gear icon next to the preview of your Notion site. Next, click “options” in the left-hand sidebar.
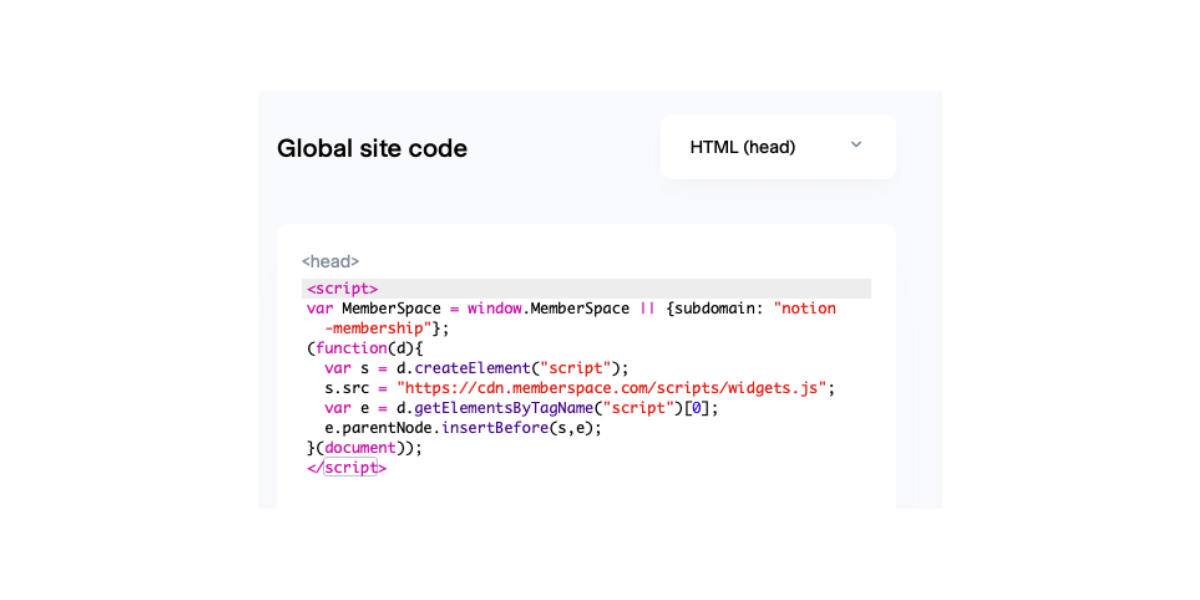
Under “Global Code Injection,” click “edit code.” Make sure the drop-down menu says “HTML (head)” and paste the code from MemberSpace in the box.
Step 5: Setup your signup and login forms on Notion
Next, we need a way for people to signup for your member plans.
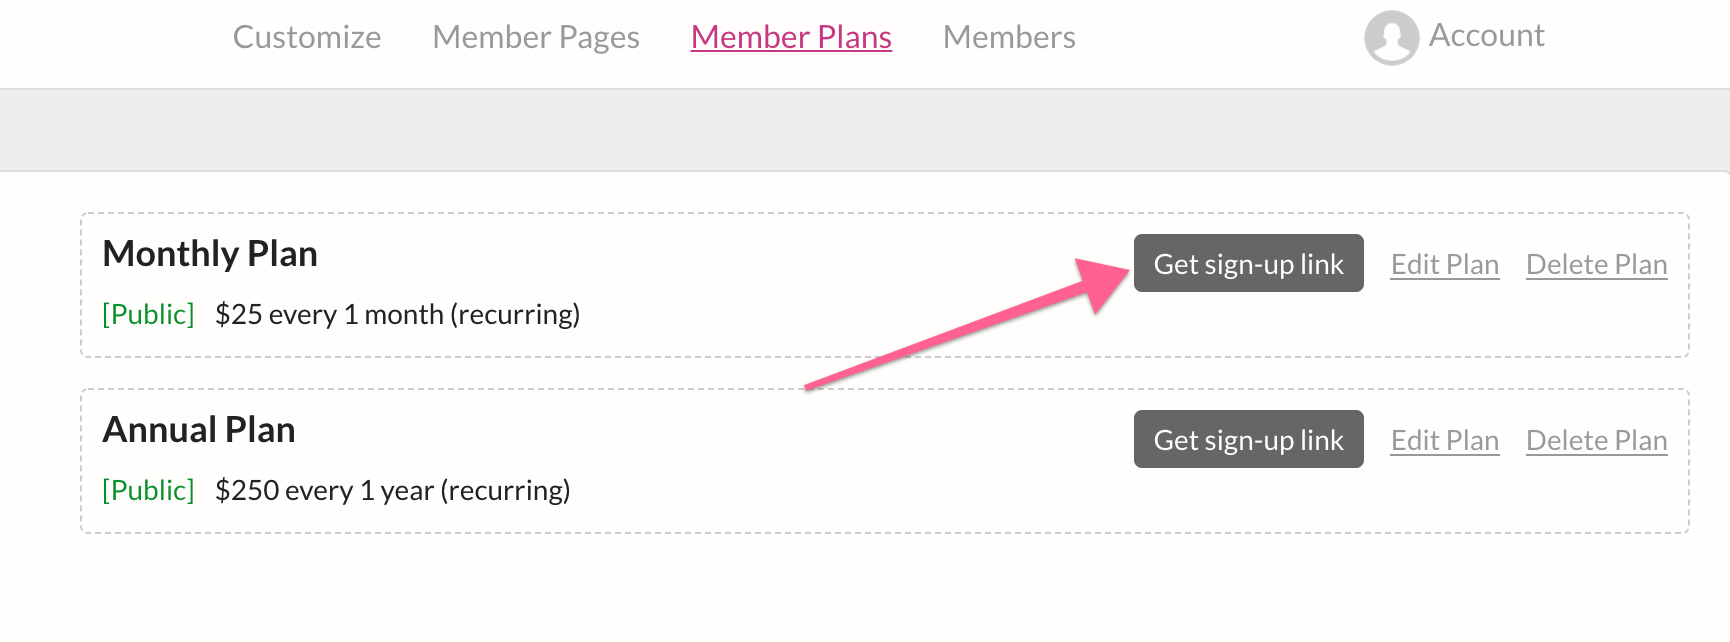
In the MemberSpace backend, go back to Member Plans and click the Get Sign-Up Link button for one of your member plans.
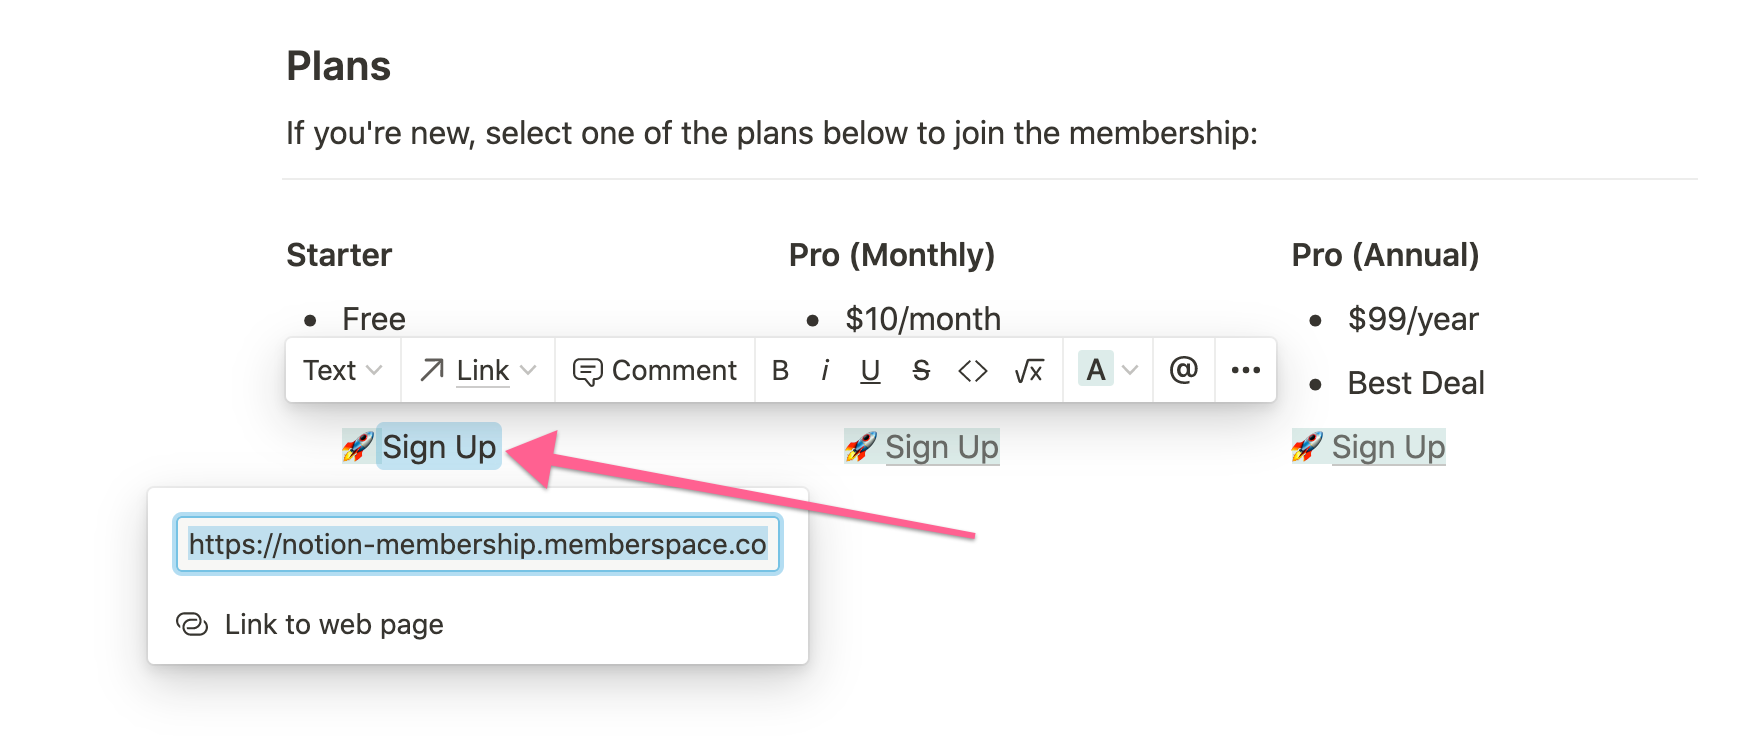
Then simply go back to your Notion site and paste this sign-up link on the page you’d like people to sign up from.
Your members will also need a way to log into your membership every time they visit your site. The easiest way to do this is is by adding a Login/Account popup.
You can add the Login/Account button so it automatically shows up on every page of your Notion site, or you can add it to a specific page or location e.g. your header menu.
When members are logged in, the button link will change to a “Your Account” link so your members can change their email, update their credit card, cancel their subscription, etc.
Here are step-by-step instructions to add a login/account popup to your site.

Need help setting up your online course?
Connect with our friendly team, weekdays 10am - 6pm ET.
Let's chat!