Sell access to your digital downloads using your website. Works on any platform including WordPress, Squarespace, Wix and more. Set up your community now.
Use MemberSpace to increase sales with our flexible, profit-enhancing features such as:
We provide all the tech you need to sell digital products and manage both free and paid members seamlessly on your own website.
1. Create products on your website
You have the freedom to create your products and product pages directly on your own website. This means you can design and organize them exactly the way you want, without being confined by rigid templates or limitations.
2. Gate your product pages
Add our MemberSpace paywall around the web pages that contain your digital products, courses and more.
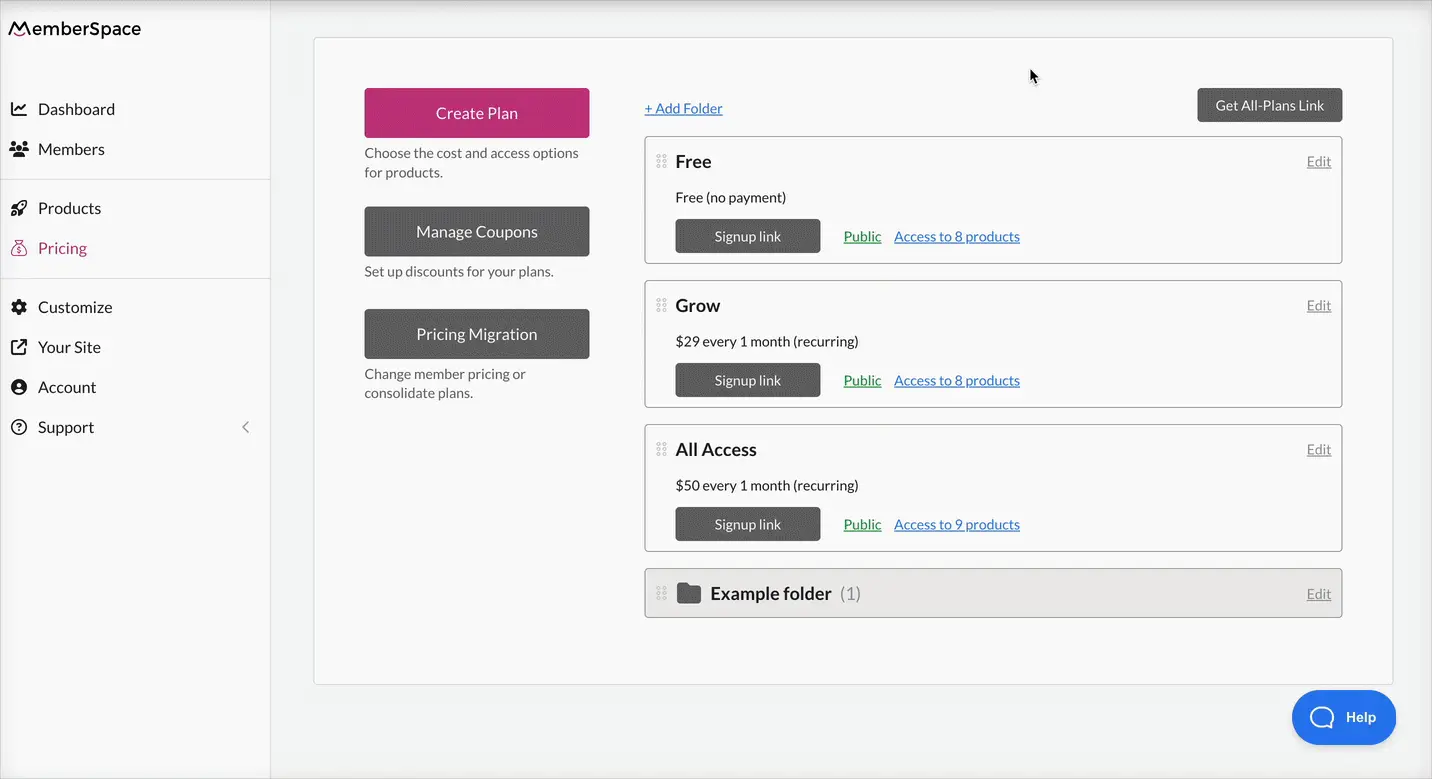
MemberSpace offers flexible payment options so you can choose the billing format that works best for your needs:
Recurring payment (e.g. $100 per month)
Multiple payment (e.g. 3 payments of $100)
One-time payment (e.g. 1 payment of $100)
Free (no payment)
4. Add the signup link to your website
Copy your plan’s signup link via the gray button next to your plan’s name. Add the signup link to your sales page so that visitors can purchase access.
Need help setting up MemberSpace?
Connect with our friendly team, weekdays 10am – 6pm ET.