I'm a Content Manager at MemberSpace helping entrepreneurs and creators sell digital products.
If you already have a Squarespace website, did you know you can use it to sell your own online courses? No need for a separate teaching platform!
Hosting courses directly on your site keeps everything conveniently in one place tailored to your brand – your blog, membership offerings, newsletter, or whatever else you provide your online community. In this post, we’ll walk through exactly how to set up and sell a course on your Squarespace site. Let’s get started.
Sell courses on your Squarespace website!
The easiest way to accept membership payments or one-time charges for digital products like online courses, communities, content libraries, and more — all from your own website!
First, choose your course topic based on your area of expertise and what you want to teach. Examples: Photography basics, beginner piano, yoga and mindfulness, etc.
Next, break your bigger topic down into smaller chunks that will become your individual lessons. For example, if your course is on baking:
Introduction to bread basics
Easy no-knead recipes
Tools, ingredients and staple recipes
Flaky pie crust from scratch
Decorating desserts like a pro
Gluten-free baking alternatives
Separate your knowledge into 5-8 main subsections or lessons. This makes the information more organized and digestible for your students as they progress from start to finish. Then, consider including supplementary materials like cheat sheets, workbooks, or shopping lists in your lessons as well.
✨ Course Tip: It’s tempting to cram everything in right away! But go slow, even the basics you take for granted can be eye-opening revelations for some students.
Step 3: Create your course pages on your website
Now that your course topic and lessons are planned, it’s time to create web pages on your Squarespace site to house all of the educational content. This will include:
A sales page to advertise your course
Individual pages for each lesson (these will be password protected in the next step)
Any additional resource pages like downloads or assessments
For some inspiration, check out these MemberSpace customers who have created online courses on their Squarespace websites!
✨ Business Tip: Make your sales page exciting and benefit-focused to convert visitors into paying students!
Step 4: Protect your course pages with MemberSpace
Once all of your content is created, it’s time to restrict access to your course pages.
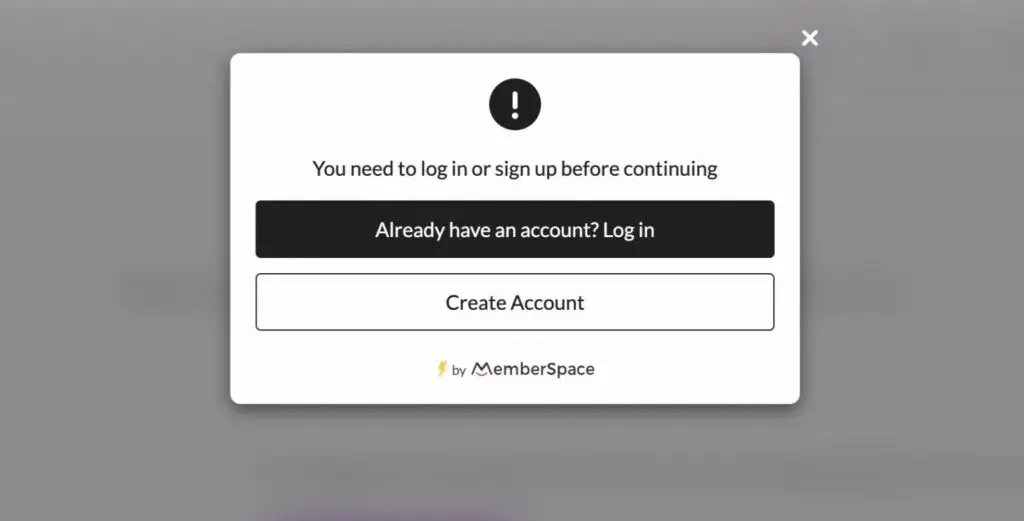
MemberSpace allows you to easily password protect any URL on your website, so anyone that tries to access your exclusive course content will be prompted to sign up for an account and purchase access before they can begin the lessons.
You can customize this pop-up in the MemberSpace Look & Feel editor to match your website's branding.
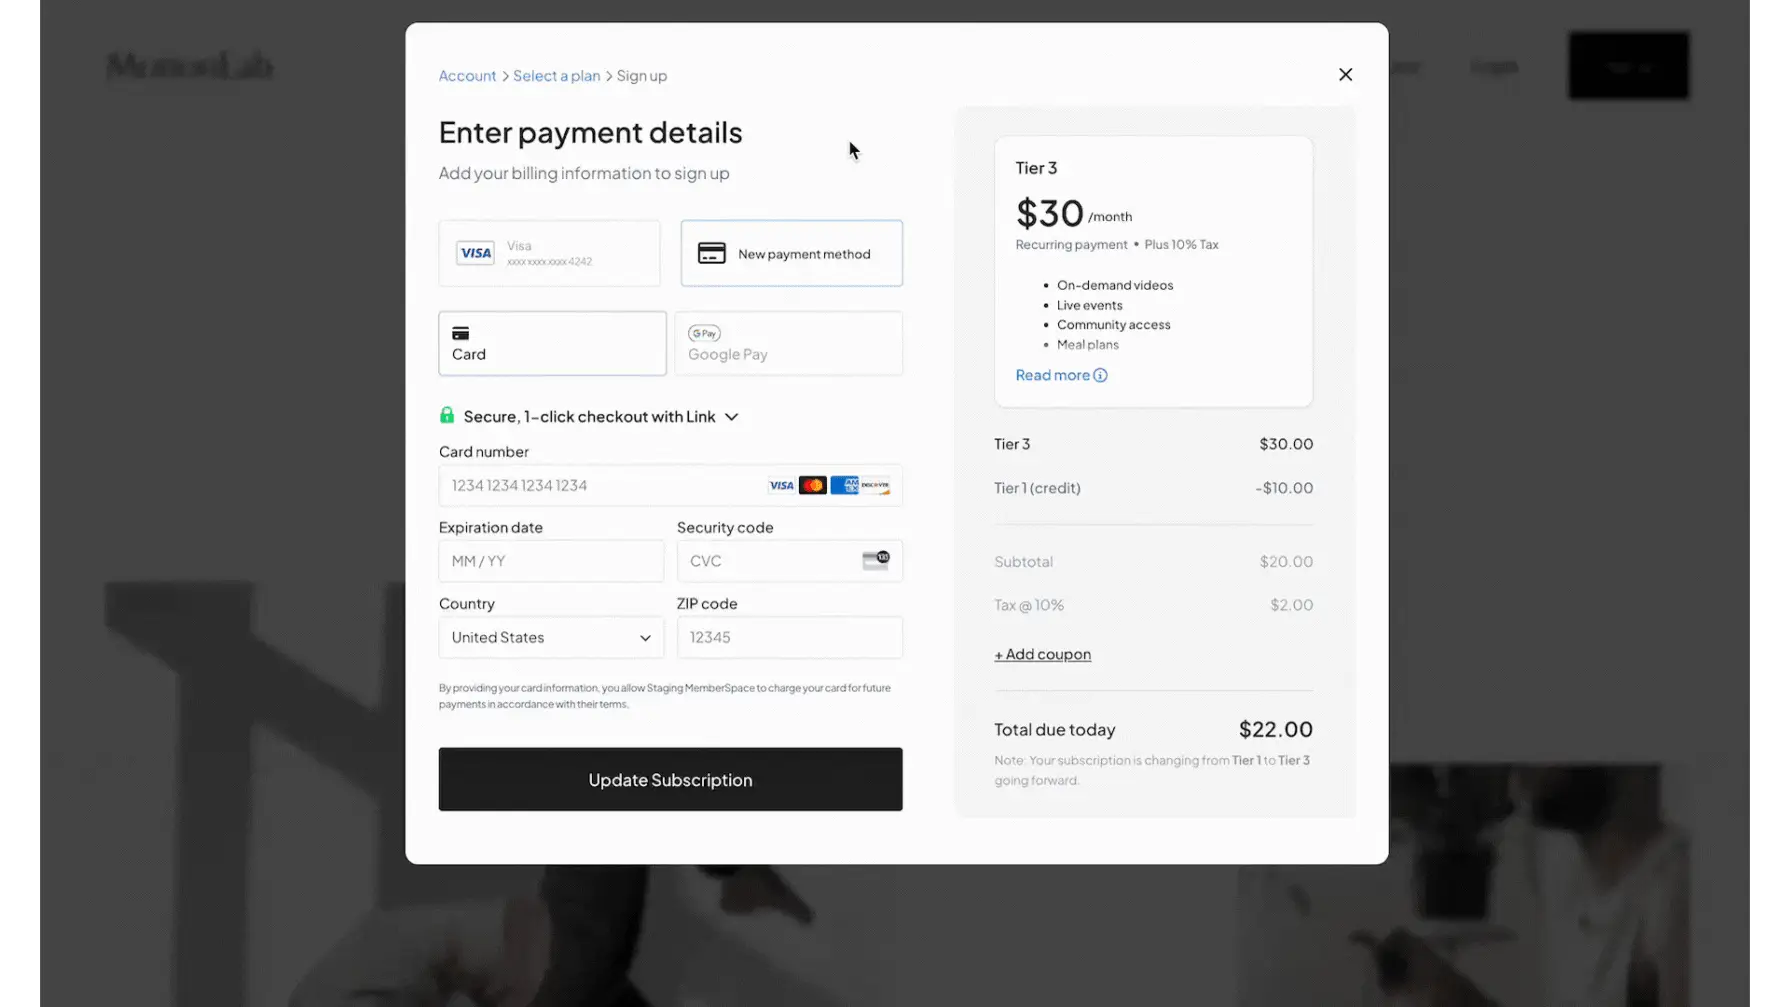
Once a customer fills out the signup form, they will see this payment form that allows them to add credit card information or use Apple Pay or Google Pay to complete their purchase.
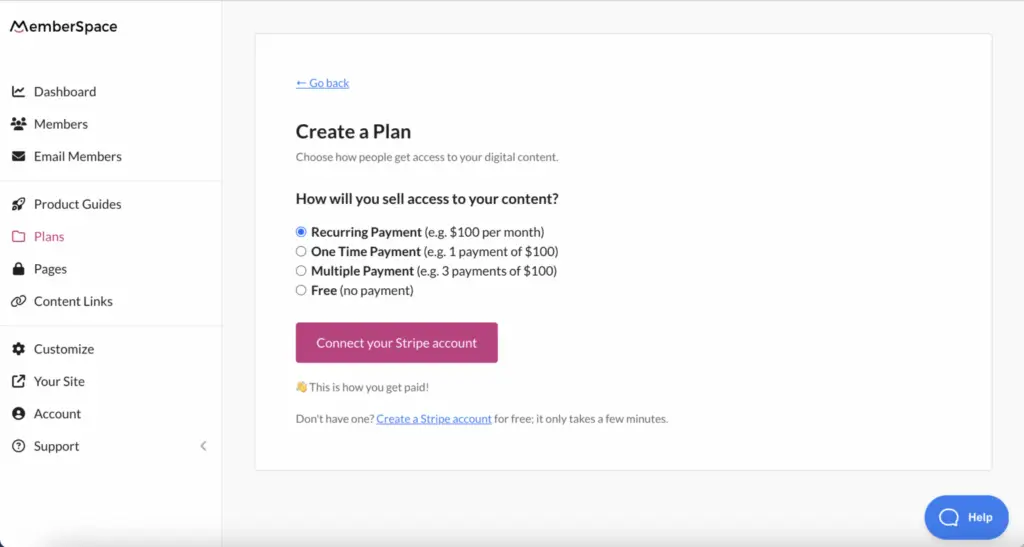
Step 5: Set up pricing for your course
MemberSpace also makes it easy to set up flexible pricing for your online course. You can charge one-time or recurring payments, offer free trials, create payment plans, and more.
Some popular course payment models include:
One-time payment for lifetime access
Monthly subscription with ongoing content updates
Free intro course to capture leads
Payment plan broken into 3-4 installments
If you have other digital products in addition to your online course, MemberSpace allows you to accept payments differently for each one.
Step 6: Sell and promote your course!
Once all the backend work of creating your course content, protecting your pages, and setting up pricing is done, it’s time for the fun part – getting students enrolled! Simply take the signup link from your MemberSpace account and add it to your sales page, as well as anywhere else you’d like, such as your blog, newsletter, or social media.
Here are additional ideas to promote your new online course:
Announcing the course to your current email list
Running ads targeting your niche audience
Reaching out to relevant bloggers or partners for collaborations
Promoting the launch through social media and organic content
Final Thoughts
Selling online courses on your Squarespace website is easy with the right platform. MemberSpace equips you with all the tools you need – from flexible payment options to password protected course pages, and more. With your course content outlined and pages designed, you’re ready to get started monetizing your knowledge and expertise.