A guide on setting up paid events on your website using MemberSpace
Step-by-step instructions on how our successful customer setup paid events.
Host a members-only event
Step 1
Create your event pages on your website
- A registration page for attendees to register for (or purchase access to) the event.
- A confirmation page that confirms successful registration and any next steps attendees should know about.
- Any other event pages you may need to share important event details like a link to the digital event, the address of the in-person event, relevant documents, links, etc.
Step 2
Protect your pages with MemberSpace
If your event is members-only, you’ll protect the registration page so only members of your existing membership can see it. If you’ll be selling access to the event, you’ll keep your registration page public so potential customers can see it.
In both cases, you’ll protect the event confirmation page and any other event pages so only registered attendees have access.
🔐 Optional
For an added layer of protection, you can add our extra security code to each of your protected pages.
Step 3
Set a price for access
If you’ll be offering complimentary ticketing to members of an existing membership, simply add your event product to your existing member plan.
If you’ll be selling tickets to the event, create a plan that provides access to your protected event pages.
MemberSpace offers flexible payment options so you can choose the billing format that works best for your needs:
- Recurring payment (e.g. $100 per month)
- Multiple payment (e.g. 3 payments of $100)
- One-time payment (e.g. 1 payment of $100)
- Free (no payment)
Most events are sold as a one-time payment. Event series may be sold as a multiple payment plan.
If you offer other digital products in addition to your event, you can bundle tiers of access by creating multiple plans and differentiating which plan(s) have access to additional content.
Step 4
Add the signup link to your website
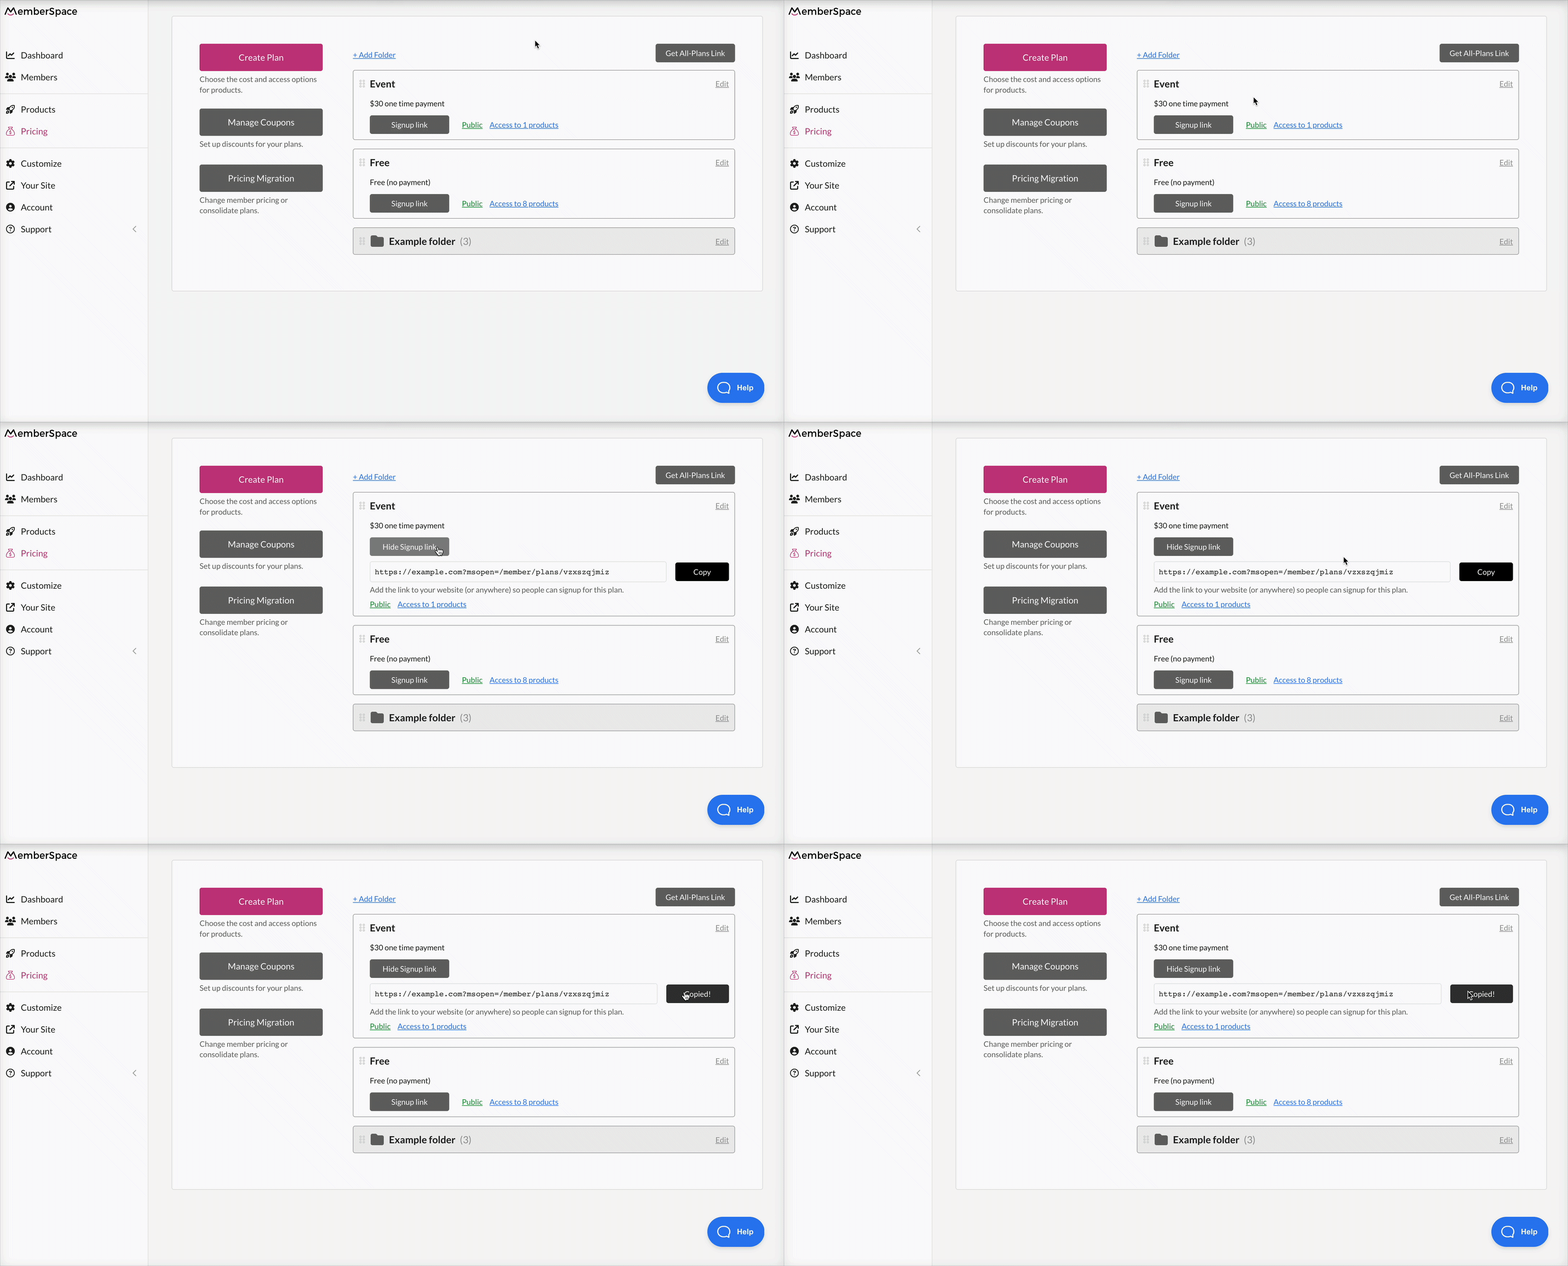
Copy your plan’s signup link via the gray button next to your plan’s name. Add the signup link to your event registration page so that visitors can purchase access to your event.

And your event registration is live! 🚀
Managing event attendees
You can easily keep track of who has registered for your event in your MemberSpace account. Simply go to your Members tab in the left navigation, choose the event plan from the plan filter dropdown.
MemberSpace Resources

For additional resources on marketing and selling your event with MemberSpace, check out MemberSpace University, our resource hub of step-by-step guides, educational videos, technical and strategy tips, and more.
Promote your event
First things first — it’s a good idea to test signing up for your event before promoting to the public. Set up a free test plan or temporary 100% off coupon and use it to register for your event.
🔐 Optional
If you’ll be adding any member-only digital resources after the event (like event notes/outlines, recordings, etc.), MemberSpace Content Links provide additional security by generating a unique URL for each of your files.

Need help setting up your event?
Connect with our friendly team, weekdays 10am - 6pm ET.
Let's chat!
